171 Extreme Build - 1/8 Scale Boeing

Collapse
X
 
  • Time
  • Show
Clear All
new posts
  • nocebo
    Member
    • Jun 2020
    • 79

    #16
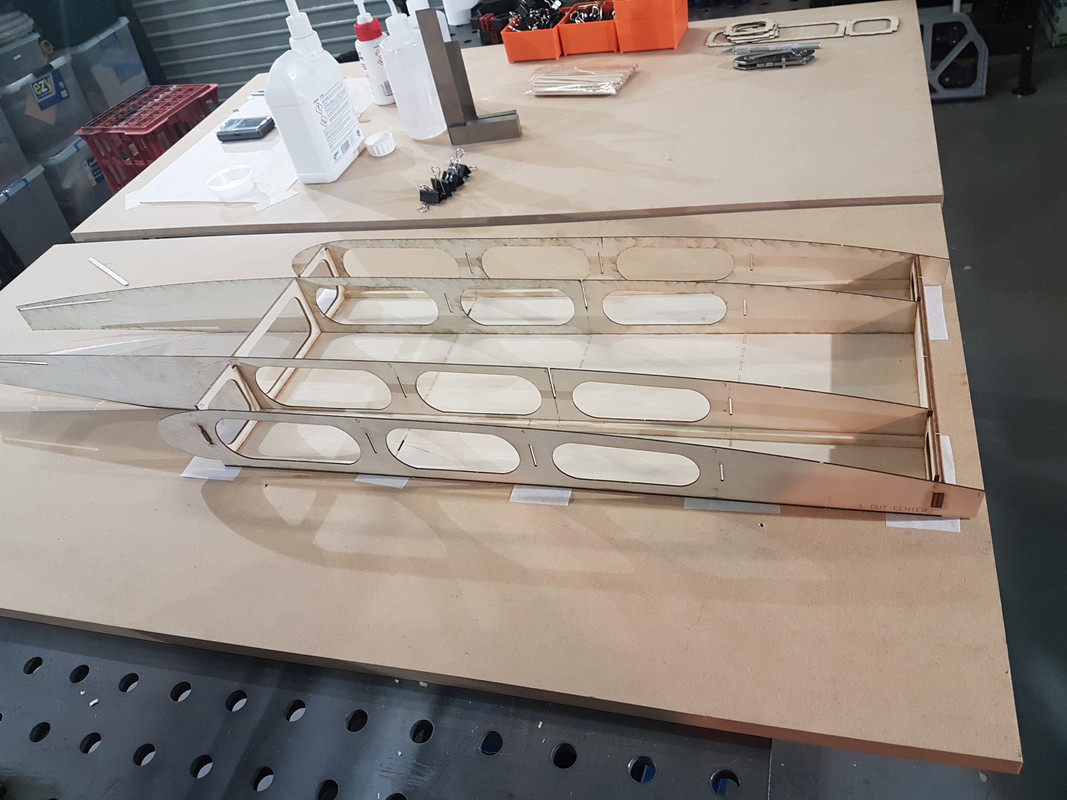
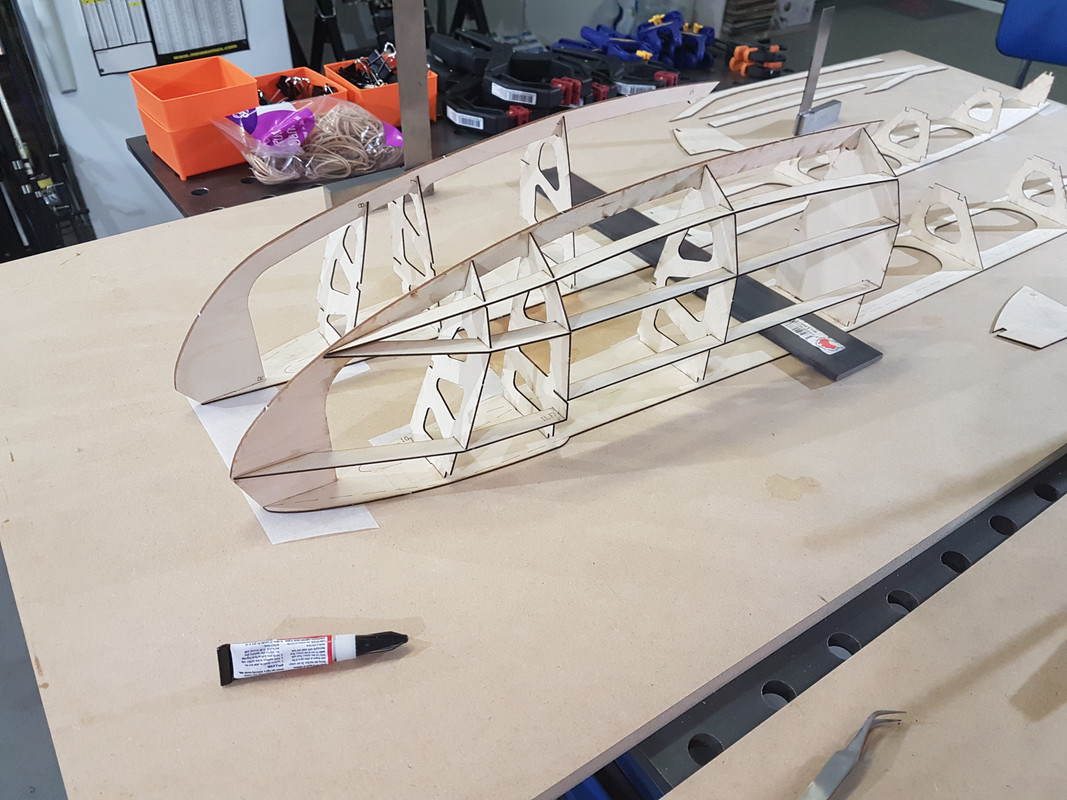
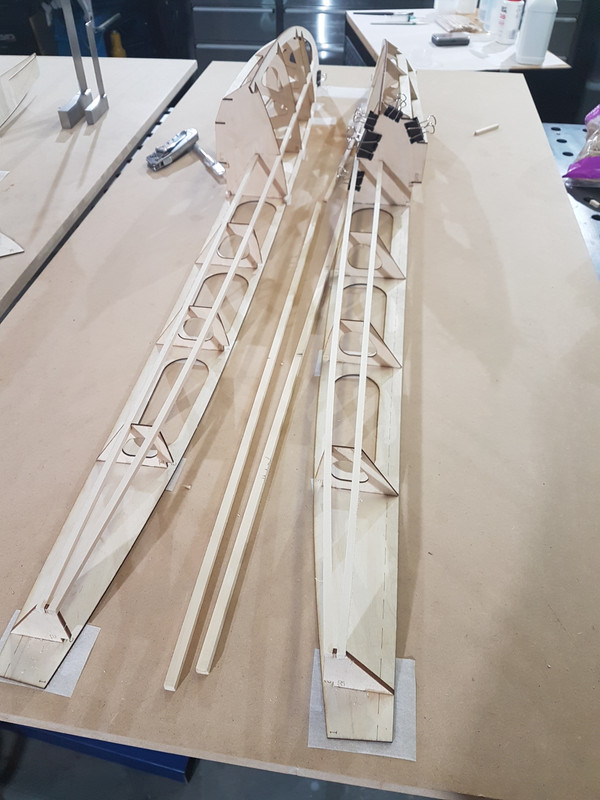
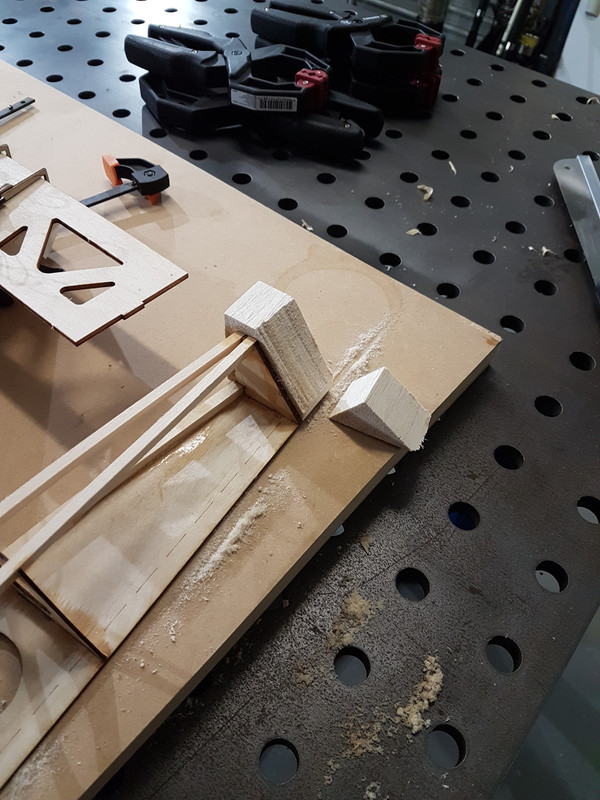
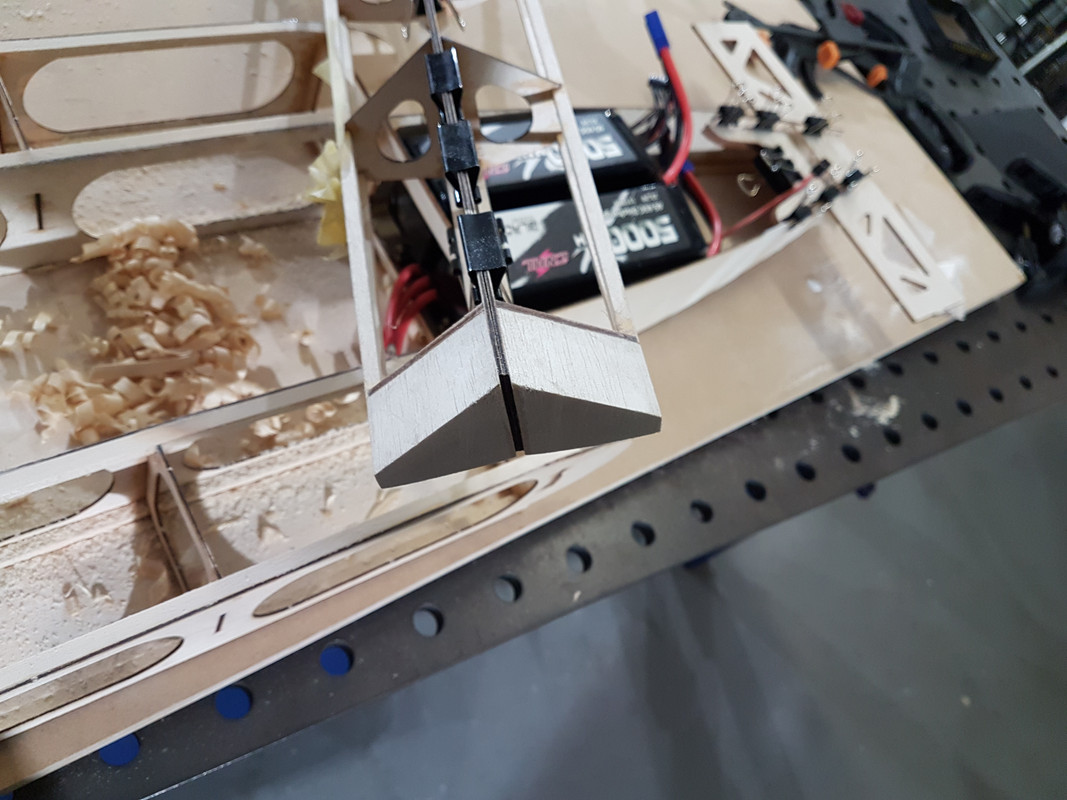
    With the transom glued into place, the next step is to glue the main stringers to the hull floor and the front support rib. This where I made my first mistake:


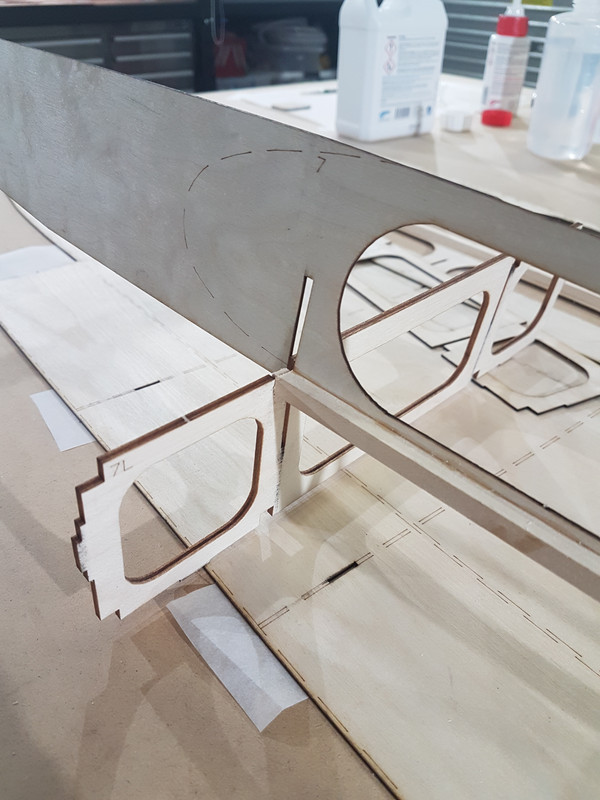
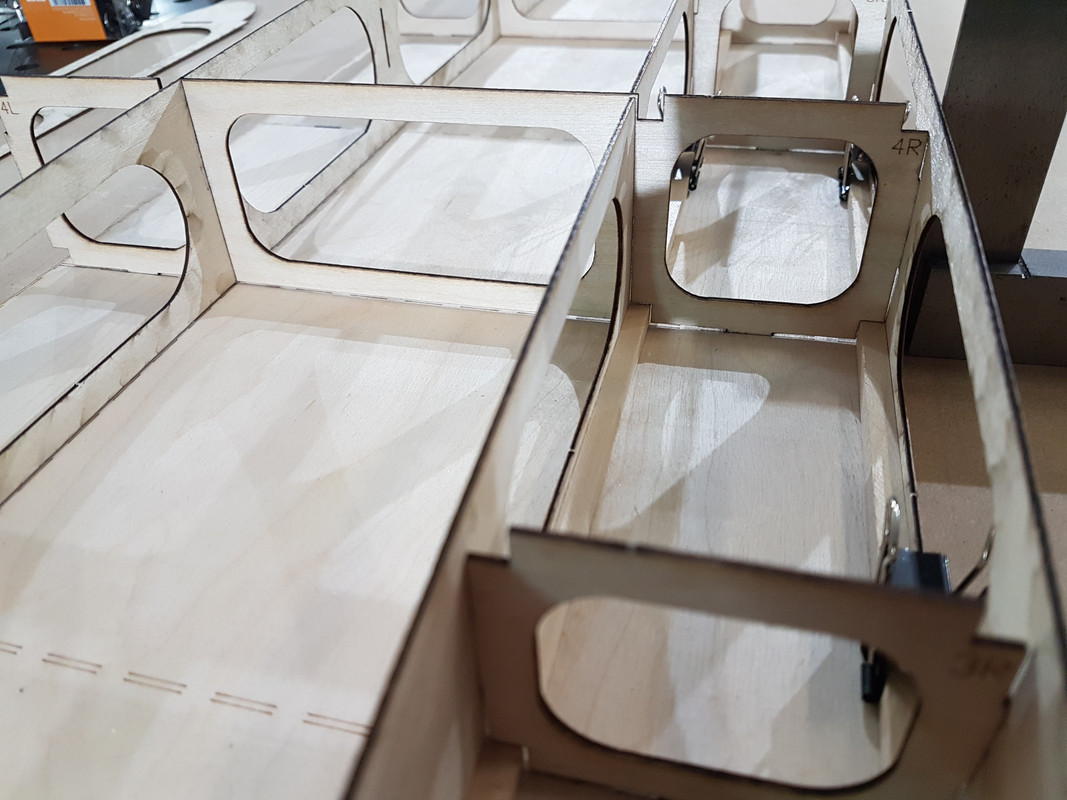
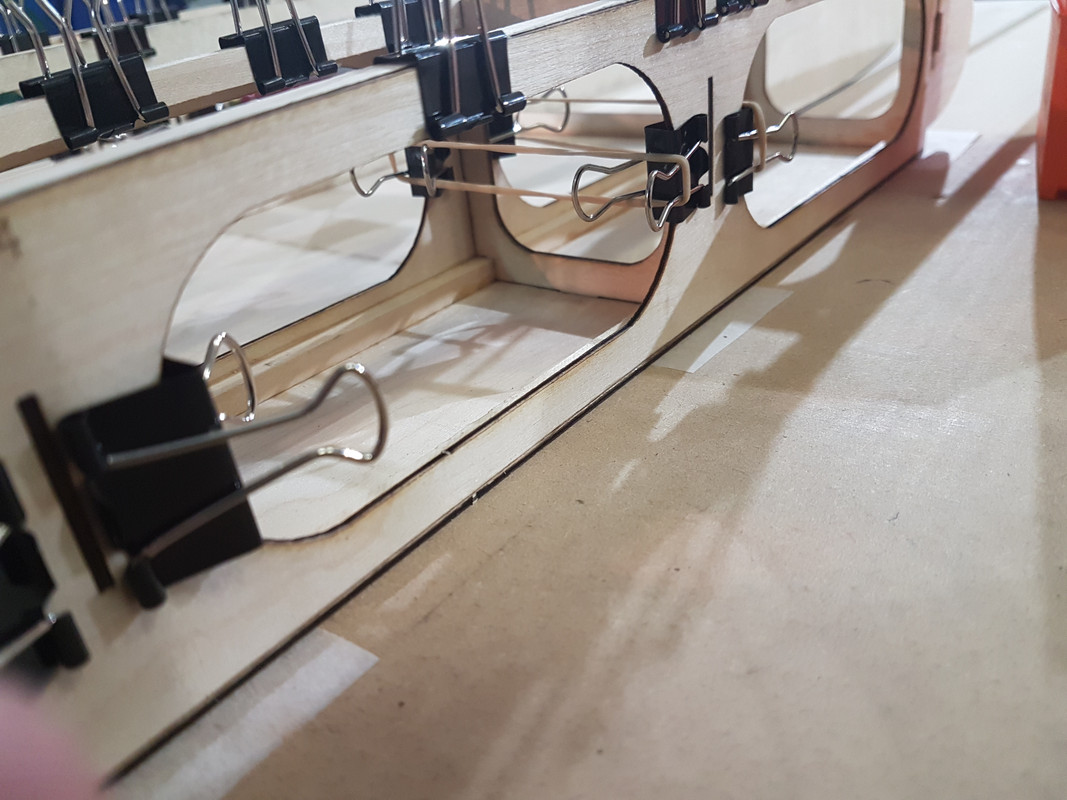
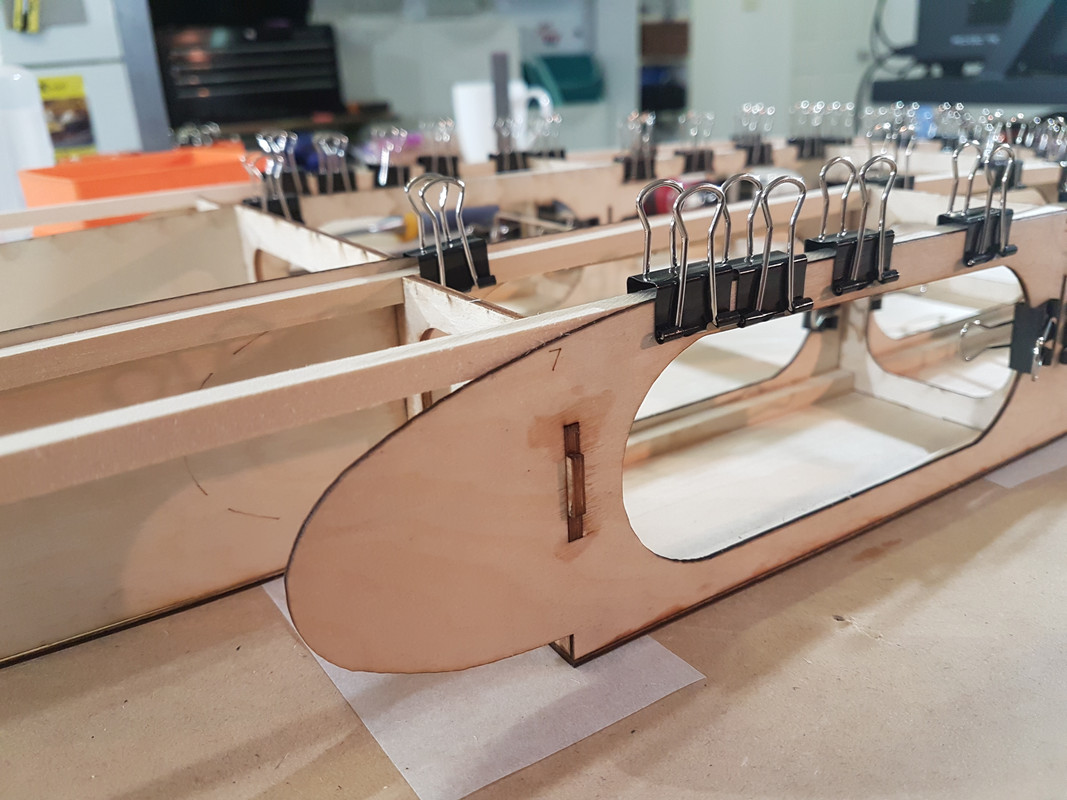
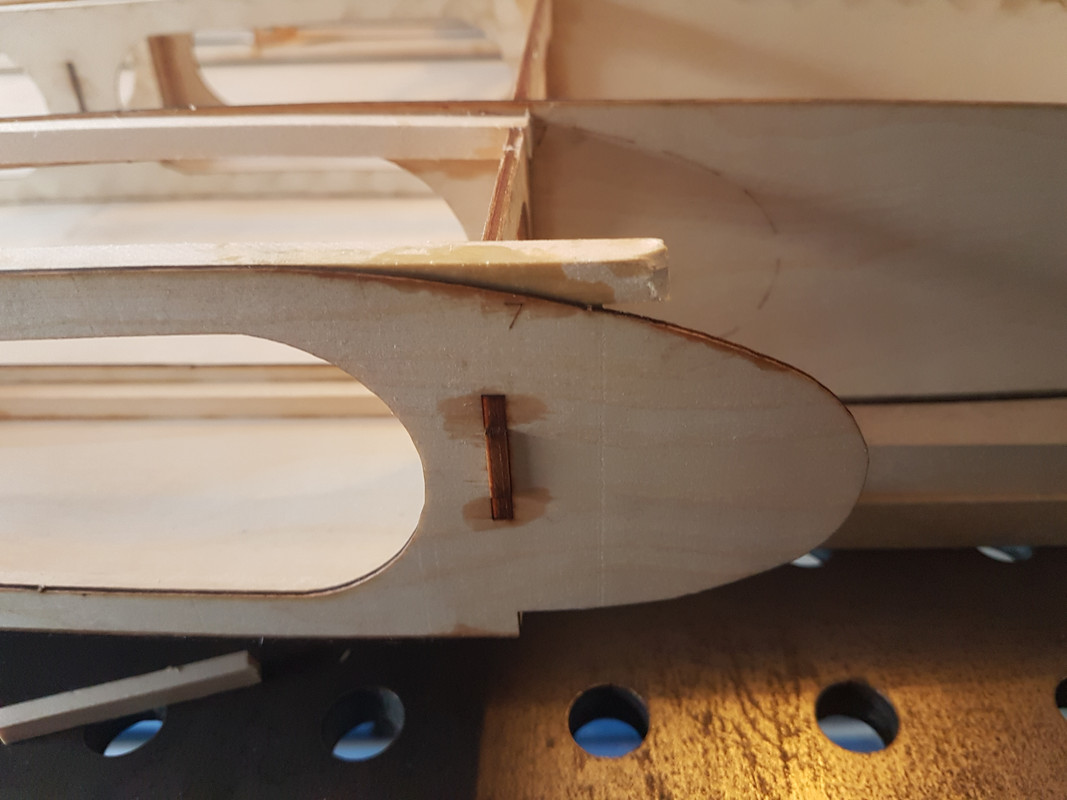
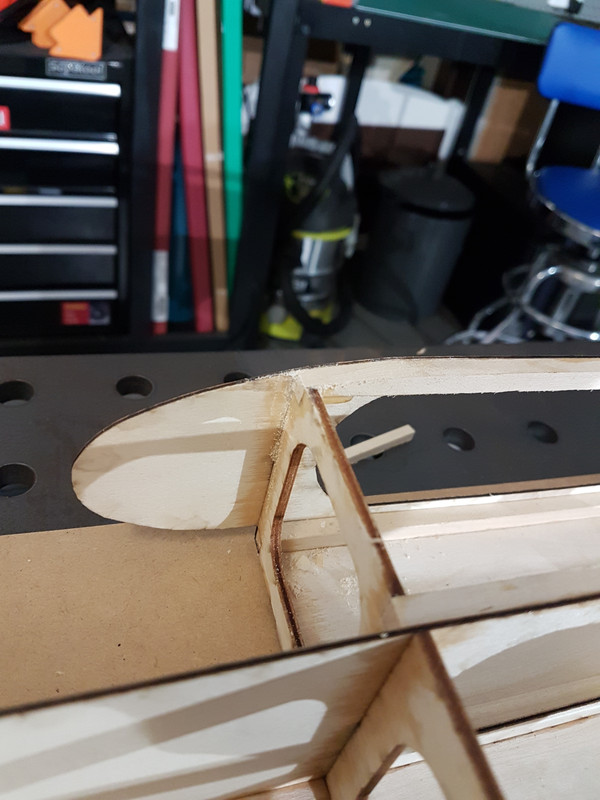
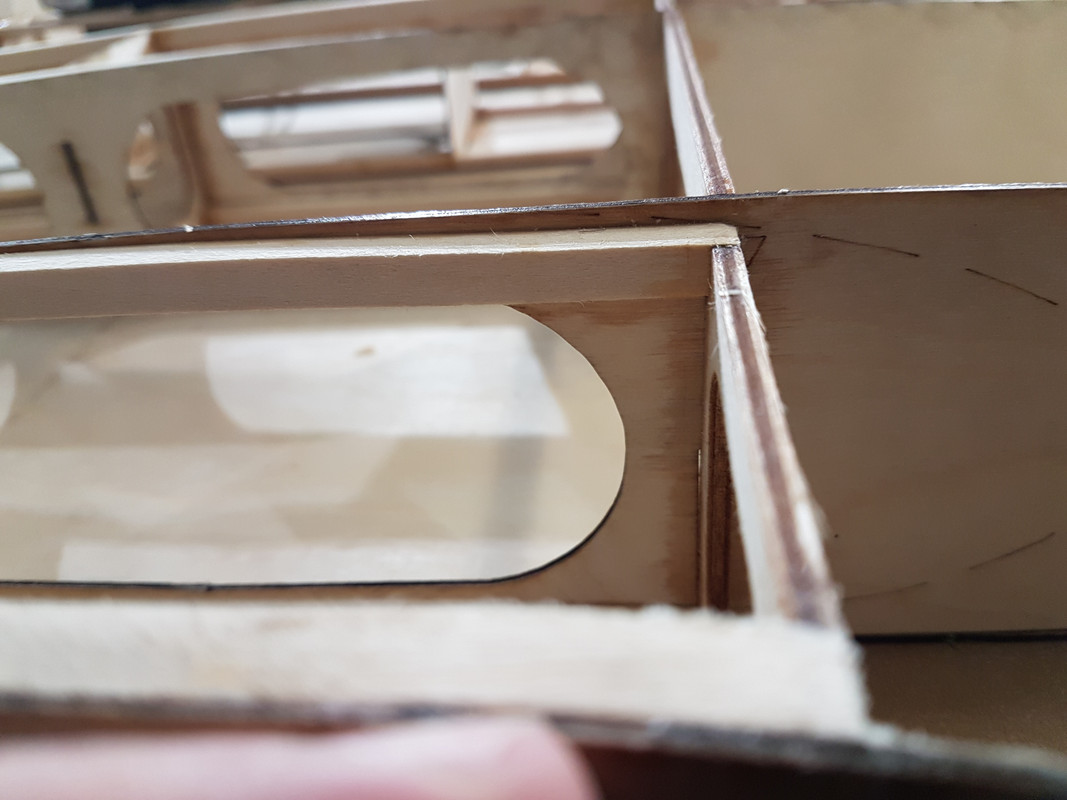
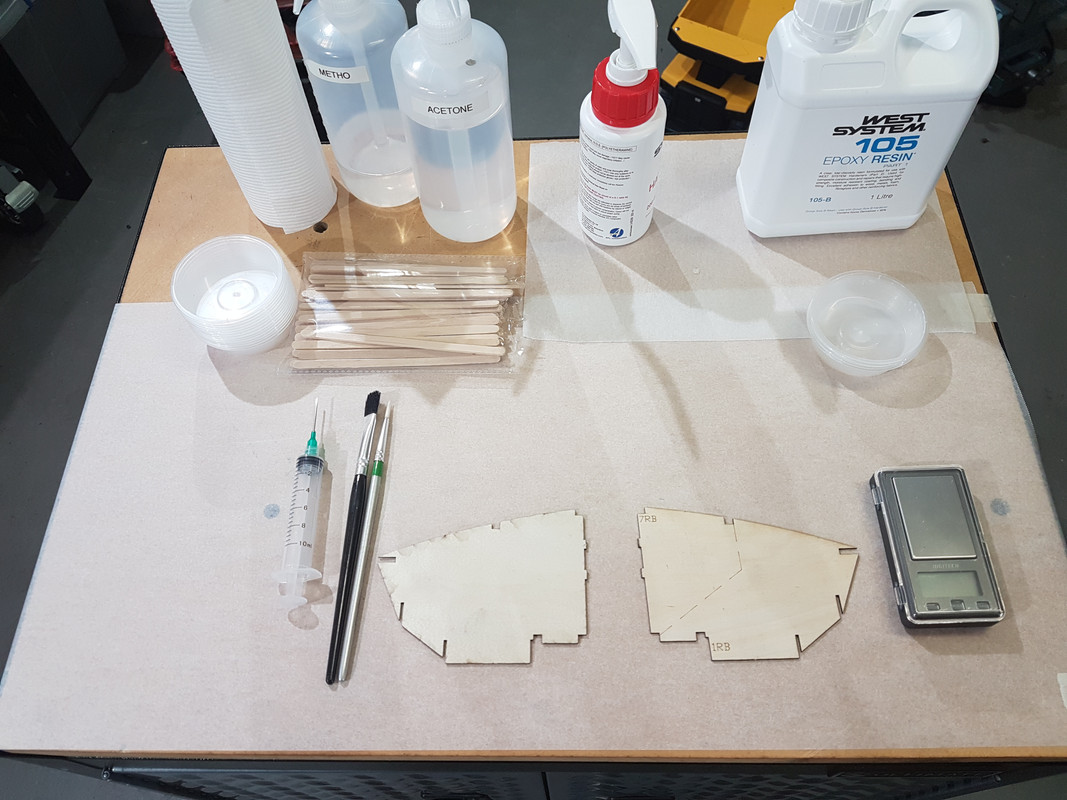
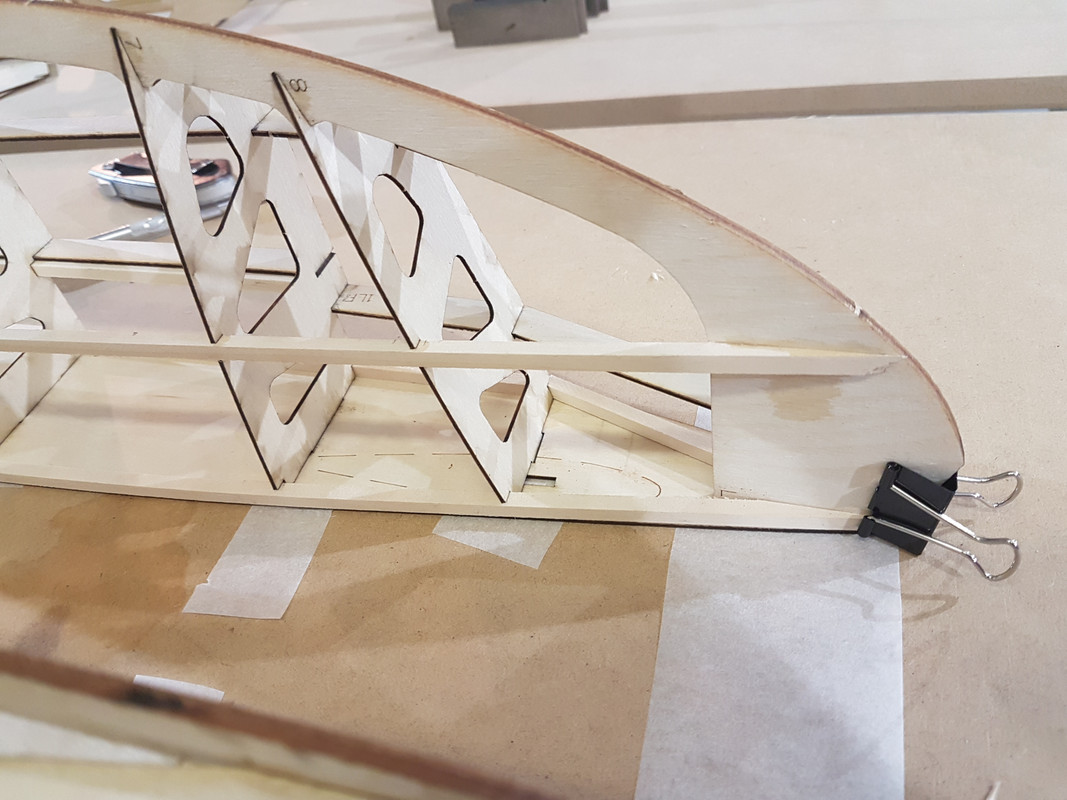
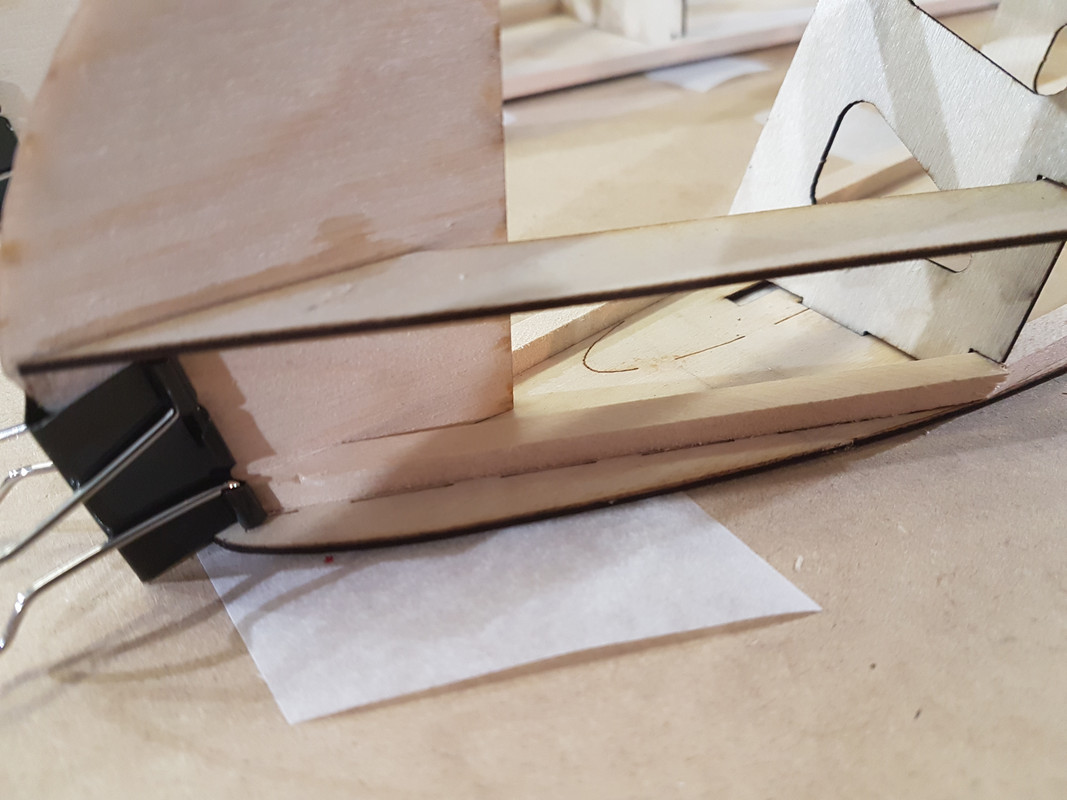
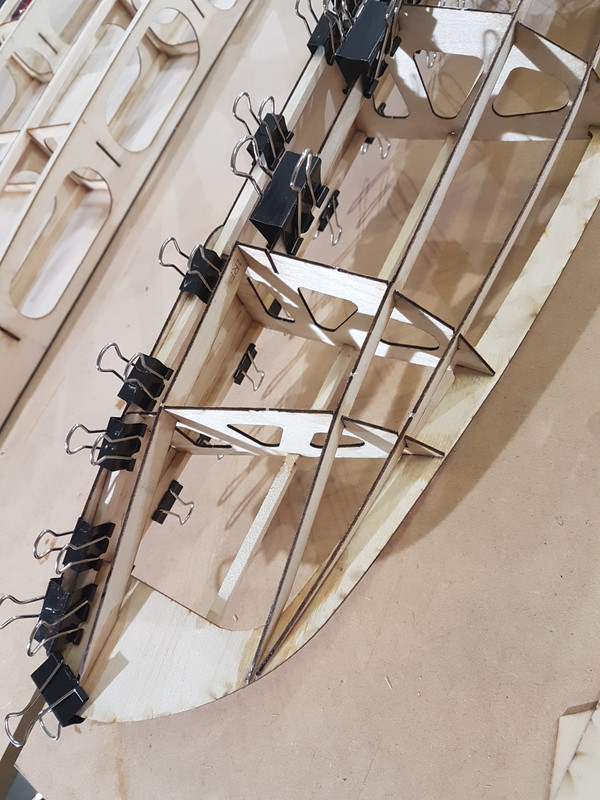
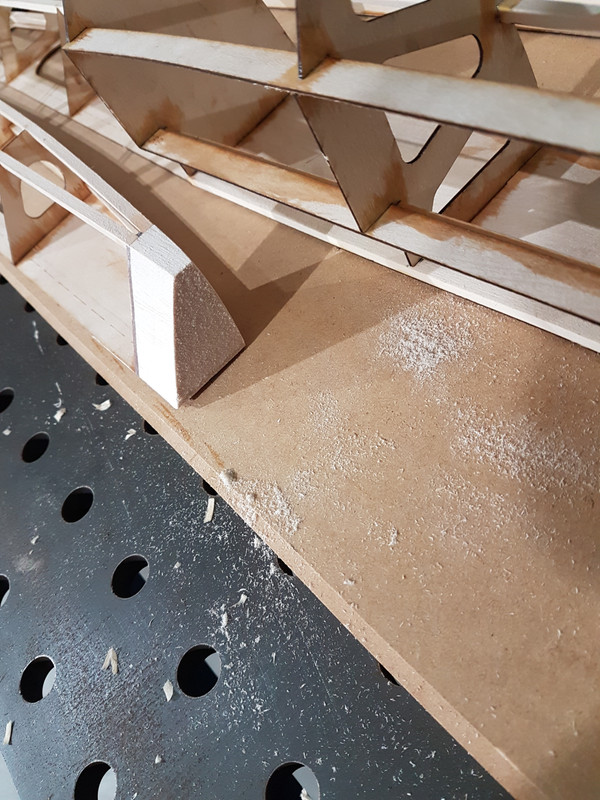
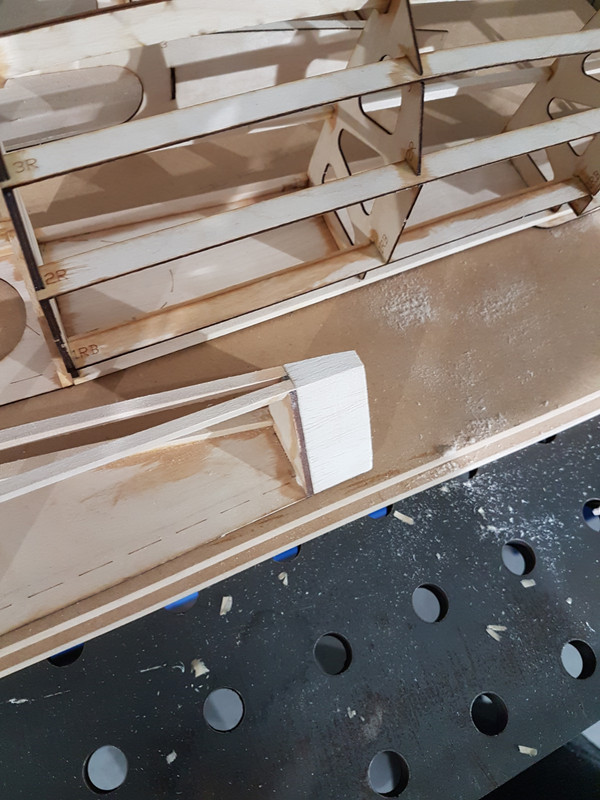
    I had glued on the basswood support pieces to the main stringers before affixing to the hull. Unfortunately the main stringers and the ribs slot together to make a very solid and clever design. This means the basswood support pieces get in the way of the slot so you cant join the two pieces together. If you are building put the basswood on last, not first : ) I was eventually able to very carefully bend the wood to make it work without the whole thing coming apart.

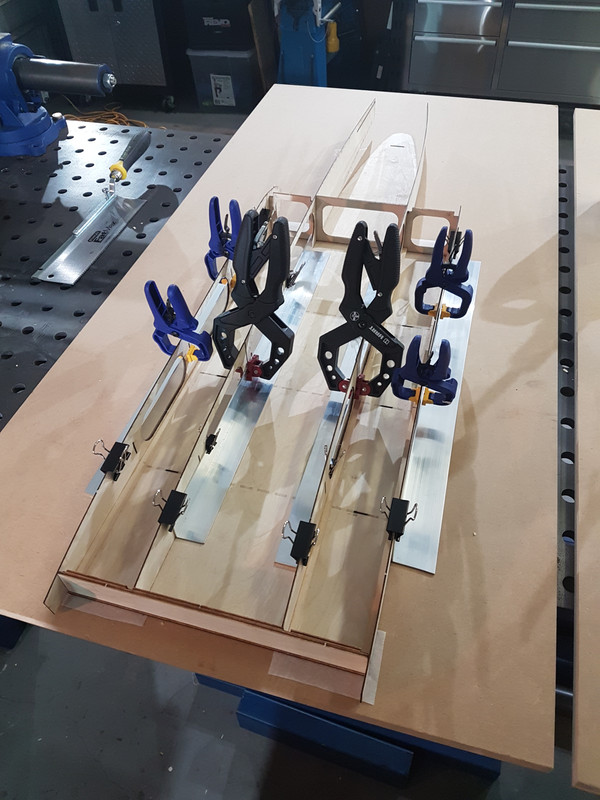
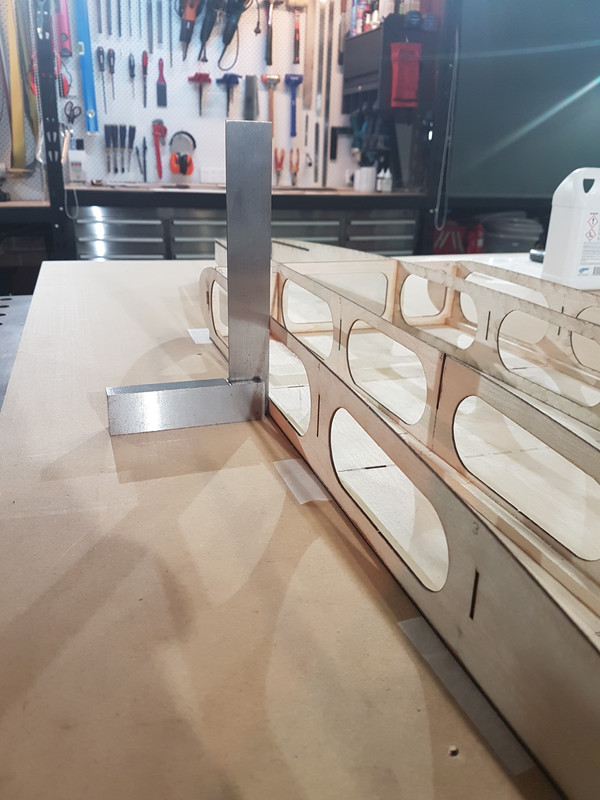
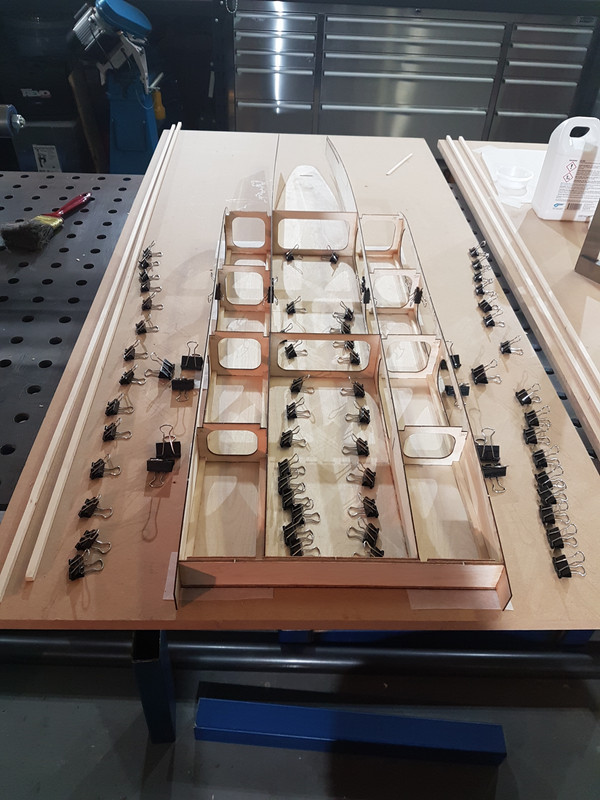
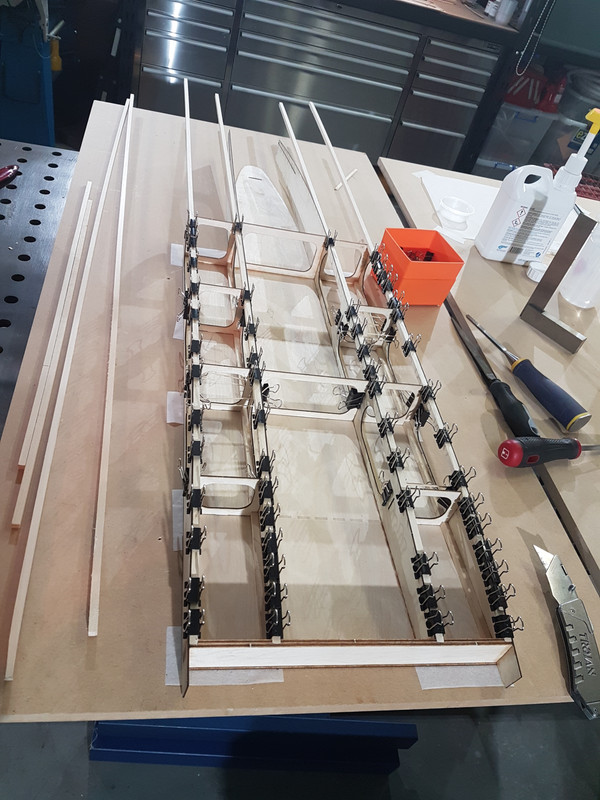
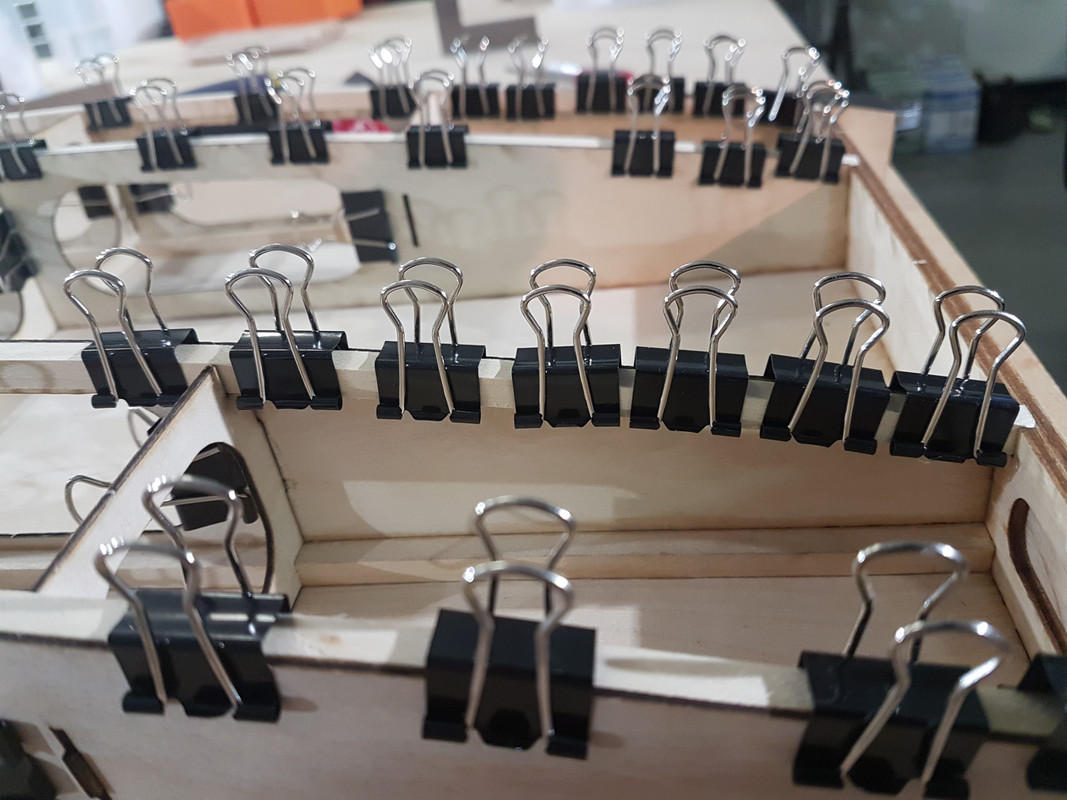
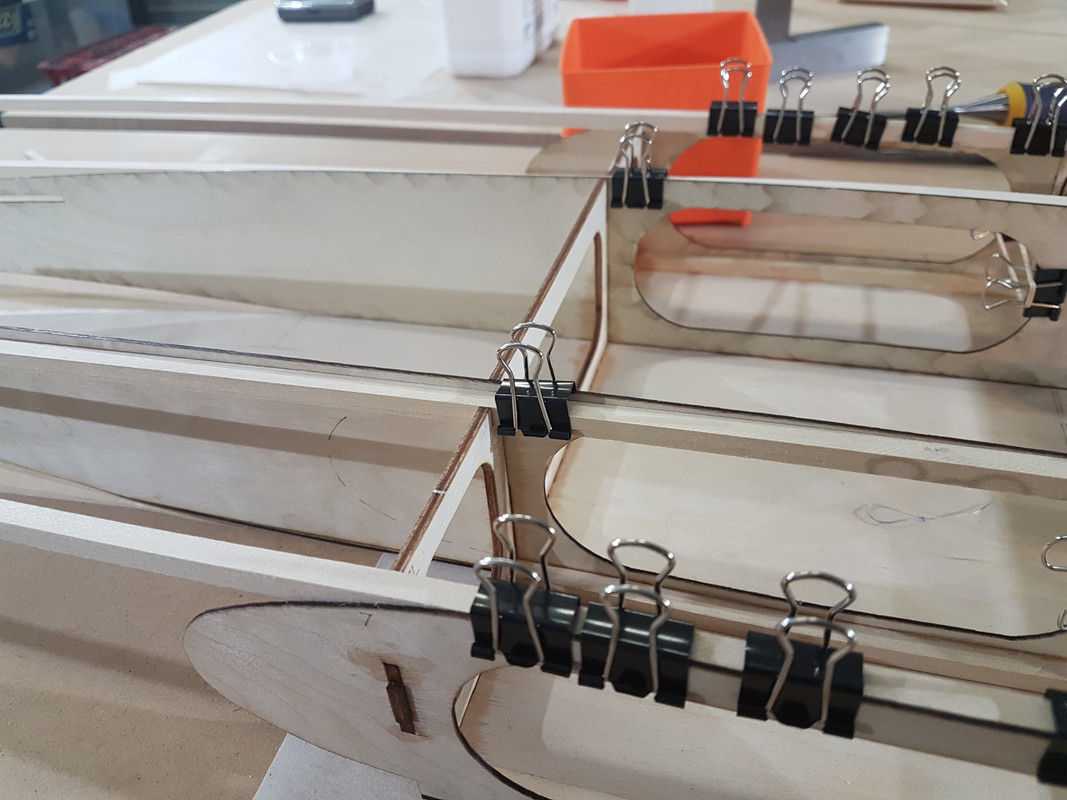
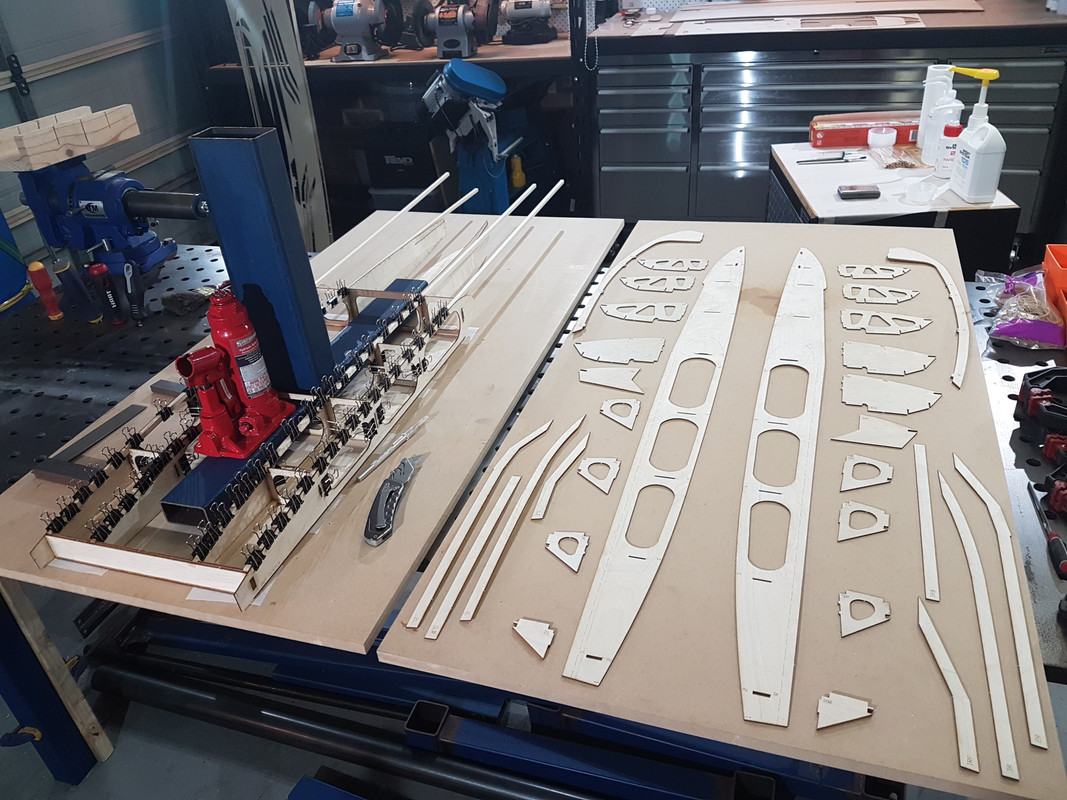
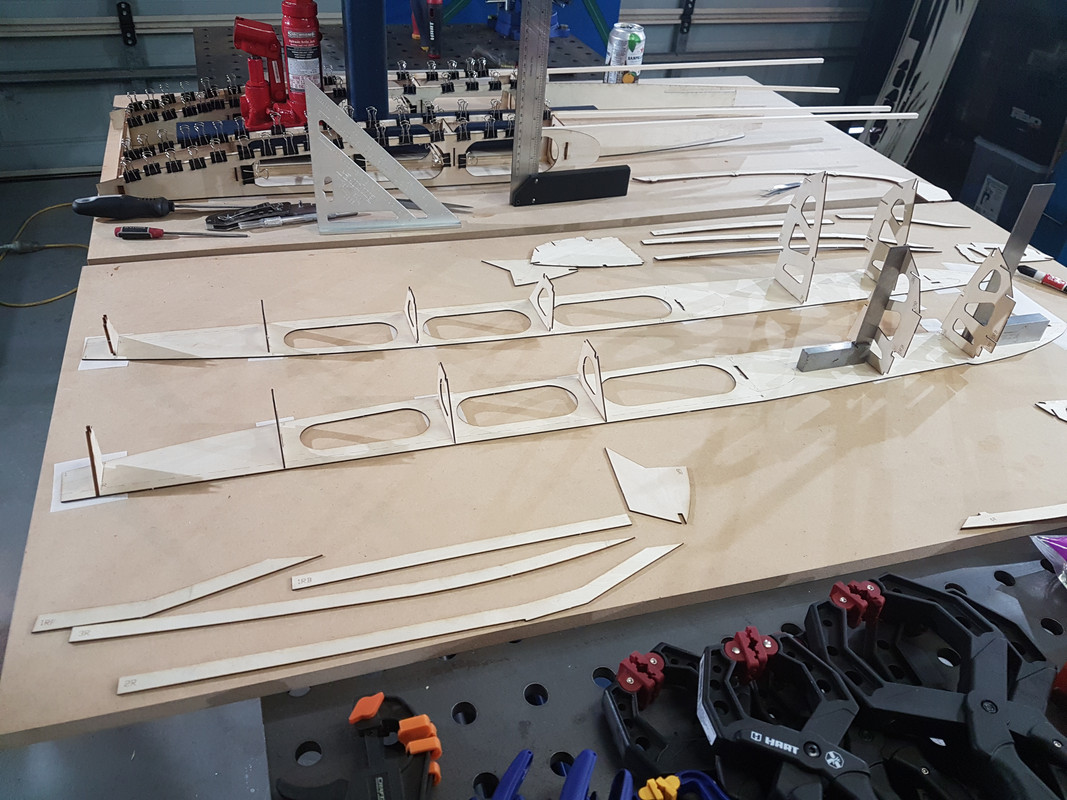
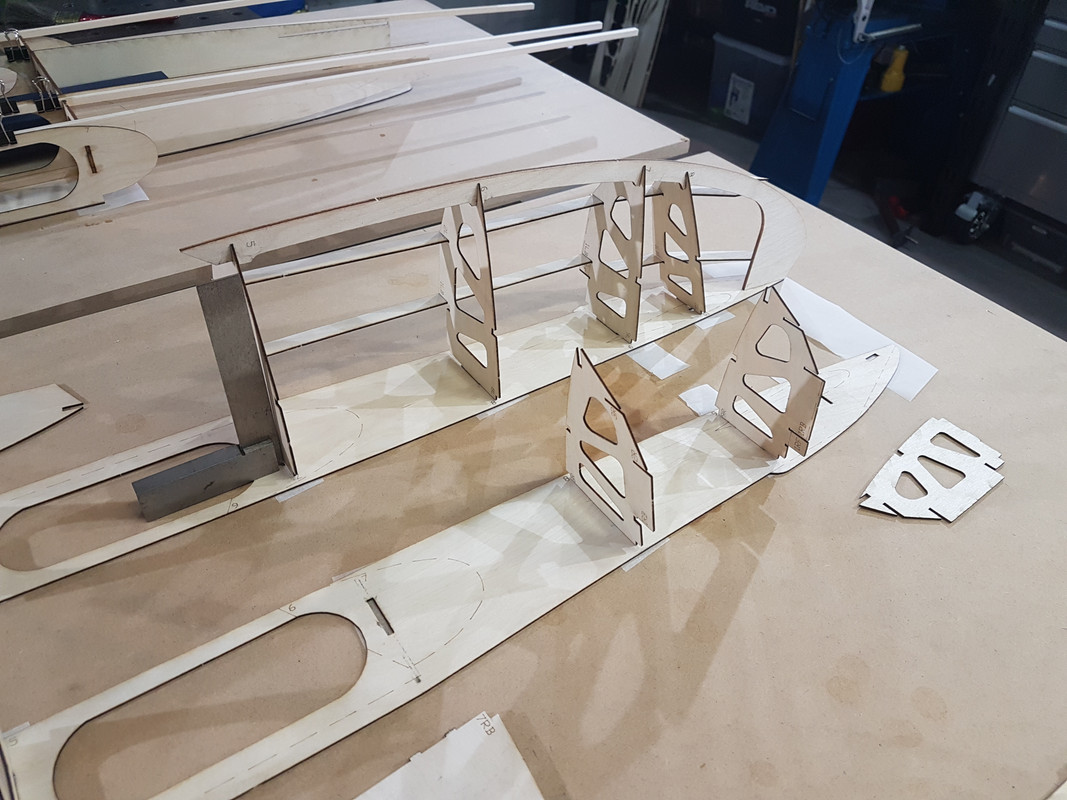
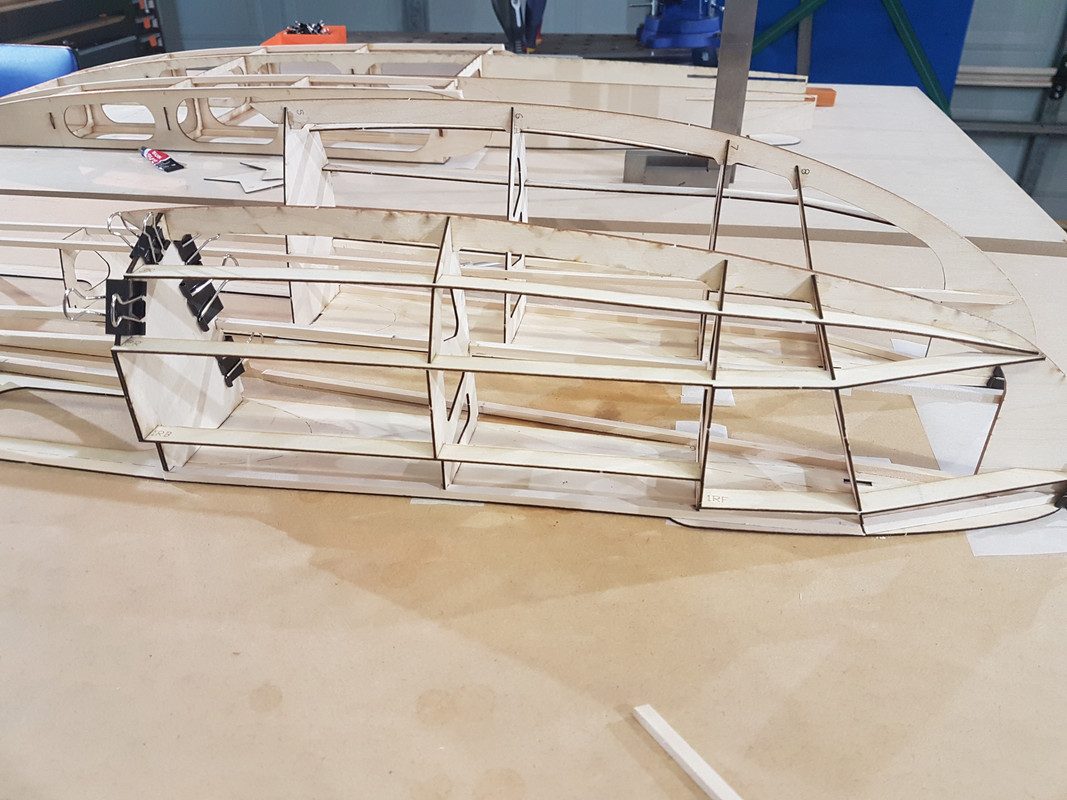
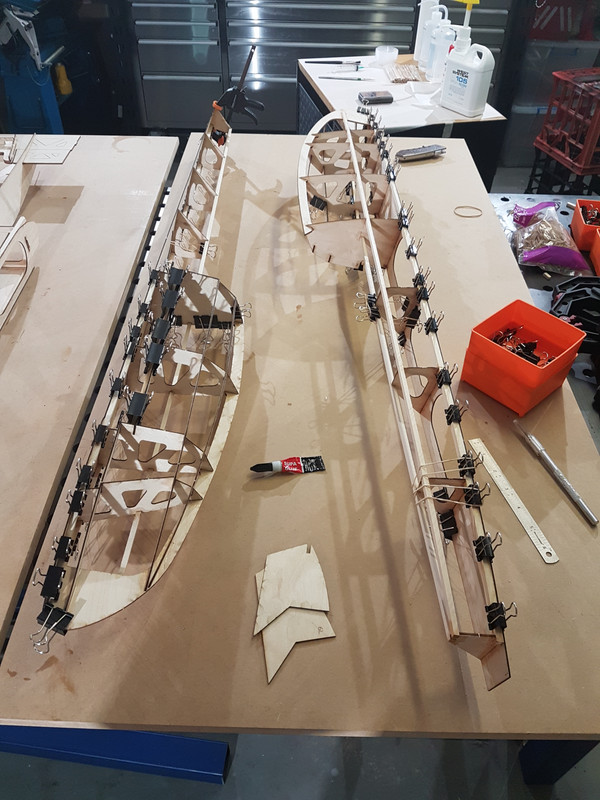
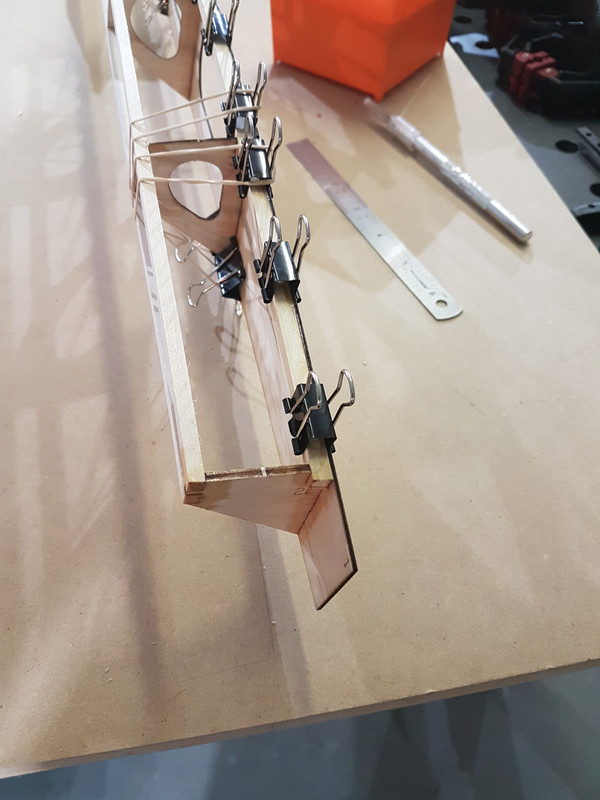
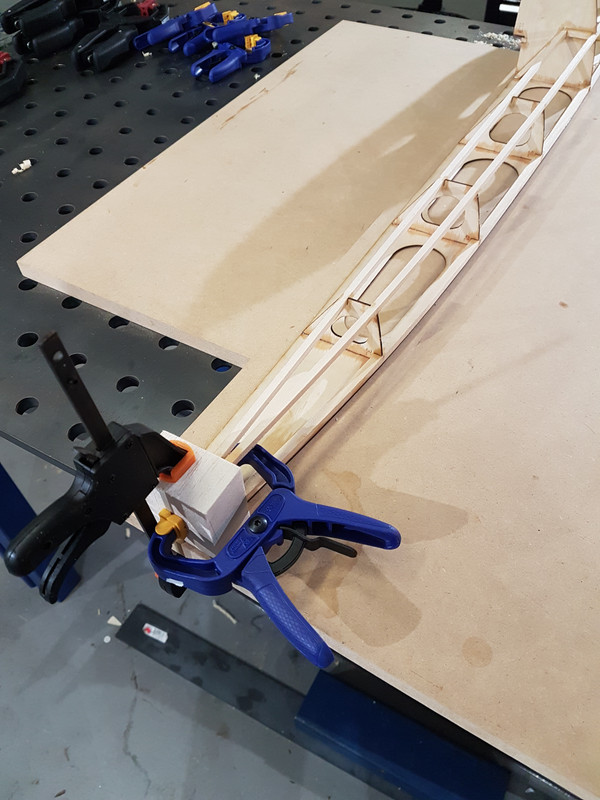
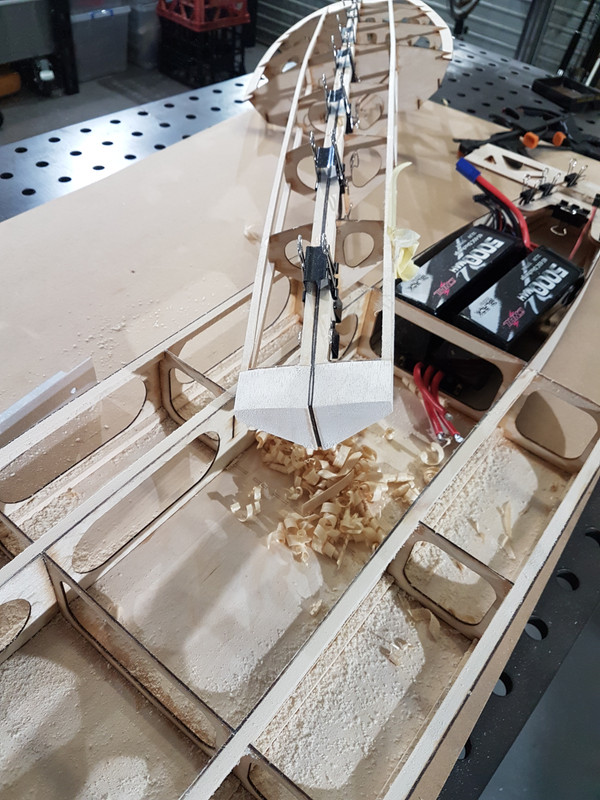
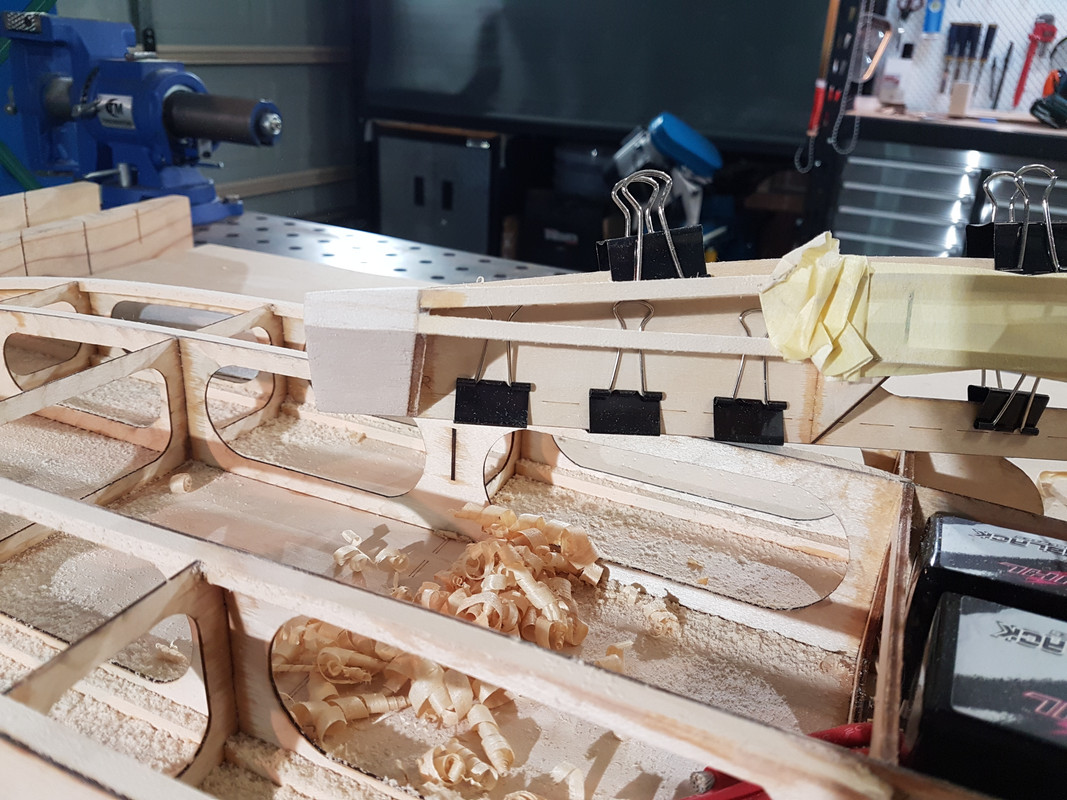
    Setting up for gluing down the main stringers is one of the more complex glue ups of the build. You need to ensure the stringers are dead straight, and in place at exactly 90 degrees to the hull. The whole thing also needs to be weighed down so its perfectly flat along the whole length. I ended up cutting up some aluminum angle to use as a support for the stringers. On the outside of the hull I actually screwed the angle into the MDF baseboard and then clamped the angle firmly to the stingers.


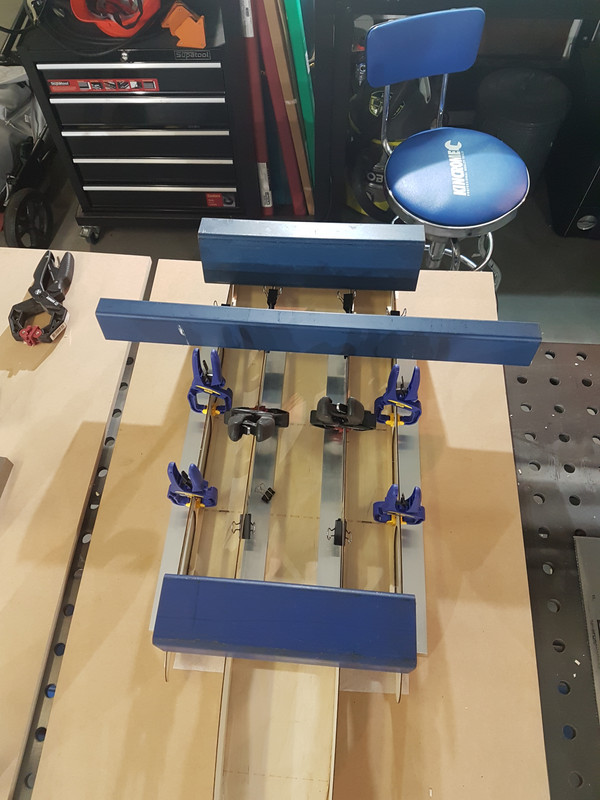
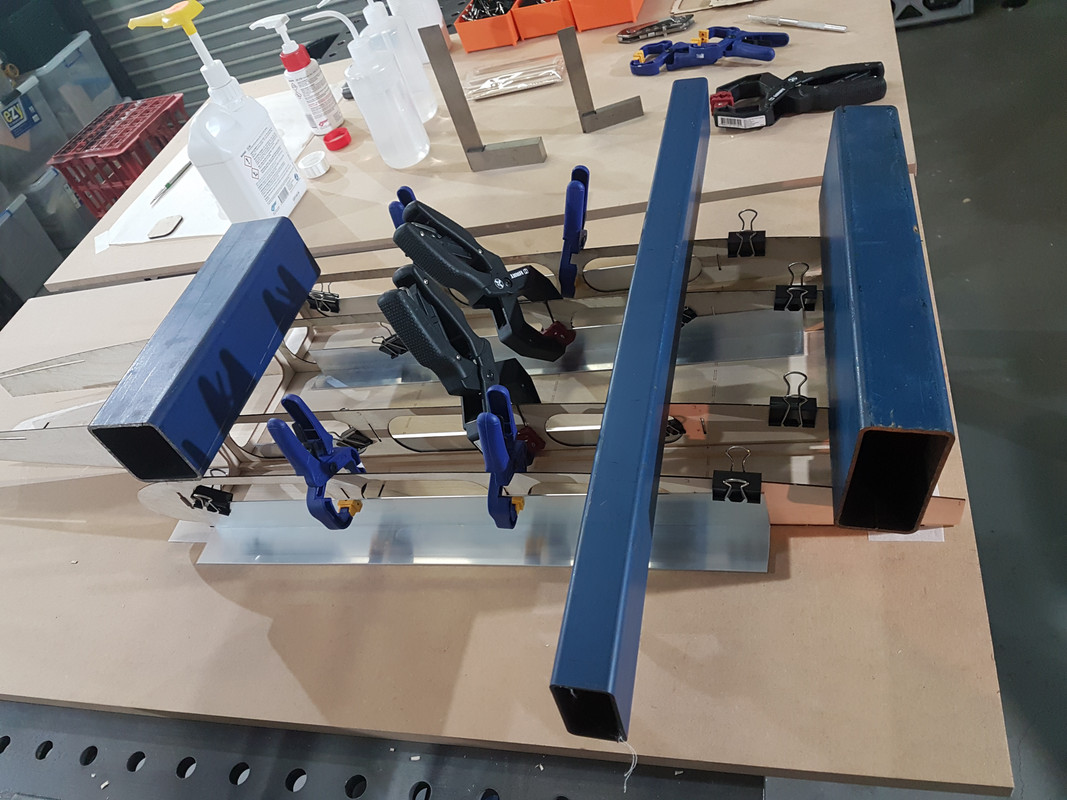
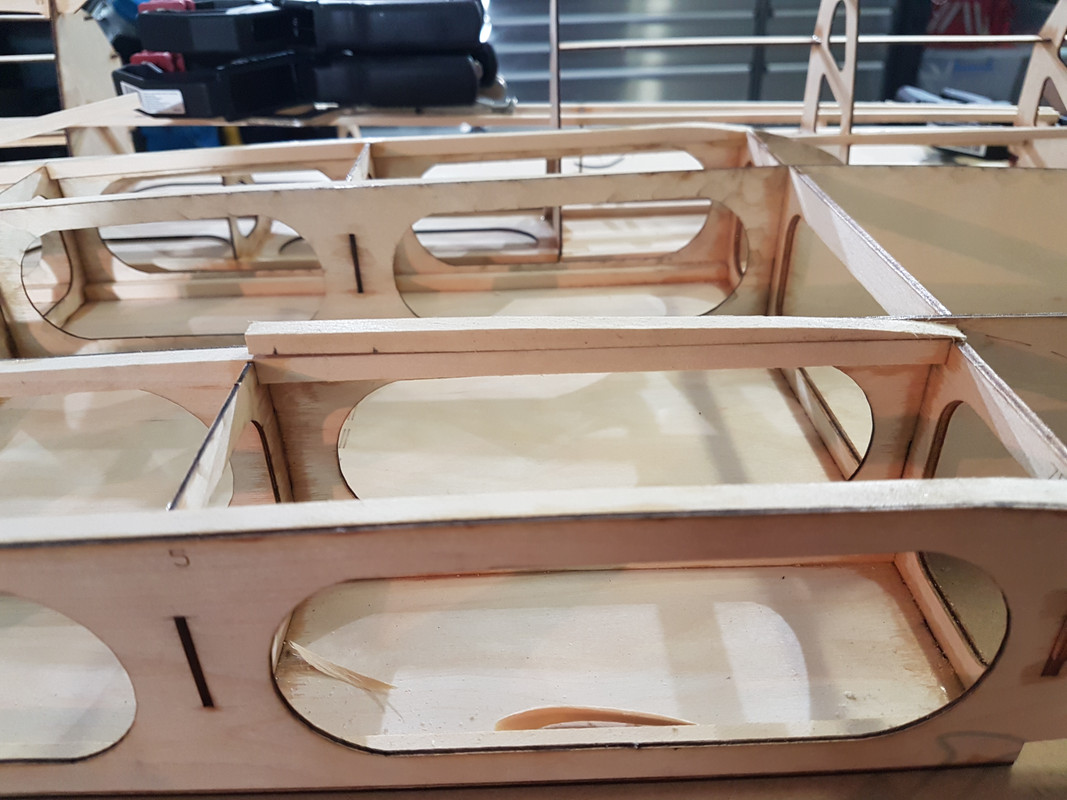
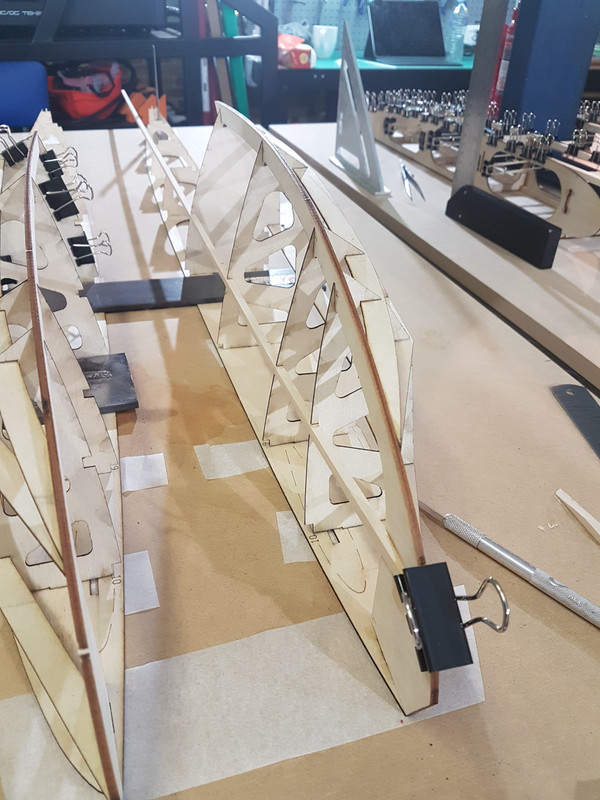
    After a full night curing i was able to remove the clamps. Came out dead straight


    Comment

    • nocebo
      Member
      • Jun 2020
      • 79

      #17
      Originally posted by jingalls007
      Yeah I have a few more sheets to cut and then I’ll sand it all down, putty where it needs it, then clear coat. I used exotic vaneer for the top decking so we’ll see how that turns out.

      They’re “big”[1/8 scales], but the gas scale boats are massive. I’m building two of Mike’s gas kits, the 164 and 172, and these boats are ridiculous. I’ll post build pics in a new thread if you have any interest.
      Very cool - so are you planning to not paint the body and just clear coat it so the timber shows though? That would look awesome i think.

      Never seen the gas scale kits in real life, only from watching you tube videos. Would love to see your builds of them, they look amazing, and would be great to get more than 3 minutes run time when compared to the electrics : )

      Comment

      • jingalls007
        Fast Electric Addict!
        • Mar 2009
        • 1015

        #18
        Your shop is awesome! It’s setup nice and clean with quality benches and tools.

        The gas scales I’m building will be electric so short run times indeed haha! But it’s more the enjoyment of building than running so it works out ok.

        I’ll start a build thread of the T6, Valken.com U-7, I’m working on.
        Last edited by jingalls007; 05-27-2021, 02:22 AM.

        Comment

        • nocebo
          Member
          • Jun 2020
          • 79

          #19
          Originally posted by jingalls007
          Your shop is awesome! It’s setup nice and clean with quality benches and tools.

          The gas scales I’m building will be electric so short run times indeed haha! But it’s more the enjoyment of building than running so it works out ok.

          I’ll start a build thread of the Valken.com U-8 I’m working on.
          Ha thanks, been getting the shop together for a while now, trying to make it all fit in a 2 car garage that i occasionally park a car in. Still need to finish of the welding table (hence all the steel on the floor) and make a couple of other stands etc, but otherwise its all finished. Would love some more room for a small Mill and a lathe, but that might have to wait until the next shop.

          Looking forward to the build thread, im guessing some serious motors and batteries to get something that size moving.

          Comment

          • nocebo
            Member
            • Jun 2020
            • 79

            #20
            After fitting the main stringers to the hull, the next step was to glue up the cross ribs. I also glued on the top basswood supports during the same glue up. First problem i encountered was that the basswood seemed slightly too large for the cutouts in the ribs. See below


            This was the case for all the cutouts for where the basswood supports run through the laser cut parts. I dont know if this was deliberate, or (more likely) the basswood has inconsistent dimensions. Either way i found it easier to trip the lasercut parts with a file/razor to make the basswood fit.

            Once everything was trimmed, i was able to drop the ribs quite easily into place, and then the basswood supports on top. I then used every clamp i had to keep it all in place.


            The basswood needs to take on a bit of curve to match the hull, i found the easiest way to do this was start clamping aft, following the line of the stringers. Lots and lots of clamps working all the way forward.


            Some creative use of rubber bands to ensure there is full contact across all the glue joints:


            Comment

            • nocebo
              Member
              • Jun 2020
              • 79

              #21
              Rather than trying to match the sharp curve at the front, i simply let the basswood extend straight out past the front of the hull. Once its dried, I will fill in the gaps with more basswood, trim to length and sand to shape.


              Comment

              • nocebo
                Member
                • Jun 2020
                • 79

                #22
                Once this was all dried up, i cut the battens to length and filled in the "missing" sections with more basswood. This was then sanded and planed to shape, following the curve of the hull.

                Trimming to length:


                Small piece of basswood i used to fill in the underneath of the outside batten:


                Here is that same batten sanded to shape:


                This is the inside batten:


                Piece of basswood glued on top:


                And in the process of sanding to shape:


                I didnt get a final shot of this sanded to shape but it essentially follows the curve of the hull. Most of the rear end of the additional basswood is cut of and only a sliver at the front remains.

                Comment

                • nocebo
                  Member
                  • Jun 2020
                  • 79

                  #23
                  Onto the sponsons!

                  While the hull was drying up, I made a start on the sponsons, these are definitely harder to build than the hull, and I am still working through the sheeting process. The shape of the sponsons are more "organic" so require some funky approaches to clamping. Also really important to keep the sponsons firmly clamped down as they are drying up to prevent warping (for those of us who have not build a dedicated jig)

                  Anyway here are the parts you need to make the sponson frames:


                  First step is double up the starboard rear sponson frame - where the turn fin attaches. Im assuming this is doubled up for extra strength.

                  Not sure what the consensus is here on how much stronger you need to make this part - can you get away with just this or do you need to back it with aluminium plate or carbon fibre? What does everyone usually do here?


                  Next step is to start laying up the sponson frames. Just like the main hull, I double sided taped the sponson frame to the build board to keep it flat. I then laid each of the frames one by one, using a square to make sure they were exactly straight. Unlike the main hull, i used CA glue to tack into place, and then backed up later with proper epoxy. The sponson is sort of flexed into place in spots, so really handy to have the CA glue working as an extra hand.


                  Once the main frames are in place you can start to tack in the front sponson supports - sort of the ride pad supports. This is where the whole thing needs to flex a bit and its a bit fiddly, the ML kit actually fits together really well though and all the parts are clearly marked. If you take your time, following the numbering system and these photos it will slot into place - if you are having to really force it its probably not right!


                  Here it is from another angle so you can really see how the frames work:

                  Comment

                  • nocebo
                    Member
                    • Jun 2020
                    • 79

                    #24
                    Once the frames were glued in, I started installing the battens. Starting from the front and working my way back, spot gluing each rib as i worked my way back. The top battens need to be tapered into the sponson to match the sheer line - i did this (poorly) with sandpaper.


                    As i worked backwards, I used to square to make sure each rib was perfectly square to the main frame before tacking in the batten.


                    As usual, I left the battens long, and once dry, trimmed to length:


                    On the bottom of the sponson, there are additional battens that need to be fitted into place


                    Comment

                    • nocebo
                      Member
                      • Jun 2020
                      • 79

                      #25
                      Once all that had dried up, I pulled the sponson from the build board and glued in the rest of the battens. These are hard to clamp when the sponson is stuck down


                      There is a bit of curve towards the rear, so lots of clamps and rubber bands to keep everything in place


                      Comment

                      • nocebo
                        Member
                        • Jun 2020
                        • 79

                        #26
                        With the basic sponson frame done, I needed to fill in the rear of sponson to provide an area to sheet against. For this I used a piece of lightweight balsa.

                        Cut to basic size:


                        Glued in solidly into the rear of the sponson:


                        Trimmed roughly to shape with a flush cut saw


                        And I then spent way too many hours sanding to shape to match the curve of the hull. The balsa sands quickly with 120 grit sandpaper on a block, but i have since gotten a nice small handplane, which is faster and quite accurate. Anyway, I basically followed the lines of the sponson and tried to keep everything nice and fair:


                        Comment

                        • nocebo
                          Member
                          • Jun 2020
                          • 79

                          #27
                          Finally, i clamped the two sponsons together so i could finish off the shaping of the rear, this allowed me to keep everything reasonably symettrical


                          Sorry if im posting too many pictures, hopefully they are helpful!

                          Comment

                          • longballlumber
                            Fast Electric Addict!
                            • Apr 2007
                            • 3132

                            #28
                            Thanks for sharing! This will be an excellent build reference for others in the future!

                            Comment

                            • nocebo
                              Member
                              • Jun 2020
                              • 79

                              #29
                              Originally posted by longballlumber
                              Thanks for sharing! This will be an excellent build reference for others in the future!

                              Thanks. Hopefully people can learn from my mistakes!

                              Comment

                              • jingalls007
                                Fast Electric Addict!
                                • Mar 2009
                                • 1015

                                #30
                                Originally posted by nocebo
                                Thanks. Hopefully people can learn from my mistakes!
                                Coming along famously. I envy builders like you that take the time to explain each step and the reasoning behind your choices. Excellent man! And btw, did I mention I’m jealous of your shop?!?

                                Comment

                                Working...