171 Extreme Build - 1/8 Scale Boeing

Collapse
X
 
  • Time
  • Show
Clear All
new posts
  • nocebo
    Member
    • Jun 2020
    • 79

    #1

    171 Extreme Build - 1/8 Scale Boeing

    Hi, been following along on this forum for a while, finally decided to jump in and build a kit. Aiming to build the Boeing in 1/8 scale, and document along the way. There is not a lot of info out there on how to build these, so hoping to add to the knowledge base. Hopefully I can learn something along the way from all the experts here as well!

    Will try to document in detail, take a lot of photos and close ups. Ive been scouring the internet looking for photos of this particular kit, there is one excellent build on this forum, and about half a dozen photos on the MLboatworks site, but thats about it. Hopefully will be more after this thread. Onto the build:


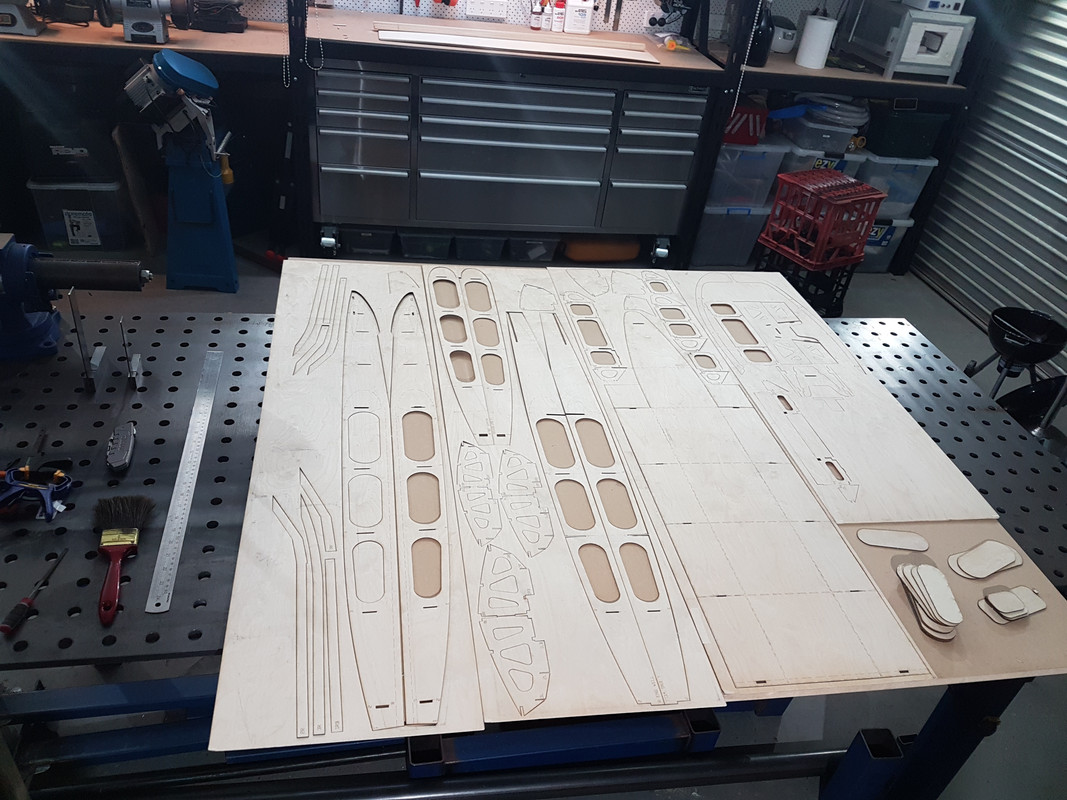
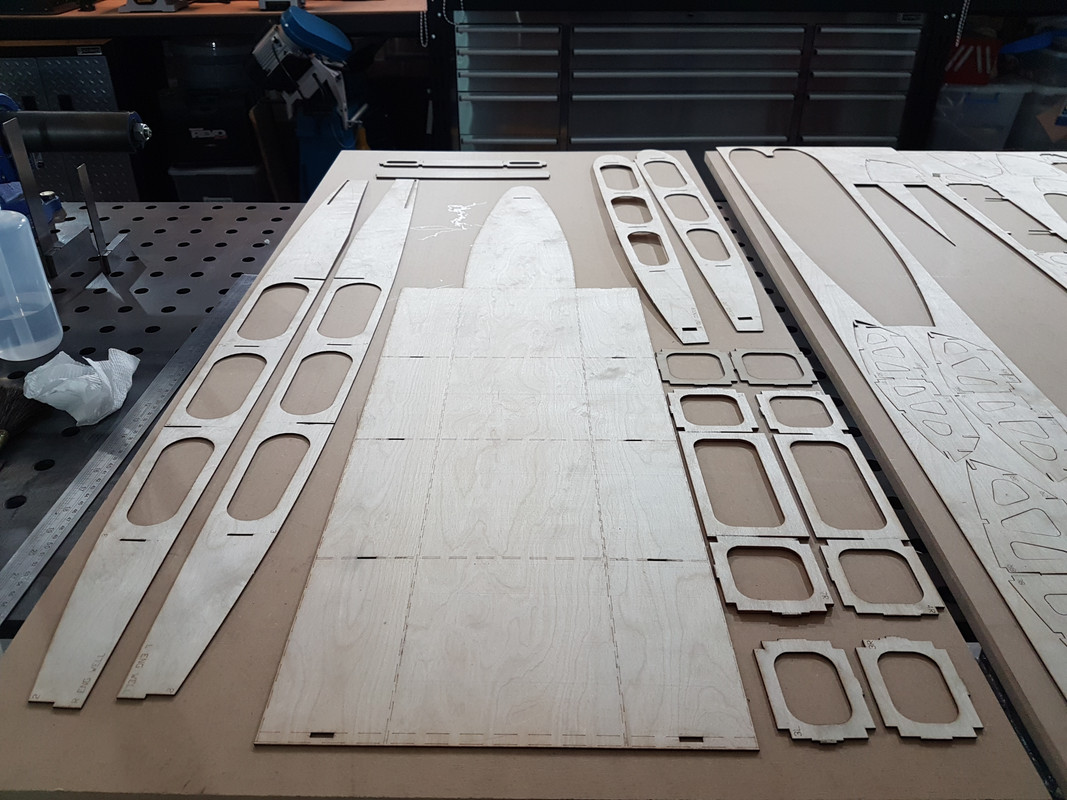
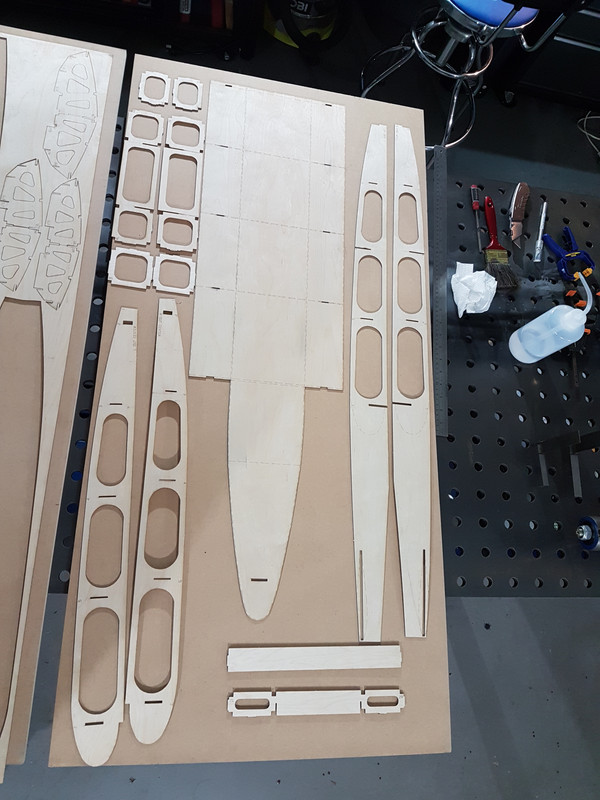
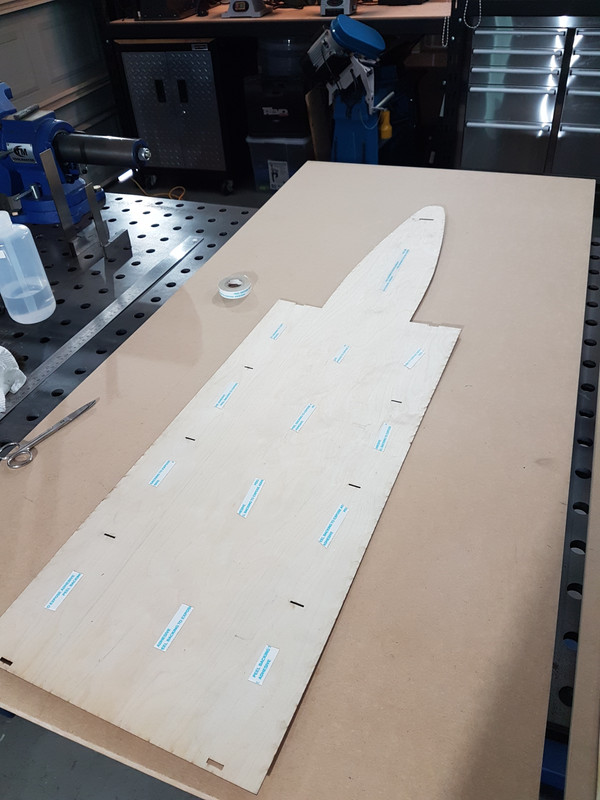
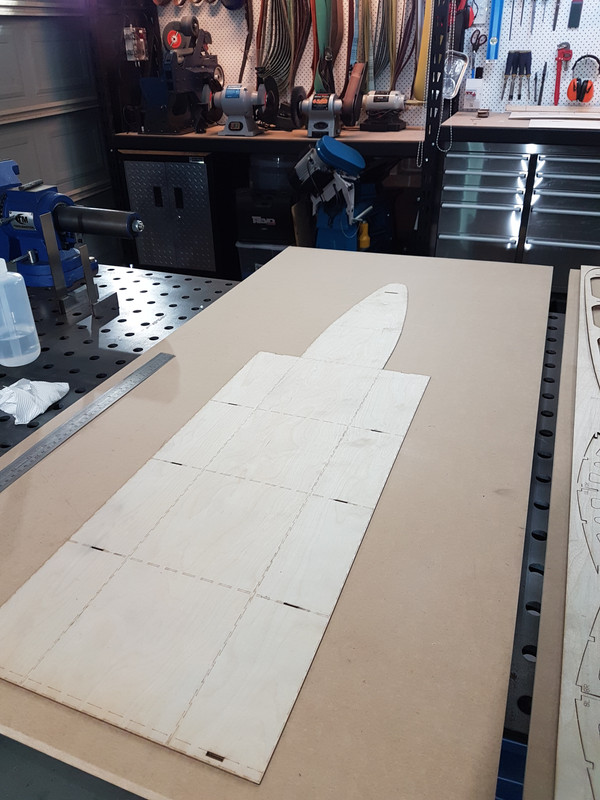
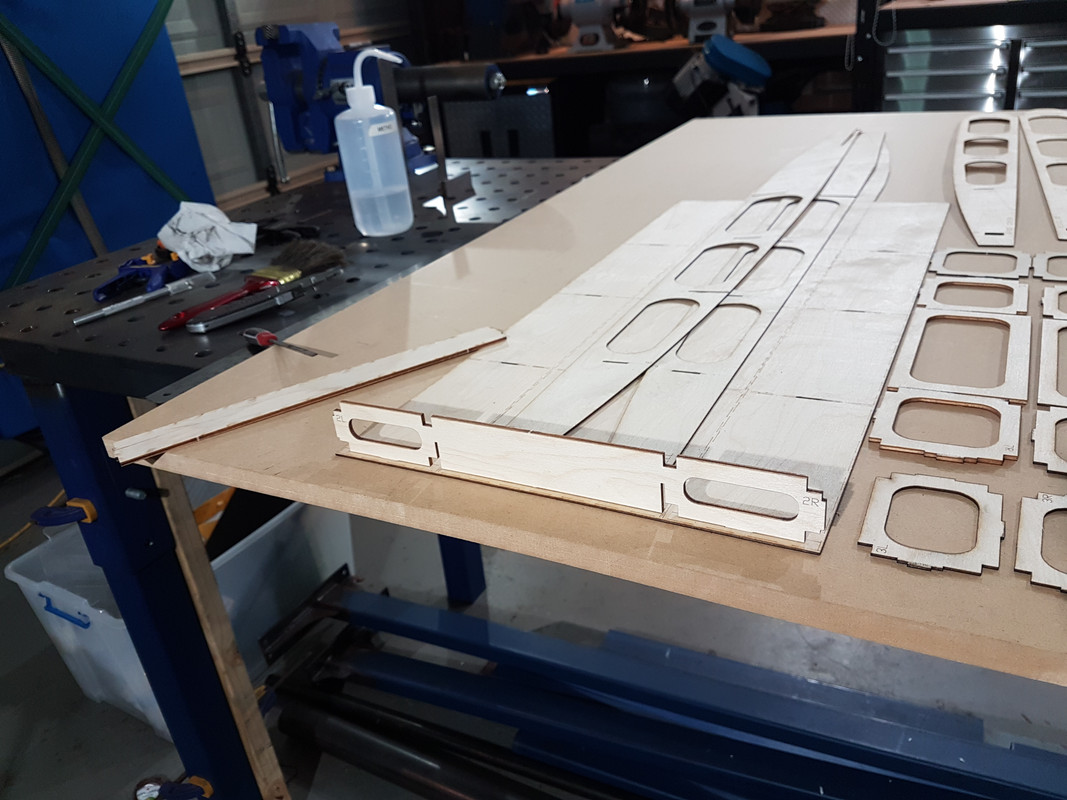
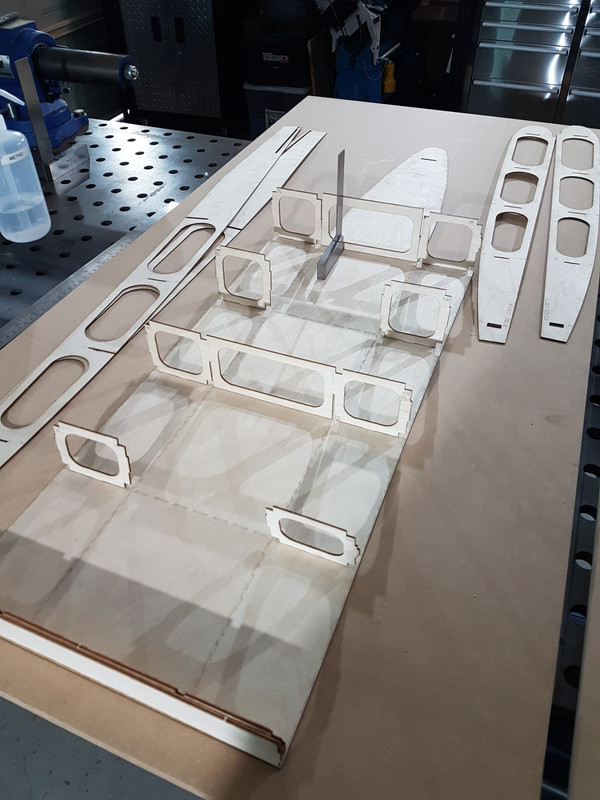
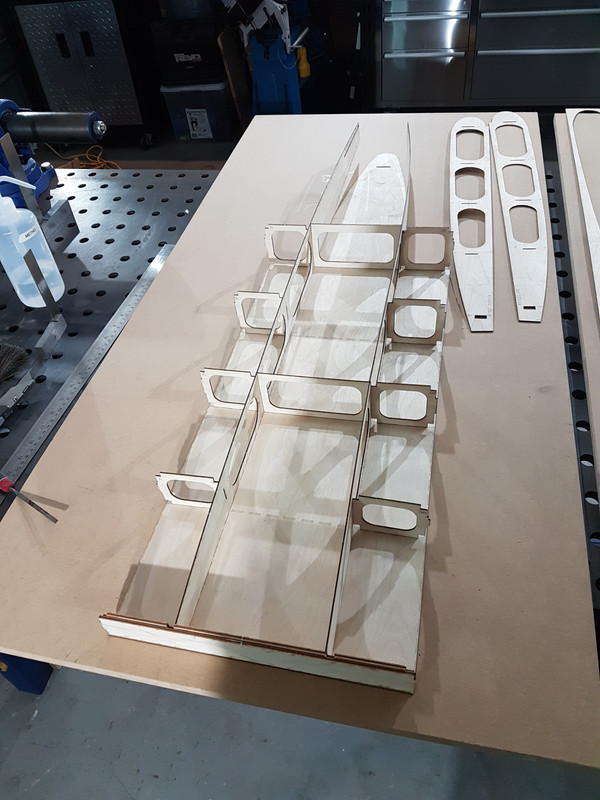
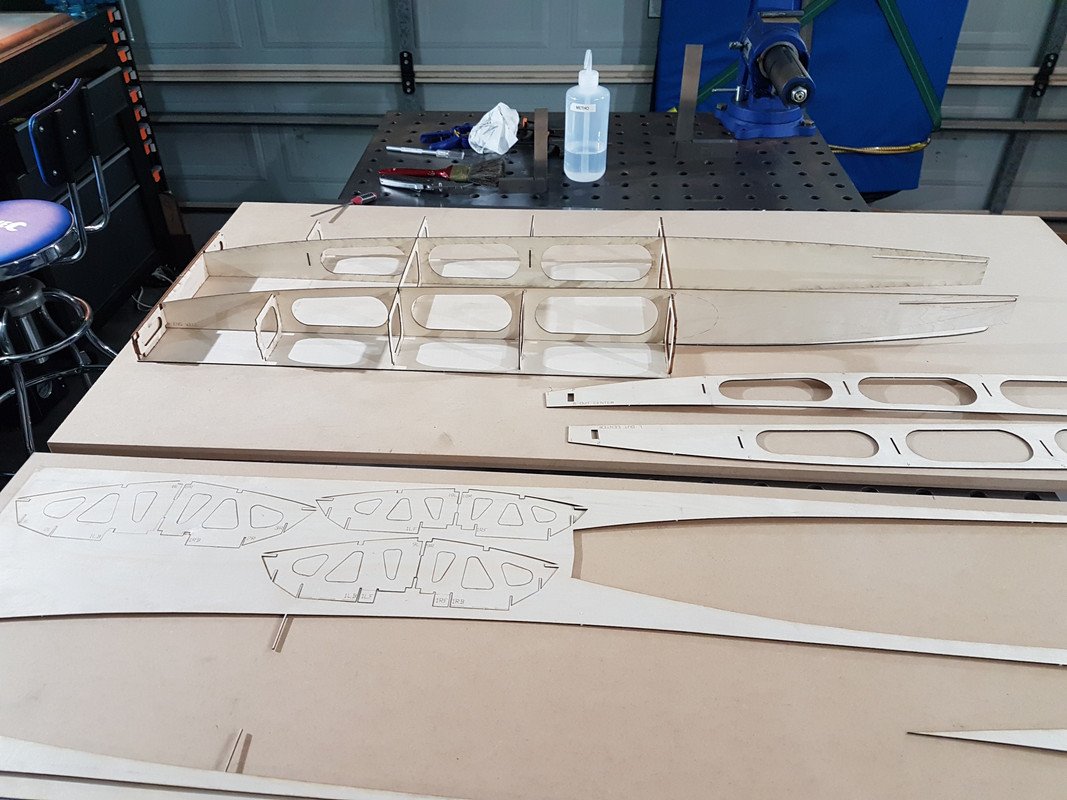
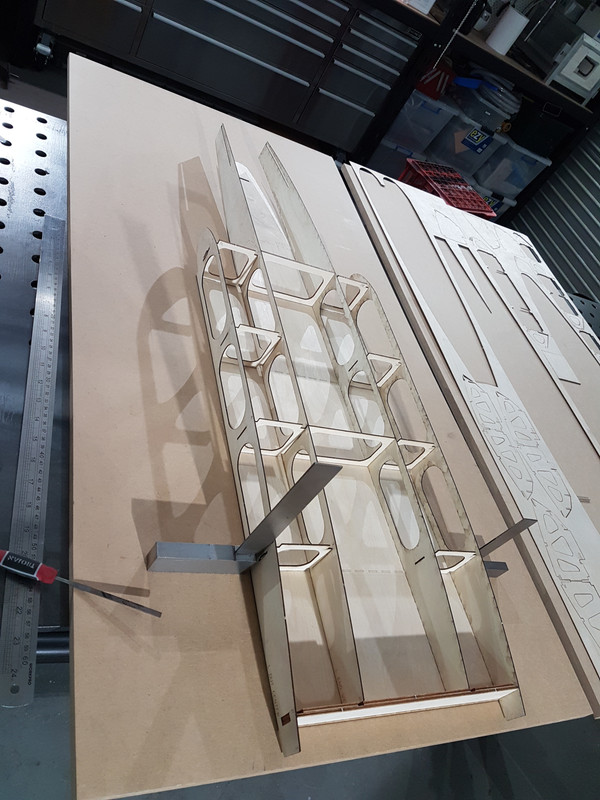
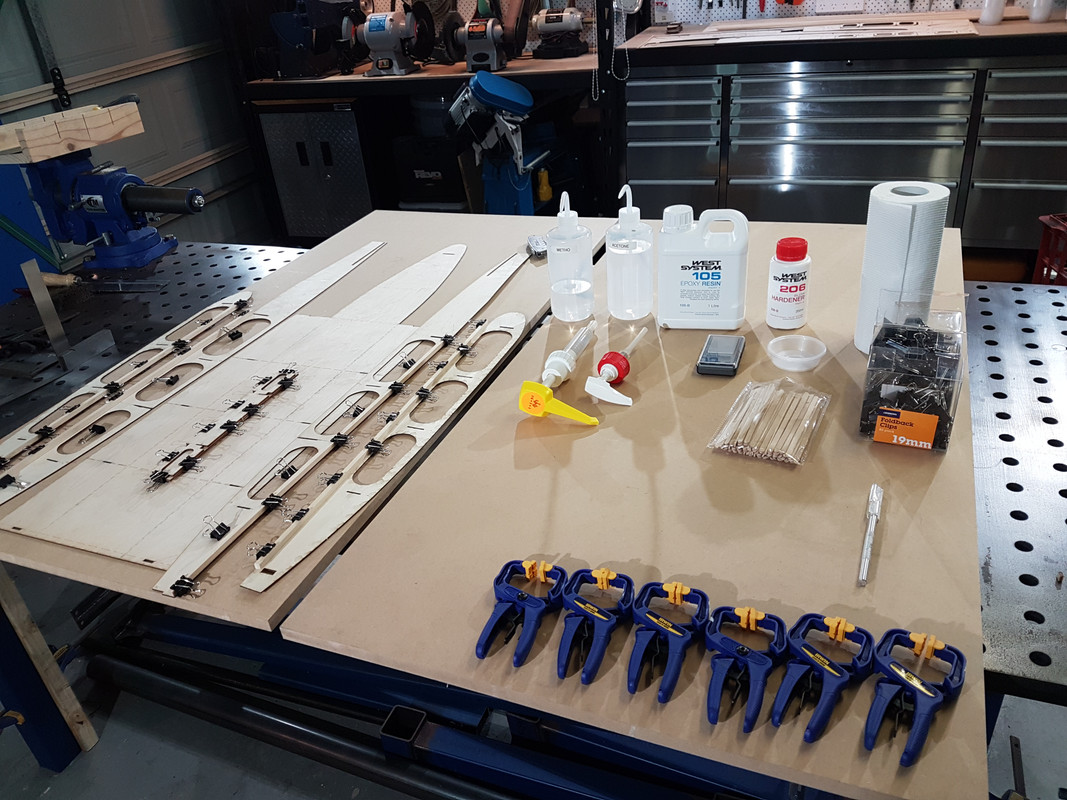
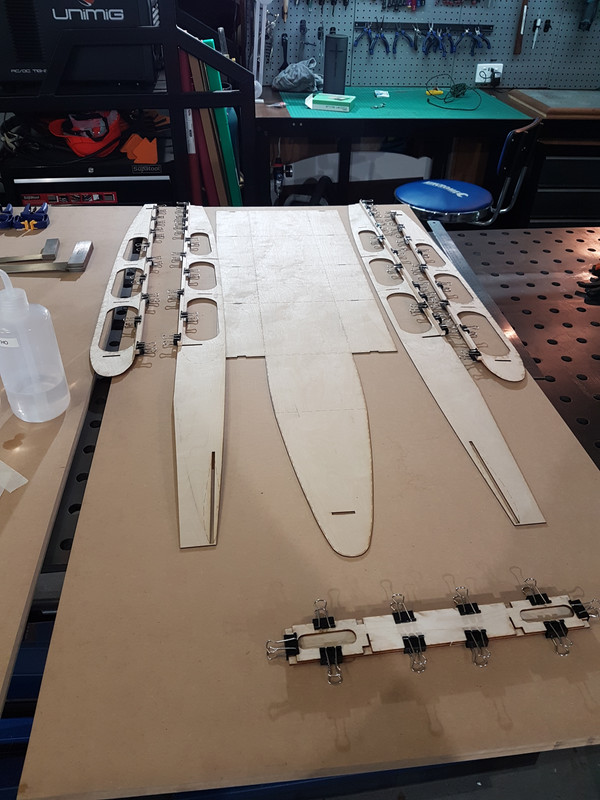
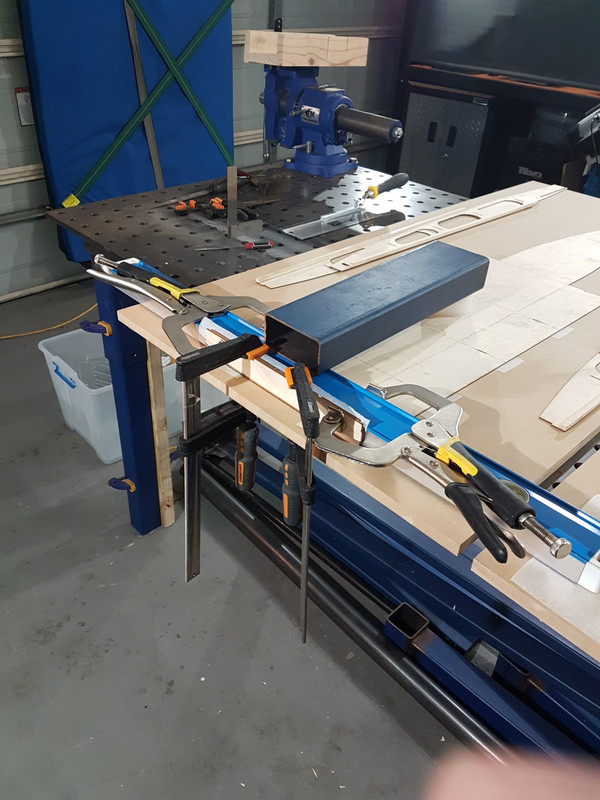
    The kit comes as about 4 laser cut sheets of plywood. The quality of cutting is excellent and the kit fits together fantastic. A lot of thought has gone into the design of the tabbing, how the components fit together, etc.


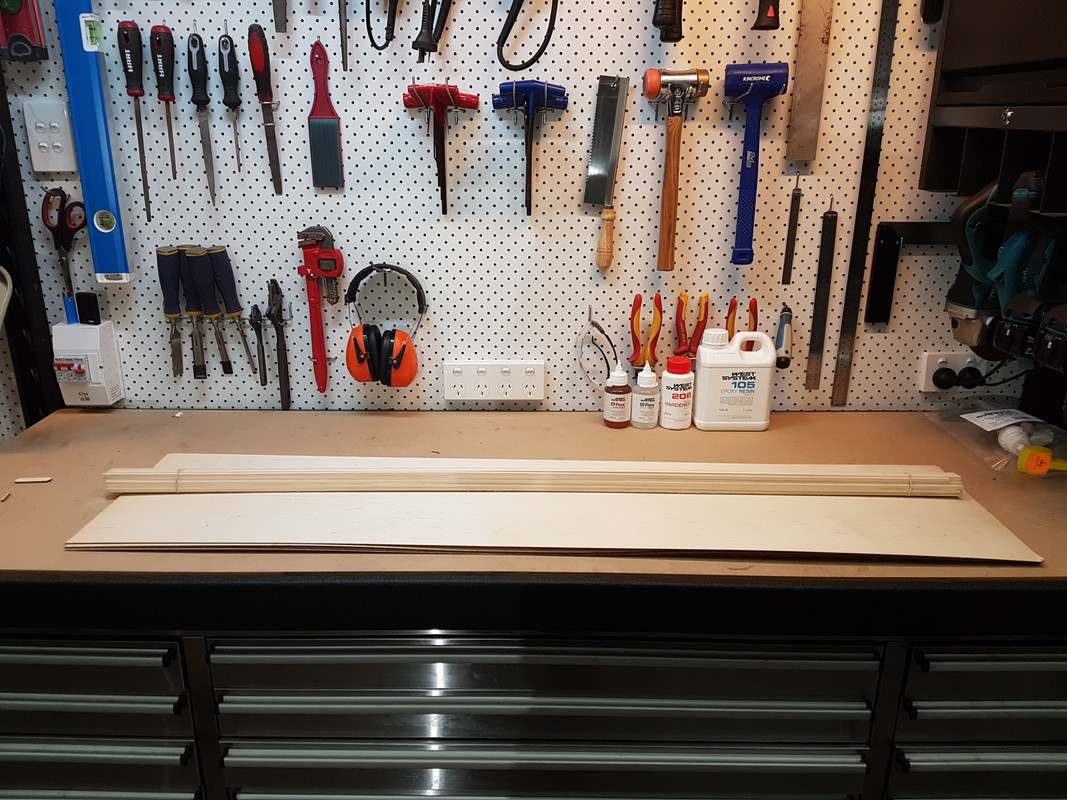
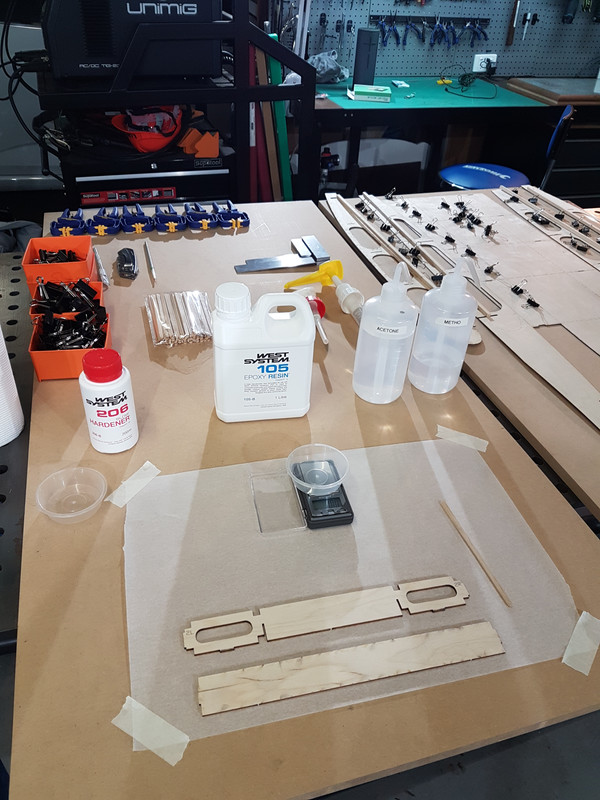
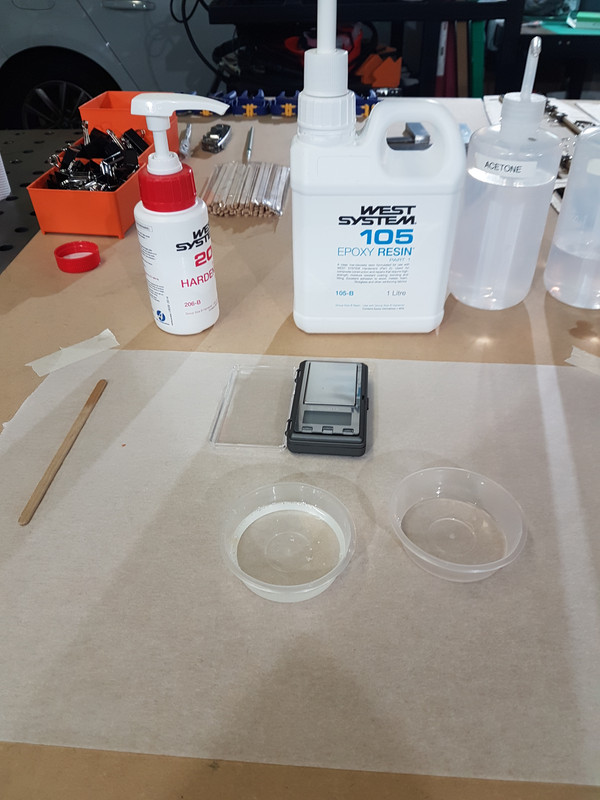
    I also grabbed 4 extra sheets of plywood and a bunch of basswood sticks, all from ML boatworks as well. Ive gone with west systems for my epoxy, both the regular and the gflex.


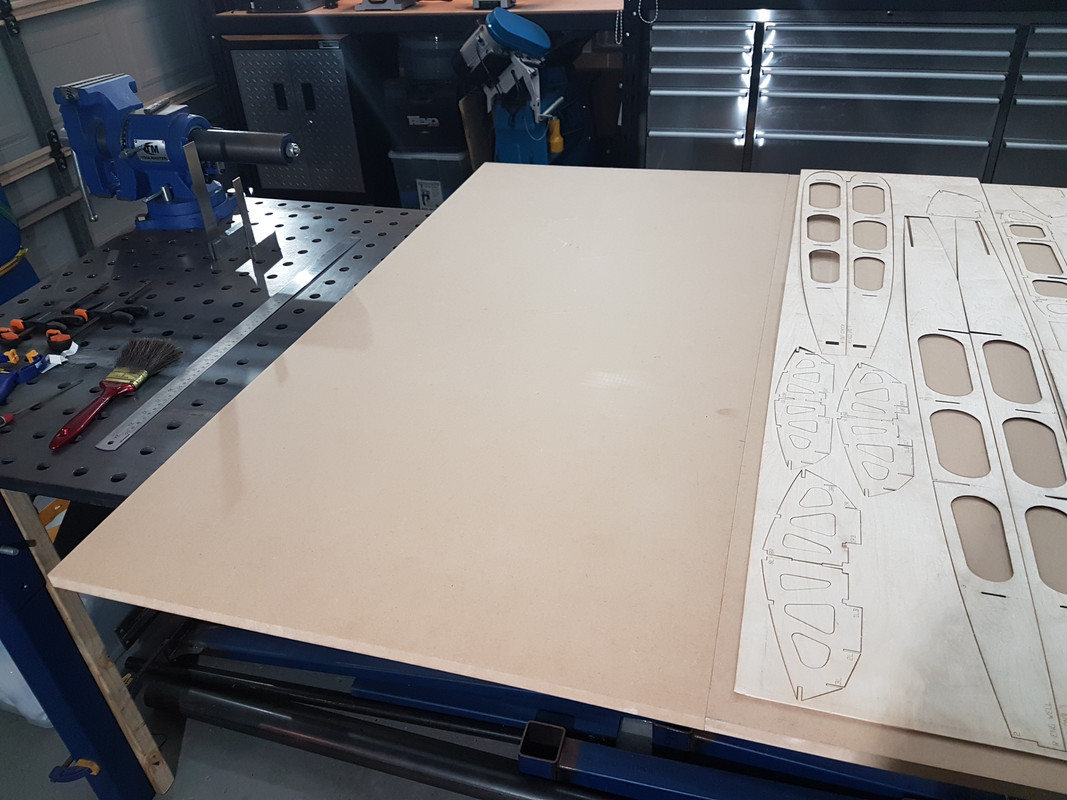
    Finally i grabbed a some MDF as a nice flat building surface that i wont mind cutting up and drilling into.
    Last edited by nocebo; 05-23-2021, 10:12 PM.
  • nocebo
    Member
    • Jun 2020
    • 79

    #2
    Building the kit starts with cutting out the individual pieces from the plywood. They are left in place with small breaks in the laser cutting. I found them easiest to cut with a razor. They also need need to be filed flat with a file or some sandpaper.


    The laser cutting leaves a burnt edge to the plywood parts - I cleaned this off with some metho and a rag. If you dont clean it off it will mark up the clean plywood - Im not sure if i want to leave the inside clear so wanted to keep the plywood clean


    Started my build on the center section - here are the parts you need:


    First step i took was to fix down the floor of the hull. All the plywood parts are a little bit warped, so the need to be held down while gluing or the whole thing will warp. Ive seen others (M5 Performance makes great videos) screw the floor down to a flat sheet of MDF, but I didnt want to put holes in the hull. I went with a super thin double sided tape, which actually worked really really well.

    Last edited by nocebo; 05-23-2021, 10:15 PM.

    Comment

    • nocebo
      Member
      • Jun 2020
      • 79

      #3


      Started with a trial fit up of the center hull. Heres the transom:


      Its in two pieces, this is the first


      and the second

      Next are the center ribs


      And then the central longitudinal pieces


      Last edited by nocebo; 05-23-2021, 10:17 PM.

      Comment

      • nocebo
        Member
        • Jun 2020
        • 79

        #4
        Here it is together:


        Last edited by nocebo; 05-23-2021, 10:19 PM.

        Comment

        • 1coopgt
          Senior Member
          • Feb 2019
          • 413

          #5
          Looking good. If you haven't found Scott Myers You tube channel yet I suggest it . https://www.youtube.com/user/matinco2 Tons of knowledge.

          Comment

          • fweasel
            master of some
            • Jul 2016
            • 4281

            #6
            Cool project. Interested in seeing more updates.
            Vac-U-Tug Jr (13mph)

            Comment

            • nocebo
              Member
              • Jun 2020
              • 79

              #7
              Thanks, yeah have seen his channel, great knowledge there and been following closely for this build.

              Comment

              • nocebo
                Member
                • Jun 2020
                • 79

                #8
                After trial fitting, next step was to do the glue up of the main hull. My process for gluing up is to lay everything out, and trial fit everything together without glue. I put every clamp on and get everything completely ready before mixing up any epoxy. Nothing worse that trying to work out how to clamp that awkward part while your epoxy is kicking off.

                Ive been reading that a lot of builders will super glue all the parts together and then run a bead of epoxy over the whole thing to hold it all together. Ive tried to avoid this with the build and stick to mostly epoxy on all the mating surfaces - my thinking is that this will be stronger? Im also using the 24 hour epoxy (West Systems slow hardener) This gives me more working time and forces me to work a bit slower and not make stupid mistakes. I tend to try to do one glue up a day, let it set overnight, sand the next day and do the next glue up.


                Here is everything laid out ready for the first glue up. Im using the pump system from West Systems but honestly rarely every use a full pump. Most of the time I will use some scales and mix up 6grams at a time into a shot glass. (5 grams of Resin and 1 gram of Hardener)


                Here is everything ready to go - as you can see Ive trial clamped everything and have spare clamps ready to go.


                And here is the first glue up. I glued the two part transom together, as well at 1/8 basswood sticks to the bottom of the 4 main stringers. The basswood sticks help straighten out the stringers, which is helpful as they warp quite a bit once out of the pack.
                Last edited by nocebo; 05-23-2021, 10:22 PM.

                Comment

                • nocebo
                  Member
                  • Jun 2020
                  • 79

                  #9
                  Next day after the epoxy had dried - next step was to glue on the transom. Used a straight edge and some weights to make sure it was completely square and flat.


                  Last edited by nocebo; 05-23-2021, 10:23 PM.

                  Comment

                  • jingalls007
                    Fast Electric Addict!
                    • Mar 2009
                    • 1015

                    #10
                    I recently finished the 171 extreme kit. It’s a solid kit that goes together seamlessly. Do you have the cockpit yet?
                    Lookin good so far!

                    Comment

                    • nocebo
                      Member
                      • Jun 2020
                      • 79

                      #11
                      Originally posted by jingalls007
                      I recently finished the 171 extreme kit. It’s a solid kit that goes together seamlessly. Do you have the cockpit yet?
                      Lookin good so far!
                      Hi, thanks for taking a look, agree so far it has been going together well, well designed kit. Currently up to the sponson sheeting, which is a little more difficult : ) Would love to see how you did your sponsons, having trouble working out how the ride pad matches up with the side of the sponson? Seems different on the starboard and port sides.

                      Unfortunately dont have the cockpit yet. Emailed rcboatworks a few months ago but seem like he is under the pump at the moment building cockpits - on backorder. Its not holding me up yet as im still working on the sponsons. Im basically avoiding doing anything at the front of the boat because im worried the cockpit might not fit when it does come in : ))

                      Comment

                      • jingalls007
                        Fast Electric Addict!
                        • Mar 2009
                        • 1015

                        #12
                        B4641679-FFB4-401C-A005-5E81E60EDECD.jpgB9BEE7BC-6E78-4F79-9225-5BE1B47AB5A8.jpg35910042-A926-4288-A301-4980EE896A10.jpgD971AA73-842C-46E2-B7E7-32925C0F2961.jpg

                        Don’t worry about gaps or curved cuts in your skins. You’ll be doing some amount of filling to get it all smooth. If you haven’t already chosen a putty I’d go with Icing. It’s a two part polyester that’s easy to sand, water resistant, and rock hard. As you can see in the pics above I love the stuff.

                        Comment

                        • jingalls007
                          Fast Electric Addict!
                          • Mar 2009
                          • 1015

                          #13
                          Have you seen Mike’s smugmug profile on his site? This kit is in there and he walks thru assembly steps showing a fair amount of detail. I use his smug mug photos for his scales kits.

                          Comment

                          • nocebo
                            Member
                            • Jun 2020
                            • 79

                            #14
                            Originally posted by jingalls007
                            [ATTACH=CONFIG]172681[/ATTACH][ATTACH=CONFIG]172682[/ATTACH][ATTACH=CONFIG]172683[/ATTACH][ATTACH=CONFIG]172684[/ATTACH]

                            Don’t worry about gaps or curved cuts in your skins. You’ll be doing some amount of filling to get it all smooth. If you haven’t already chosen a putty I’d go with Icing. It’s a two part polyester that’s easy to sand, water resistant, and rock hard. As you can see in the pics above I love the stuff.
                            Thanks, this is exactly what i was looking for, some close up of the sponsons and how the sheets butt together. So far Ive done the sheeting on the air trap and the back of the sponson, hopefully will do the ride pad tonight. Will check out the Icing putty, havnt picked anything yet.

                            Your build looks great by the way, its crazy how big these things are when they are all together.

                            Yep been all over Mikes Smugmug profile - he has heaps of pictures, just not many of the 171 build. Each sponson design is slightly different so just trying to work out exactly what sheet butts up to what sheet, or overlaps, or overhangs, etc.

                            Comment

                            • jingalls007
                              Fast Electric Addict!
                              • Mar 2009
                              • 1015

                              #15
                              Yeah I have a few more sheets to cut and then I’ll sand it all down, putty where it needs it, then clear coat. I used exotic vaneer for the top decking so we’ll see how that turns out.

                              They’re “big”[1/8 scales], but the gas scale boats are massive. I’m building two of Mike’s gas kits, the 164 and 172, and these boats are ridiculous. I’ll post build pics in a new thread if you have any interest.

                              Comment

                              Working...