 Tweet
Tweet
Electric surf board!
-
twissted from speed. Lead, fallow or get out of the way. Copy cats in back of the buss!!! -
Looking good!!
i see you have started the job I need to get to on mine, fitting the bulk heads and stringers. did you use the age old technique of pencil and calliper to transfer the shape of a more technical way? (i would love to get use of one of the digital scanning arms to make a perfect fit to mine but not sure of the correct name of it and cant find one on google in my area)
also what shaft centres did you choose to run with?
JasonComment
-
Cardboard and pencil, with alot of trimming, fitting& trimming, fitting & trimming. Had to even start over a few times.
My centers are 79mm apart. And thats fine I probably woun't ever run anything larger than a 65mm prop. I might try a 70mm, but from everything I've read. With talkin with guys that have run 70mm Props. And from emailing the PS and other prop shops. They all say 70mm and above are just Amp hogs.Comment
-
Got the backing plate in and I'll start on the rails and motor mount tomorrow.

Comment
-
This sure is not pro's work by any means. But its not bad, for being my first build. The progress up to now. Got the motors all put together, and let me tell you. The MBP collets are some nice peice's of art. Plus they are very light. Water jackets are polished, and the rear motor supports are also from MBP there CF. I do have a question, does it matter if the motor wires from one motor touch the other motor wires?

Plus in the above picture, as you can see the rear ring are not attached to the hull. Gong to cut some CF plate, maybe 2 or 3 layers stepped with a peice of CF cloth ove it, to keep it all neat.

And the section that will surround the motors, still need some refinement to fit the way I want them. And the plate behind the motors, I still need to drill some access hole. So I can get to the rear support bolts. And from where the rails are, up to the side of the hull at an angle. Will be another CF plate, just trying to make it look cleaner.


Comment
-
Looking good buddy and yes tge MBP collets are the best out there. I never seen something so precise. About the motor wires i had a twin 1717 setup at first I had motor wires touching and when I had power to only one motor there was some glitching into the second motor with no power. I spun the motors around and the problem disappeared. I dont know if it was just a coincidence or not.my youtube videos http://www.youtube.com/user/chris81983?feature=mheeComment
-
Thanks Chris
Here's a couple more pictures. I just layed the 2 front rails, up on top. Just to give you an idea of what it will lokk like when its done.


Comment
-
Wow thats nice n clean looking I am liking this buildmy youtube videos http://www.youtube.com/user/chris81983?feature=mheeComment
-
Very nice Jason
But you bought the motor mount from mhz, why you didn't use it ?
Baby Sv43 / 2 x TP 5660 1100Kv / 8S / SF240A
Comment
-
where is the hardware from? It looks great, interested to see what else is available.Comment
-
They are from wd200
Baby Sv43 / 2 x TP 5660 1100Kv / 8S / SF240A
Comment
-
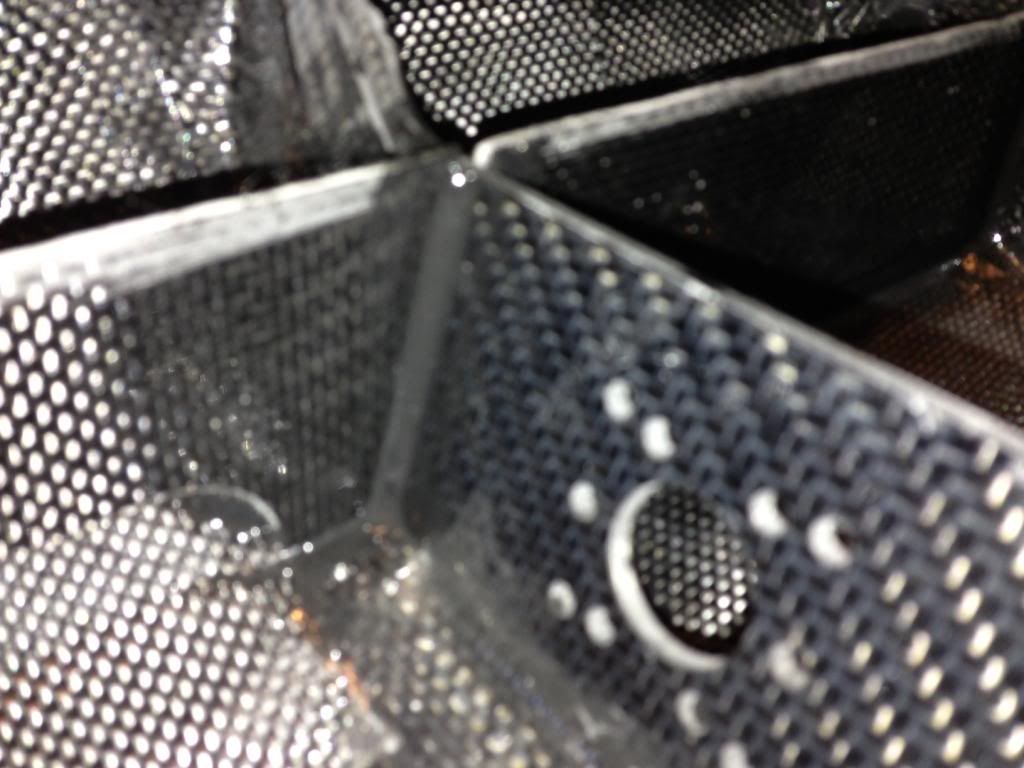
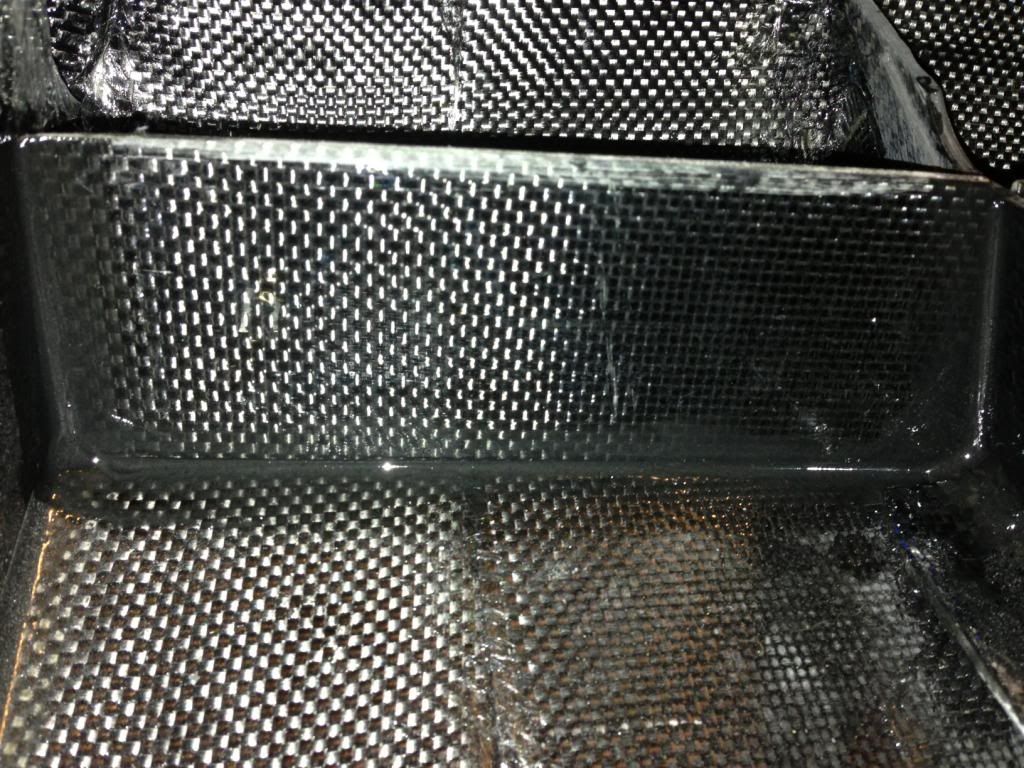
This is before I epoxied in the motor area. I almost messed up, the other night. I was about to epoxt the rails and the rib in. When I thought, how in the hell will I ever get the rear motor support bolts out to remove the motors. Thats why you can see the two holes in the rib.

I got the motor area all boxed in and epoxied in place. With a butt load of CF cloth for reinforcement. Thank you Keith and Joel, on recommending the 406 silica filler. And Joel for the graphite powder, to make the epoxy black. Without the filler, I was starting to wonder what I was going to use to epoxy my vertical joints and not have it run. All the joints are reinforced on the back side. And the front side that everyone will see, I made the epoxy thick enough not to sag and run. I use the end of a wooden stir stick to get it into the joints. Then I used my finger inside a rubber glove. To drag the seam like you do when your using silicone on some thing. I think it came out fairly nice. Granted its not near as nice as some of the builds on here. But I'll get better.

Comment
-
U did a damn good job and I myself consider this to be one of the nicer builds so u can erase your last comment lolmy youtube videos http://www.youtube.com/user/chris81983?feature=mheeComment
-
Thanks for the vote of confidence Chris. This build isn't up to par with some of the builds I have seen on here. But give me time, I'll get better. But its not to bad for a first build. Chris yourbuild's are top notch. What's sad I'm already thinking of the next boat I wanna build.Comment


Comment