ML Boatworks Rescue Project

Collapse
X
 
  • Time
  • Show
Clear All
new posts
  • Ayles
    Member
    • Jun 2021
    • 62

    #1

    ML Boatworks Rescue Project

    I have been dreaming about building a boat for sometime now and came across this abandoned project for what seemed to be a decent price. Since it included a ton of hardware, motor, SC, cowling and a servo I decided to pull the trigger. The ad was a circus circus hull, but would love if someone could verify so I could search out some build photos.

    I haven’t ever built an rc boat but I did race rc cars in the mid 90s and recently restored a car here at home so this seemed like a doable project. I am likely going to need a fair amount of advice!

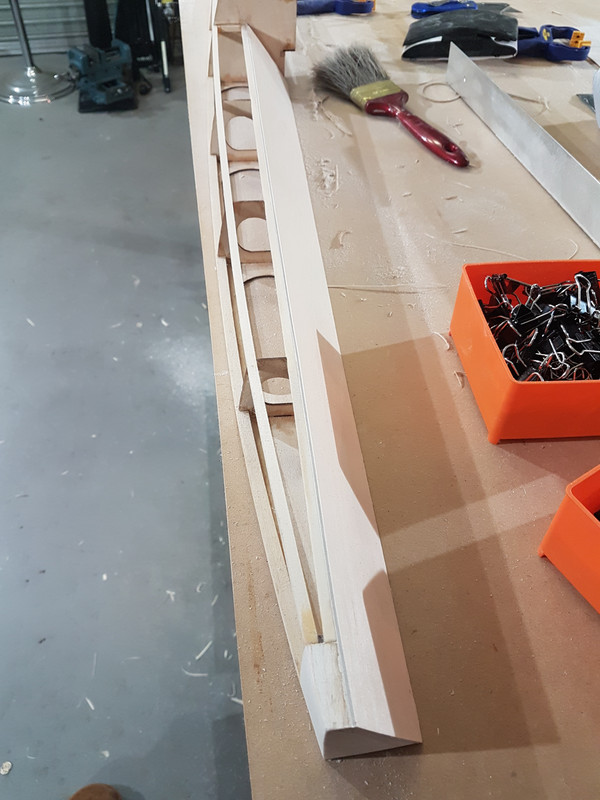
    I want to order the sheeting from ML and I think the first step here is to finish the bottoms of the sponsons and mix up some epoxy to go over all the joints. Then I think working out the nose will follow.

    Looking forward to this project!
    Attached Files
    Last edited by Ayles; 06-07-2021, 01:07 AM.
  • jingalls007
    Fast Electric Addict!
    • Mar 2009
    • 1015

    #2
    Cool buy! What brand of motor is that? Is it an out runner?

    Comment

    • Ayles
      Member
      • Jun 2021
      • 62

      #3
      I wish I knew!

      This is all very new to me as are the techniques I need to finish the thing!

      I started ordering supplies tonight so I can start epoxying the areas that need to be finished. Then I think the next order of business is figuring out the nose/cockpit. That area appears to be missing some framework. Lots of pics have carbon fiber cloth in this area too.

      Comment

      • nocebo
        Member
        • Jun 2020
        • 79

        #4
        Originally posted by Ayles
        I wish I knew!

        This is all very new to me as are the techniques I need to finish the thing!

        I started ordering supplies tonight so I can start epoxying the areas that need to be finished. Then I think the next order of business is figuring out the nose/cockpit. That area appears to be missing some framework. Lots of pics have carbon fiber cloth in this area too.
        Very interesting looking motor - is that fitting on there for water cooling or grease? Looks like a huge motor, any idea of the KV?

        Any what ESC/Battery combo you will be going with?

        Edit - just saw the photo of the ESC, so thats decided : )

        Comment

        • Ayles
          Member
          • Jun 2021
          • 62

          #5
          I have no idea on the motor or ESC :) I got everything as it is in a package. I have been wanting to build one of these boats for a while and this came up for sale not too far away and the price seemed good.

          The seller said the motor is water cooled and was built by a now defunct local company in Seattle. Outside of that I don't have any more info. So if anyone recognizes it I would love to know more!

          Comment

          • NativePaul
            Greased Weasel
            • Feb 2008
            • 2760

            #6
            The motor is a Littlescreamers watercoole outrunner, they were pretty inefficient but could make decent power. They didn't make many of these big boat motors, they were made as a replacement for a weedeater petrol engine, the standard KV was 650 to spin petrol size props on 10s, though I know they did wind at least 1 differently so I cant be 100% sure yours is 650KV.

            The castle Ice 200 HV is a very good ESC, just make sure you don't get it wet.
            Paul Upton-Taylor, Greased Weasel Racing.

            Comment

            • Ayles
              Member
              • Jun 2021
              • 62

              #7
              This is great!! Thank you for the info!!!! Pieces of the puzzle are coming together!

              Comment

              • NativePaul
                Greased Weasel
                • Feb 2008
                • 2760

                #8
                Check out this 15 page thread on the motor, I didn't read it all but I recommend you do, where I left off there seemed to be issues with this motor and Castle ESCs (though they were an older generation than yours, so may or may not be an issue) and it seemed like the other KV variant was going to have a different pole count.

                The 650kv had 6 poles, so you can count the poles (turn the motor through 1 complete revolution counting the number of times it cogs, then divide that number by 3) to find out for sure if it is 650KV.
                Paul Upton-Taylor, Greased Weasel Racing.

                Comment

                • Ayles
                  Member
                  • Jun 2021
                  • 62

                  #9
                  Thanks again! This more great info! I certainly appreciate it!

                  Comment

                  • Ayles
                    Member
                    • Jun 2021
                    • 62

                    #10
                    As I spend more time with what I have it seems more questions arise!

                    I have been studying build photos and I am now questioning finishing the stern of the boat. Here are some photos as it sits now. Is there any further building that happens on the underside back there?

                    hydbottom1.jpg

                    hydbottom2.jpg

                    hydbottom3.jpg

                    Comment

                    • nocebo
                      Member
                      • Jun 2020
                      • 79

                      #11
                      Hi,

                      My kit is slightly different, but i think you will need to do a couple of things, on the ends of the sponsons I filled in the gap with a piece of balsa and then put a piece of ply over the very end.

                      See this pic - hope it makes sense:


                      I also imagine you will need to file or sand down the excess sheeting to match the line of the sponsons.

                      Comment

                      • Ayles
                        Member
                        • Jun 2021
                        • 62

                        #12
                        Ok, thanks! Hope I understand. Are you saying the back of the boat isn't flat? where the sheeting and frame extend beyond the stern here. This gets filled with a piece of balsa (wedge shaped) on each side?
                        hydbottom4.jpg

                        Then on the bottom, the lip on each side gets sanded smooth all the way up so the bottom is flat? That only seems problematic as when it reaches the forward end of the hull where it starts to dip down.
                        hydbottom5.jpg

                        Better photo of the transition:
                        hydrobottom6.jpg

                        And I could be totally overthinking it!

                        As a quick note, I did order 5 sheets of plywood and a block of balsa which should be here on Thursday. Then I can start figuring out the remaining 4 pieces of sheeting on the sponsons.

                        Comment

                        • nocebo
                          Member
                          • Jun 2020
                          • 79

                          #13
                          Originally posted by Ayles
                          Ok, thanks! Hope I understand. Are you saying the back of the boat isn't flat? where the sheeting and frame extend beyond the stern here. This gets filled with a piece of balsa (wedge shaped) on each side?
                          [ATTACH=CONFIG]172917[/ATTACH]

                          Then on the bottom, the lip on each side gets sanded smooth all the way up so the bottom is flat? That only seems problematic as when it reaches the forward end of the hull where it starts to dip down.
                          [ATTACH=CONFIG]172918[/ATTACH]

                          Better photo of the transition:
                          [ATTACH=CONFIG]172919[/ATTACH]

                          And I could be totally overthinking it!

                          As a quick note, I did order 5 sheets of plywood and a block of balsa which should be here on Thursday. Then I can start figuring out the remaining 4 pieces of sheeting on the sponsons.
                          Sort of - so in your first photo, those circled areas get filled in with balsa (or just ply could work i guess) and then capped off.

                          On the second two photos - no dont sand this smooth, the lip is there deliberately to trap air under the hull. I was referring to to top of your hull, it looked like the ply had not been sanded down yet.

                          Im at work at the moment, but when i get home ill temporarily attach my sponsons and take some photos so you can see what it looks like. Should give you a good idea of how its meant to be finished up. (or at least how i did it : )

                          Comment

                          • Ayles
                            Member
                            • Jun 2021
                            • 62

                            #14
                            Got it! That makes sense. You correct on the top part, that still needs to be trimmed and sanded flush, I just didn't want to get to crazy with that stuff before I knew how much material needs to be removed.

                            Comment

                            • Ayles
                              Member
                              • Jun 2021
                              • 62

                              #15
                              Ok, I did a bunch of searching last night and I see what you are talking about and understand what needs to be done on the rear portion!

                              I have a nice chunk of Balsa arriving tomorrow that should be enough to make both of the rear pieces and the nose.

                              Comment

                              Working...