-
-
I have been plugging away! Borrowed a scroll saw (never used one before) and attempted to cut my first piece of sponson sheeting. What a disaster!! :)
I headed back down to my workshop made a better template and took another shot at it. Much much better and I am very happy with how it turned out. After some sanding to shape it fits damn near perfect. Now to glue it on...
sponson.jpg
sponson_Sheet1.jpgComment
-
The fit was actually really good, kind of proud of how it turned out considering I have zero woodworking experience, zero boat building and zero model building experience :)
I have been using Tightbond wood glue. After combing threads here it seemed like a good solution. It's actually a hard choice (like a lot of this stuff) as everyone has a different POV on what works and multiple things do work well.
thumbnail_IMG_6991.jpg
Next on my list is the final piece of sheeting on the one side. How does the final sheet on a sponson join up with the framing so its in the correct position to meet up with the top sheeting?Comment
-
Great job, looks really really neat and coming together really well. Once you sand it down and use some light filler it will really come together.
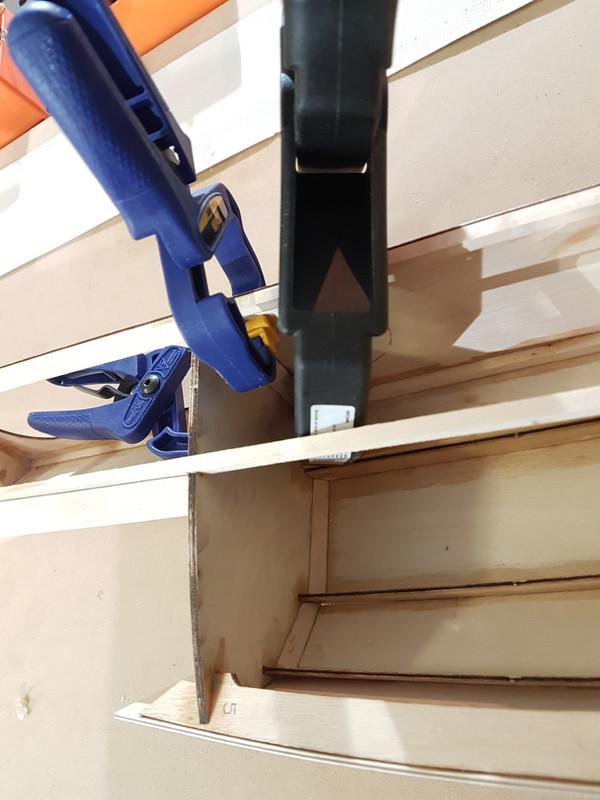
I know what you mean about different POV and no hard and fast rules - having exactly the same challenge. Its what you get for getting involved in a niche hobby : ). For the final piece of the sheeting - i spent ages trying to work out the best way of doing this - and i dont know if my idea is the best, but i ended up sanding down the edge of the frame to be in line with the shape of the sponson. I then glued the sheet to this frame. I figured the larger gluing surface would provide a stronger joint. Here are some photos of what i mean:
Comment
-
Thanks!!
Ok, your second photo shows exactly what I had been thinking in my mind. I think it will work out just find. Unfortunately I am out of town for a few days and won't be able to cut out any more skins until I get back.Comment
-
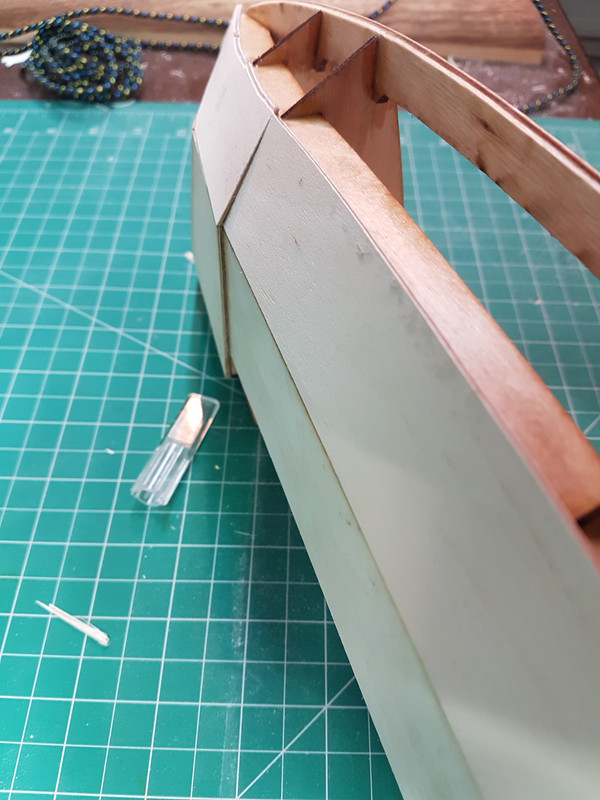
Glued in my second piece and not super exited about how it fits towards the front of the sponson. I may remove it and try again since it doesnt butt up as nicely as the rear portion. If its not a big deal maybe I can just fix that spot with filler.
27EAD472-796D-40C2-94B7-F1ABADEDB503.jpgComment
-
Work continues! So far it seems like it takes a few hours just cut and shape one piece of sponson sheeting. This one turned out just ok. There is a 1mm gap at the front but not going to worry about it as I'll just fill it. Otherwise the rest of it came out beautifully. One more to go, which I will start on tonight.
thumbnail_IMG_7017.jpgComment
-
Looks great - it was taking me an hour or so per sheet as well, it does get faster though as you go. I wouldnt worry about the gap at the front, a little bit of filler goes a long way. Just threw up photos of my section of the build up on the other tread - ill put up the final ones this afternoon as well so you have a reference if you like.Last edited by nocebo; 07-14-2021, 08:57 PM.Comment
-
Finished sheeting the sponsons today! Looking pretty good after a little sanding.
A28F2848-7EE1-4986-8FB1-ECDB075F2A24.jpg
As for next moves I am a little unclear what to do. Here is where things are now. I still haven’t figured out the canard or rear wing. Seems like both of those need to be figured out before I start epoxying the inside.
0C0B25D3-FCB2-4C7B-AA39-55C16DB983E7.jpg
Also need to work out the nose and it seems like I need some reinforcements down the center.Comment
-
Where do I go next??
I got some Icing delivered to start filling/smoothing some areas on the hull. Hoping to get some advice on what construction needs to happen down the center. Right now it seems a little flimsy and mind is a little boggled when it comes to building the hatches and mounting the fiberglass cowlings and shaping the nose.
I did some emailing and it looks like there aren't any tail wing support kits available and there seems to be long lead times on some of the other fiberglass bits I need (rear wing, canard, turbine tray).Comment
-
Looks great!, sponsons came out really good.
Cant help on the center unfortunately, im still waiting on the cowling and other fiberglass parts - like you said, long lead times. Maybe start fitting rudder, struts etc while you are waiting on the parts? Thats what I have been up to.Comment
-
Thanks! I do have the hardware but having trouble finding what kind of measurements I need to take for mounting the rudder and strut.
Do you have any threads that you have found helpful in this regard?
I may try and cut out the skins for the sponsons. They all have a nice curve to them, do you know how that radius is set? Or is more of an artistic thing?Comment
-
Best thread i have found is this one:
Doesnt have the specific measurements you are after but is basically the same hull. I have just finished mounting up the rudder and I cut the slot for strut last night - ill post it up so you can compare notes. From memory i mounted the strut 51.5mm from the rear of the transom - this allows enough room for the drive dog and a bit of extension of the cable to ensure the prop extends past the transom.
I ended up mounting my rudder on the left hand side rather than the right, from what I have reading there are pros and cons to mounting on the left or right.
I am guessing the radius is hand cut, following pictures of the original boat as closely as possible. I have not seen any plans or formulas for cutting those curves.Comment
-
That is a great thread!!! Give me a little anxiety to see that skill level.
I looks like his rudder is just lined up with the internal framing. Some great pictures and ideas for the hatch overs and cowl mounting. I was curious about his use of carbon veil and found this product locally that is way more cost effective and probably will work just as well: https://www.tapplastics.com/product/...nytex_x_mat/91 the description sure fits the bill.
I think I will do some filling and maybe take a stab at that knytex cloth in the sponsons, mount the rudder and find a home for the servo. I tried a little mothers polish on the rudder and I think I will probably end polishing the visual external hardware.Comment
 Tweet
Tweet

Comment