Replaced the 4mm contacts on the motor leads with my standard 5.5mm contacts from here on OSE.com. I actually wanted to just leave the stock contacts to test their durability in real racing use, but I needed the ESC to be able to be used with other motors as well (for testing), so everyting needed to be compatible.
I also swapped out the factory battery connecter with 6mm contacts, which is what all of my batteries have. If I ever get to a place where I'm starting over on everything, I'd put 5.5's on the batteries too. Longer grip length makes up for the smaller diameter, and it seems that all of my racing buddies use 5.5's, so swapping/borrowing cells is a pain.
Once this was done, I put velcro on the bottom of the ESC and ESC on-off switch, and placed them in the boat.
Now, some of you may be tempted to think "why didn't he build a solid mount" for that ESC, since it has mounting tabs. I thought about it, but honestly, velcro works fine, and is WAY more versitle. At a race, you have to be able to EASILY swap parts out, or even just simply do normal maintenance. Unbolting, unscrewing, etc' is not efficiant, and makes you miss heats.
With a test motor in place, everything gets connected up as shown. I lined up the motor cooler to allow the cooling lines to pass through the existing holes in the motor-mount sides. ESC is air-cooled (fan), so water only goes to the motor. I will use some data recording to monitor ESC temps and see if this arrangement would be acceptable for racing/bashing. Stay tuned on that.
The final addition to the hull is this trick little machined tow-hook that Steven (www.offshoreelectrics.com) provides. Looks trick, and should greatly aid in the tennis-ball recovery, if necessary! Great when out testing alone.
To install, I located the holes and drilled some pilots with a VERY small drill bit. I wiped down the bottom of the piece and applied a dab of epoxy on there, then placed on the bow and screwed the piece in place. The small screws grip the fiberglass fine if you are VERY careful getting them started. The epoxy should help to secure it in place.
With that done, I applied some decals to fully represent Team Horizon, and she's ready for the lake.
Looks great, and I can't wait to get her on the water for some tuning.
OK, I lied... I'm NOT quite finished yet... I decided to do one more change to her before she hits the lake.
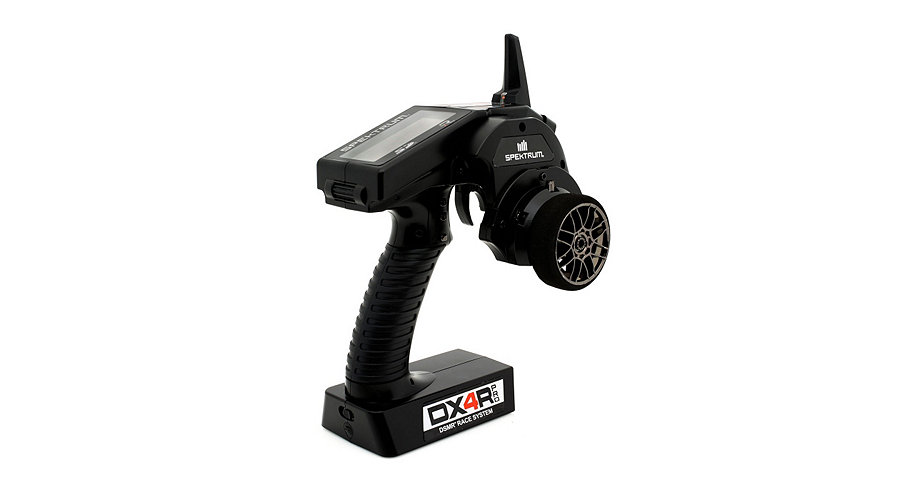
It's now officially announced that Spektrum DX4R-Pro Transmitters are on the way. I have been testing one for awhile now for the Spektrum test team, and I'm going to install it in this boat to test the new RX in a boat.
I have already tested the radio with the MR3000 and MR200 and they work great. I haven't put the new SR2000 DSMR Micro in a boat yet, however, and I will here. It has the "extra range and signal security of frequency-agile DSMR™ technology".
OH, I also forgot to describe the ESC setup procedure. It's VERY simple...
I always bind my RXs using a seperate RX pack on the bench before installing in the boat. That way it doesn't rely on the BEC from an unsetup ESC to get the process started.
Once the RX was installed and everything was plugged in, the ESC setup works like this:
1) Power up your TX
2) Connect betteries to ESC
3) While holding down the setup button on the ESC, turn on ESC.
4) Release setup button as soon as the ESC RED LEDs begin to flash.
5) With TX in neutral, press setup button once. You'll see one green flash.
6) With TX pulled to full throttle, press the setup button once. You'll see two green flashes.
7) With TX pushed into full reverse, press the setup button once. YOu'll see three green flashes.
The ESC will then flash and beep a couple of times, and you are set to go. You only have to do this once, unless you change RX's, etc...
On the bench, this ESC is SMOOOTH!! Fan is pretty powerful and moves a lot of air. Should be interesting to see how this all works!
Darin E. Jordan - Renton, WA "Self-proclaimed skill-less leader in the hobby."
You stated: You have to inspect the flex cable and bushing fit very carefully. Sometimes they are great, other times they are sloppy, or the cable isn't straight in the stub-shaft, etc. Use your best judgement to figure out where to go from here.
Anyway, my flex cable - bushing fit is very sloppy. Should I try drilling out the strut so a Teflon bushing will fit, or just order a new strut? Any other ideas?
Darin, I just wanted to say thank you for the crucial modification info on the IMP31V2. This thread alone inspired my purchase decision of the IM31V2. I have made only few modifications as of yet however, I am currently running this boat in P-Limited class with the HOTMBC in district 7. Mods are 5.5mm bullets, Prather S225 and 6S with Venom 20c 5000mah batteries (eww). Right now with the ballast added to the aft/stern area of the interior I am GPS clocking at 55.1MPH in the SAW. I am quite competitive in this setup in my class but it's limited to 4s. Any ideas or tips on keeping this relative speed in 4s config? Thanks.
Got the bottom finished up and put on a coat of primer, then a few coats of flat white enamal.
Now that that is dry, I can start assembling the hull again.
For the trim tabs, I've never really seen the need to use aftermarket on these boats, though I did design the mounting to be a direct bolt-on replacement for the Speedmaster 1.5" tabs. :)
After talking with Greg Schweers about tabs a bit ago, I decide to see if the boat would settle into the turns a little better if I used shorter trim-tabs. They are 1.5" stock. I trimmed these down to 1".
Also, I'm going to be using a set of OSE IM31 replacement turn-fins. I designed these and have tested them extensively. They turn the IM31 into a whole new boat when it comes to turning in race water.
When mounting the fins, it's important that they are parallel to the keel, and that the bottoms are mounted parallel to the bottom of the boat as well. I used a 1-2-3 block against the transom to get the mounting brackets correctly aligned, and then a long straight edge along the bottom of the fin itself to make sure that was correctly aligned. Once there, simply bolt everything down snug.
Darin,
Can you explain to me how the Square fin helps the hull in turns? I have a set of the curved turn fins mounted on my Shockwave 26 mono hull. That boat has the stock plastic turn fin, which is tapered and I believe deep enough, but the hull has a tendency to skip when making turns. Was wondering if I fabricated aluminum fins similar to yours if it would help.
Ken
NEVER SATISFIED RACING Fine Design 32 V-Hull 4082+6s
Can you explain to me how the Square fin helps the hull in turns? I have a set of the curved turn fins mounted on my Shockwave 26 mono hull. That boat has the stock plastic turn fin, which is tapered and I believe deep enough, but the hull has a tendency to skip when making turns. Was wondering if I fabricated aluminum fins similar to yours if it would help.
Ken
More fin in the water...
Darin E. Jordan - Renton, WA "Self-proclaimed skill-less leader in the hobby."
 Tweet
Tweet


Comment