-
-
Shawn, have you had any trouble with hull cracking at or around the point of attachment on smaller internal vertical braces, like the one you're using under the front deck of this build? I ask because the amount of stiffness the stringers added to my Genesis has me sold on the practice, but other builders have warned me about small contact area vertical bracing due to the concentrated pressure they can apply to the hull during after a good smack.Vac-U-Tug Jr (13mph)Comment
-
I fit them very carefully and let the bond hold them. I never wedge them in! Using this practise I have not had any issues. I think if you crammed the pieces in it would put pressure on the hull and give spider cracks, I would imagine anyway. And I’ve done a number of them now, it started with Little Miss G. The Geico twin. Oh nope, one befor that,my Shocker, lolComment
-
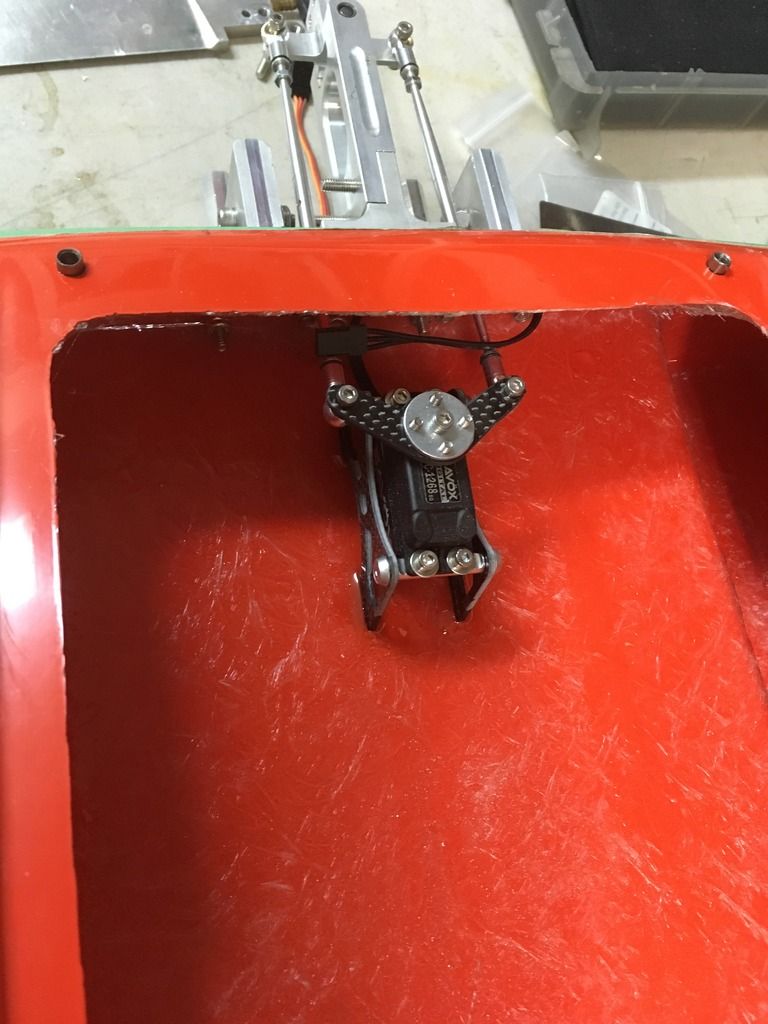
I figured I’d show the servo mount and how I like to neatly adhere them. This I picked up from Tony(Properchopper) a number of years back.
Thanks Tony.
I have been having small issues getting good bonds on the AC hulls. Just a bit of extra prep needed. I sand it well and for good measure I have been putting scratches in the hull with my Exacto blade to give the epoxy a bite.
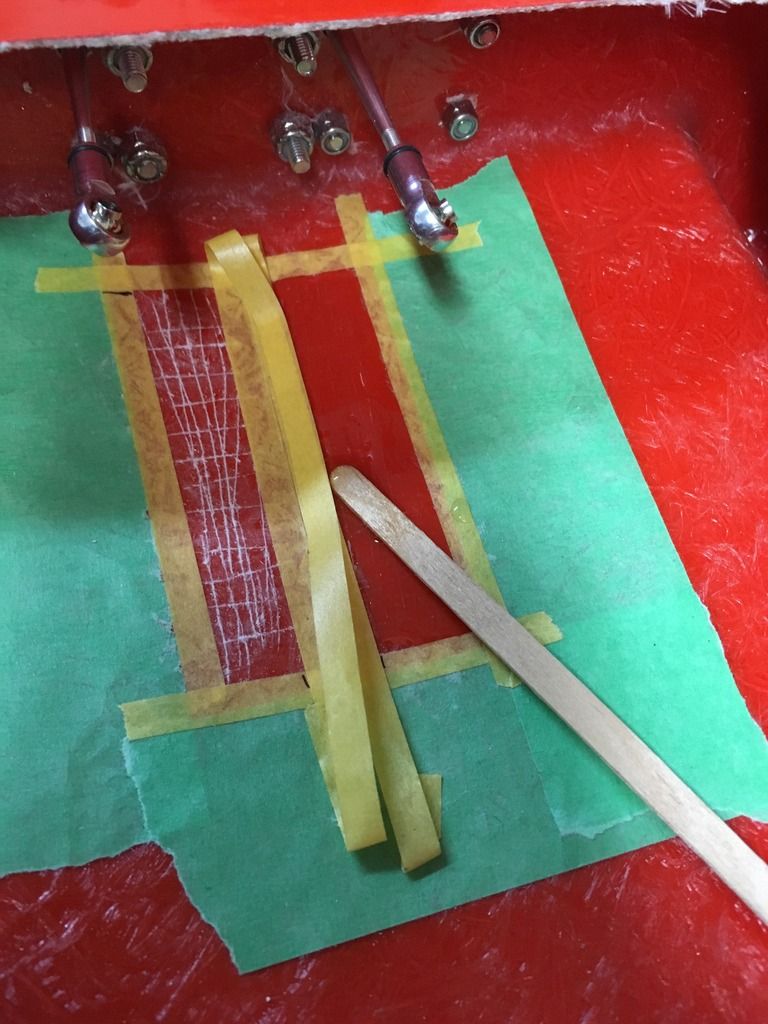
I lay out the tape and do that in a way that I can pull it off easy once the epoxy is starting to harden some. Prep the servo mount by sanding where the epoxy will be then apply epoxy to the mount and to the hull floor and place the mount on let the epoxy do its thing. A few hours later I pull the tape and then let it harden overnight.

And wala, complete:
Comment
-
PrettyComment
-
Where do you get those sexy rod ends?Comment
-
Can also get rod ends from RC4WD.Comment
-
Thanks, missed that.Comment
-
I managed a pretty nice hatch install, it slips on at the front and put bolts at the rear. I doubt I’ll need anything but hatch tape in the middle as this hatch is hefty.
I do a layer of FG cloth between the Tnut and hull then one over the works of it. I actually drilled holes in the base of it and threaded some cloth thru that as well.
Comment
-
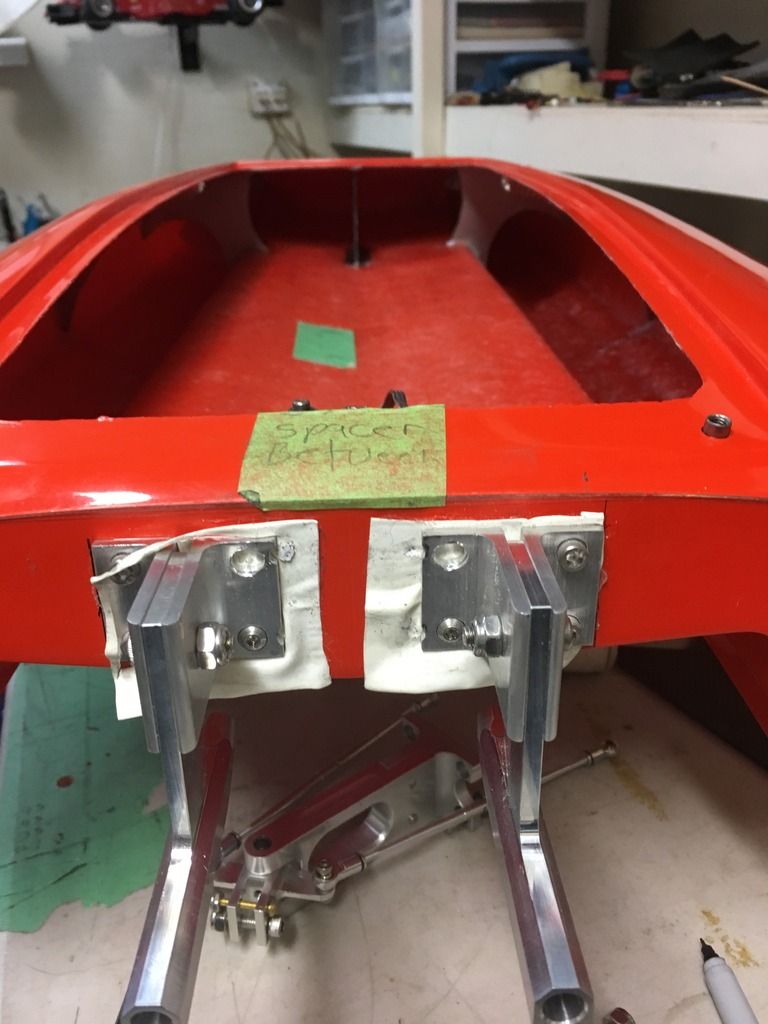
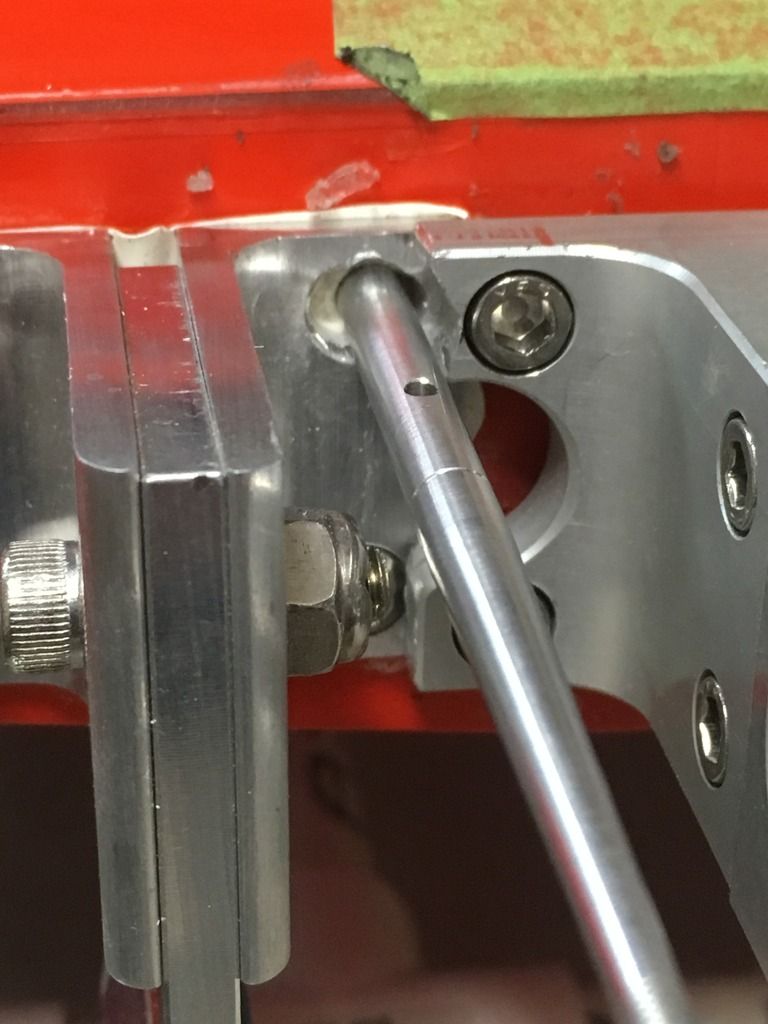
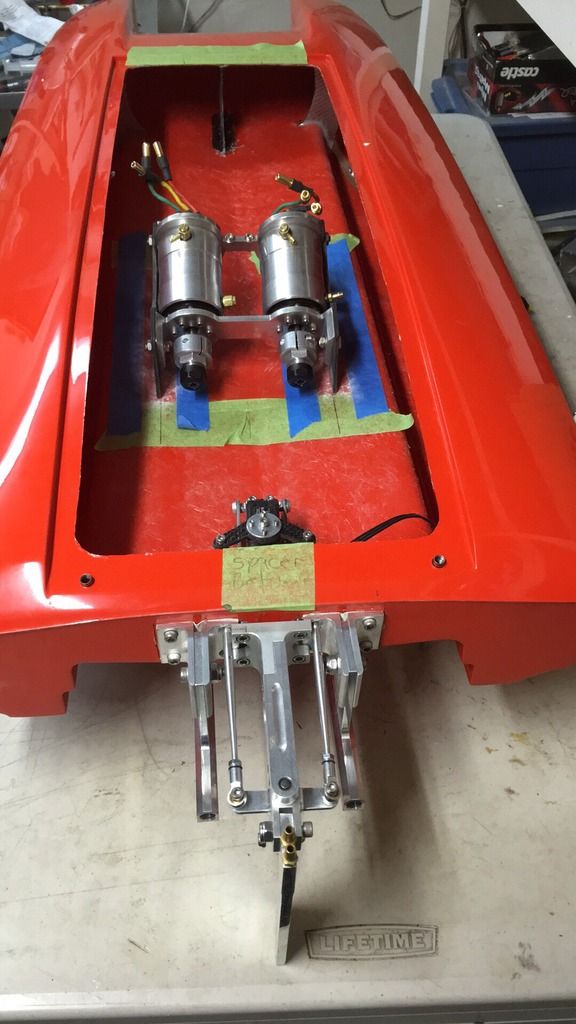
Allright! It’s back ON!!! I got my mount from Dave over at HRC
Turns out the motor Center to Center was 3mm wider than I set my struts at. Oops somewhere but oh well. So I widened the holes for strut brackets a tad and remounted it all. But I decided to put a gasket in between ala party balloons, haha. Now this also works for my seal on the pushraods. For how long IDK but I liked the idea!
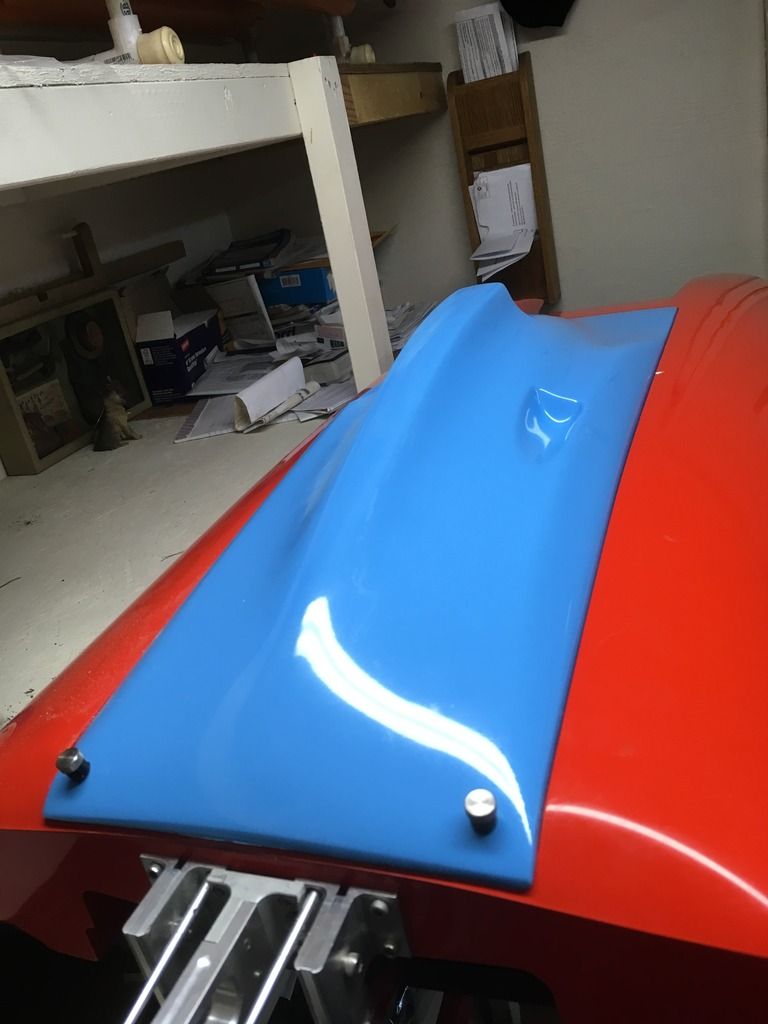
And I’ve decided to do away with the blue lid by painting it Black/Silver I think. Thinking a stripe right through the boat.Comment
-
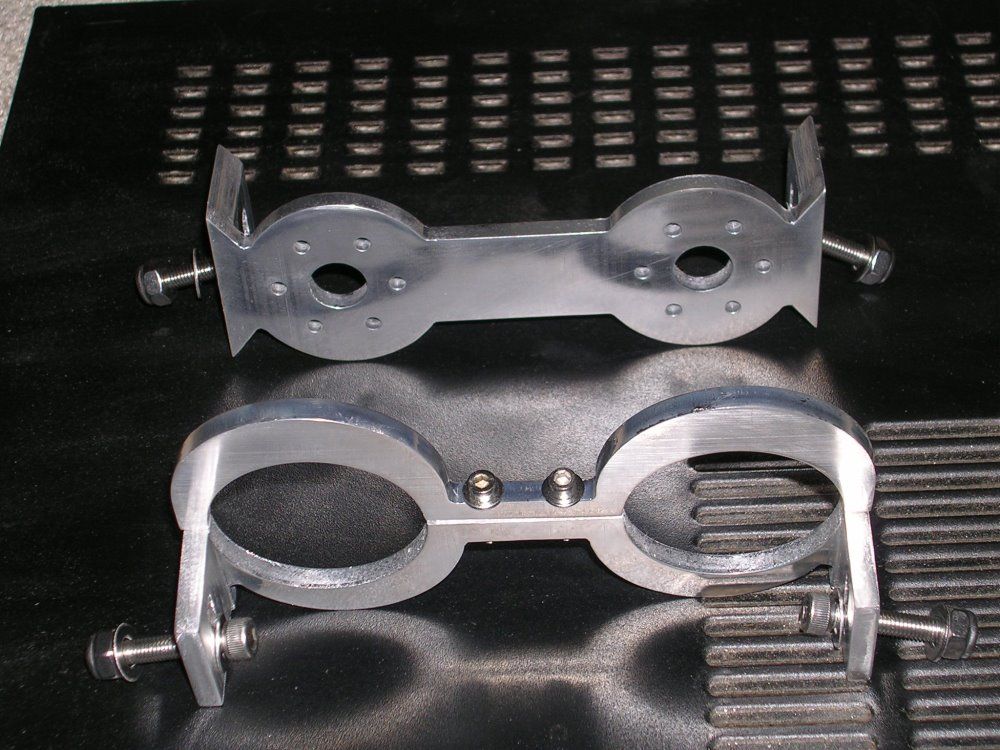
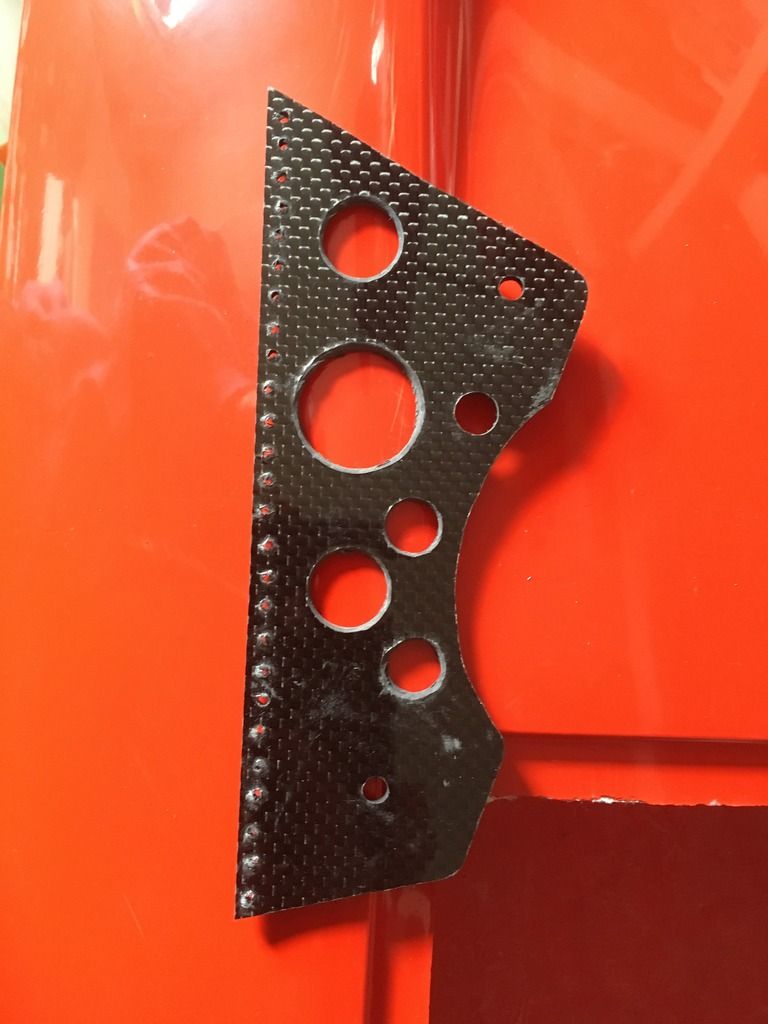
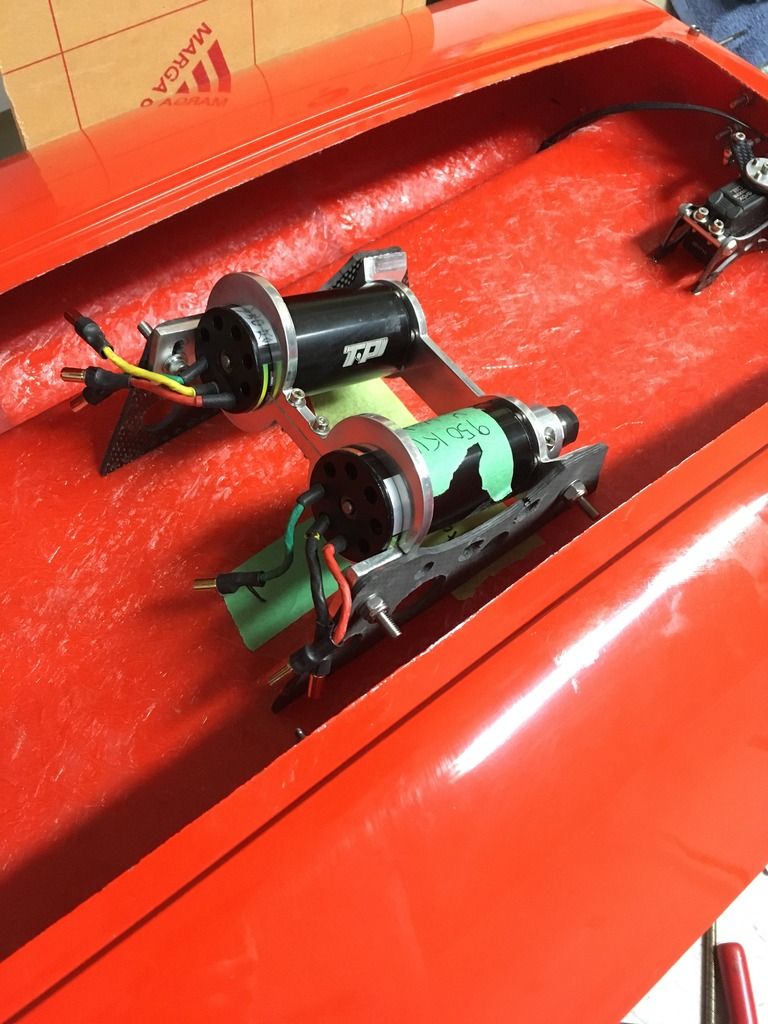
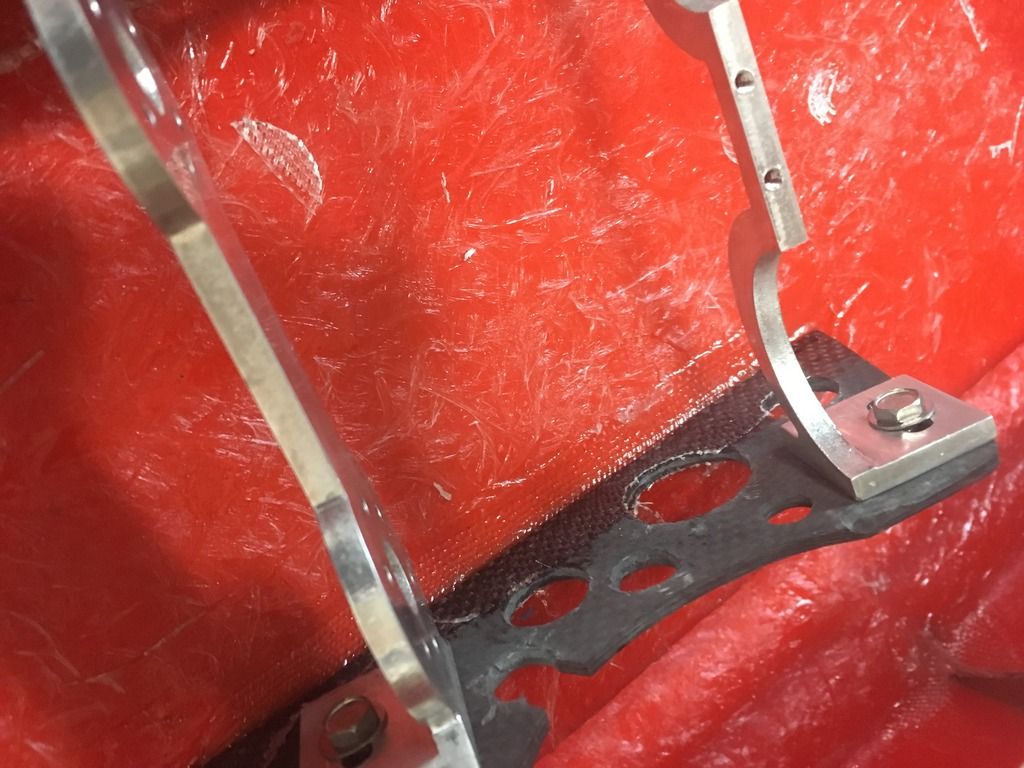
I made side rails for the mounts from 1/8” CF
Bolted it together with stainless bolts as the collets interfered with Hex head cap screws
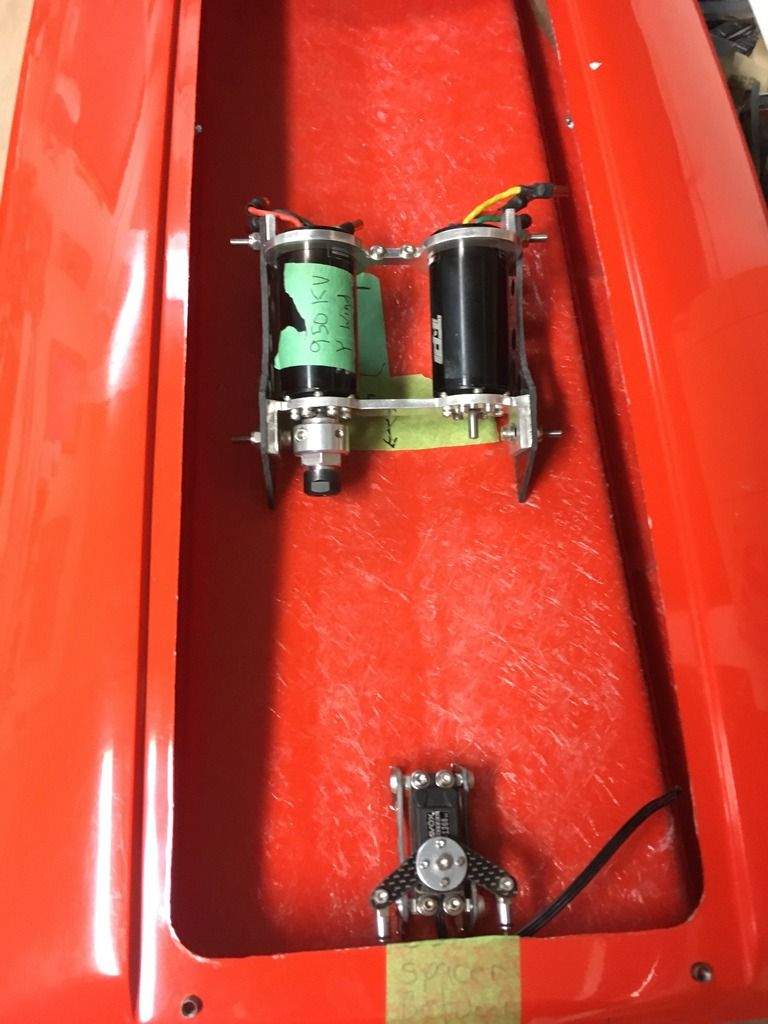
Then all aligned and tacked in then FG’d in
Comment

 Tweet
Tweet


Comment