Cheetah rebuild

Collapse
X
 
  • Time
  • Show
Clear All
new posts
  • larryrose11
    Senior Member
    • Jun 2010
    • 757

    #1

    Cheetah rebuild

    Hello All,
    I was not quite happy with the way mu chetah turned out, So Im rebuilding it!!!

    Here are the basics:

    - FG cheetah huill (Thanks again Basetronics!!)
    - Neu 1521, 1Y (1577 KV)
    _ T180 controller
    - TFL and Speedmaster hardware
    - 6S, 2P, 5000mAh NanoTech, 65C

    The upgrades:
    - custom Battery sled-tray system,
    - custom Servo mount
    - custom ESC cover
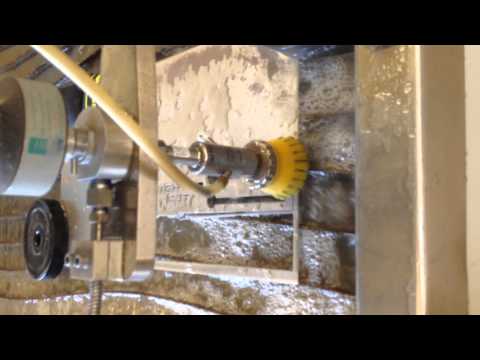
    - CNC graphics on whatever I can.
    - 2 part foam flotation in the front.
    - hydro-dip the exterior.
    Going to be fun!!!

    Also, here is my origional build thread
    http://forums.offshoreelectrics.com/...at!&highlight=
    Last edited by larryrose11; 05-22-2014, 06:04 AM.
    Cheetah, Super Rio, (Mod) Starship (Mod and sold),
  • Luck as a Constant
    Make Total Destroy
    • Mar 2014
    • 1952

    #2
    Can you video the hydro dip? Where are you getting yours?


    Sent from my iPhone using Tapatalk
    There's a hole at the center of earth where the rest of the world sinks but i stand still...

    Comment

    • flraptor07
      Fast Electric Addict!
      • Aug 2013
      • 2451

      #3
      If you want to get the most out of this hull you'll want to do the ride pad mod that Tiqueman came up with, Here's mine with Scott's hull mod https://www.youtube.com/watch?v=CWlCxsirqQY That was 6 laps in 1min. 38sec.

      Comment

      • Scott M
        Senior Member
        • May 2013
        • 426

        #4
        Can you post pics of the mod?

        Comment

        • larryrose11
          Senior Member
          • Jun 2010
          • 757

          #5
          I did the Ride pad mod already to the hull in original build thread.
          http://forums.offshoreelectrics.com/...636#post518636
          Cheetah, Super Rio, (Mod) Starship (Mod and sold),

          Comment

          • larryrose11
            Senior Member
            • Jun 2010
            • 757

            #6
            Add so it begins
            I was not happy with how smooth the CF inlay was in the sponson area, and I wanted to move the motor back a bit to have more room for the ESC.
            Further, I wanted to use some fancy-ass deco weave CF cloth so Im going to sand the hell out of the interior.
            Here is where it started


            I did some CF over the stuffing tube hole, and water exits


            How to smooth out the sponson area.....
            I tried using a dremel, but I could not get it nearly flat enough for my liking.
            So....I invented a new tool attachment for my Multi tool. Holey hell, does it work great. I I think Ill patent and sell them!!
            It is an extender for the sander foot for a multi tool, so you can reach into tight areas. It attach to the multi tool in the same way as the other parts, so it is not permanent at all. Basically, I welded some nuts on to the adapters I found, and used some threaded tube as the spacer.
            Cheetah, Super Rio, (Mod) Starship (Mod and sold),

            Comment

            • larryrose11
              Senior Member
              • Jun 2010
              • 757

              #7
              So.... I had this idea for a stuffing tube holder....
              So thought I would try to make one, instead of using just glue.
              Im going to use a 0.87 flex with teflon liner, and that requires a 9/32 tube. I would like it to be removable, so the stuffing tube holder will have a 11/32 brass tube mounted in it, and will be sticking out the bottom of the hull to hole the 9/32 tube.
              I then carefully measures the motor mount angle to make sure everything is perfect, and made a jig out of ply wood to hold the aluminum stock at the correct angle.


              Cheetah, Super Rio, (Mod) Starship (Mod and sold),

              Comment

              • flraptor07
                Fast Electric Addict!
                • Aug 2013
                • 2451

                #8
                Nice job, looks like it's gonna work great!

                Comment

                • larryrose11
                  Senior Member
                  • Jun 2010
                  • 757

                  #9
                  Servo Mount.
                  I have seen a lot of mounts out of carbon plate on here, so I taught I would try something different.
                  I saw a aluminum project box that for some reason sparked my interest. Something like this:
                  1590a_ib.jpg

                  With a bit of hand milling, I turned it into this:

                  Cheetah, Super Rio, (Mod) Starship (Mod and sold),

                  Comment

                  • larryrose11
                    Senior Member
                    • Jun 2010
                    • 757

                    #10
                    With a bit of sanding, and buffing, I taught myself how to polish aluminum.
                    Here is how it starts.
                    1. Sand off the Aluminum anodizing and sand the scratches out of the aluminum with 300 grit.
                    2. Follow with a wet sand of 400 grit.


                    3. Off to the buffing wheel. I have a drill attachment type. Progressing through 3 different buffing compounds, till it is a mirror
                    Here are some of the interior parts: Motor mount end plate and ring, stuffing tube older, an servo mount. The additional plate in the background is for other stuff.
                    Cheetah, Super Rio, (Mod) Starship (Mod and sold),

                    Comment

                    • larryrose11
                      Senior Member
                      • Jun 2010
                      • 757

                      #11
                      Translucent powder coat!!
                      Wow, I found out that people nor make translucent powder coat!! It is designed to go over polished metals.
                      I bought some Starburst Orange copper, and headed over to TechShop Detroit.
                      You can tell in these pics, but in the sunlight it sparkles, like a metallic paint. I really like this stuff!!
                      The strange x pattern in the plate is actually a reflection from the steel joists in the ceiling.


                      Cheetah, Super Rio, (Mod) Starship (Mod and sold),

                      Comment

                      • larryrose11
                        Senior Member
                        • Jun 2010
                        • 757

                        #12
                        I have some new skilz!
                        I can Waterjet!!
                        This is a test of a battery sled design I made.
                        I like the results enough that this thin aluminum plate will end up with the same polish and powder coat, glue it to CF plate as structure.


                        Cheetah, Super Rio, (Mod) Starship (Mod and sold),

                        Comment

                        • larryrose11
                          Senior Member
                          • Jun 2010
                          • 757

                          #13
                          I flippin LOVE TechShop Detroit!!

                          I used the water jet for some more parts.
                          A FighterCat logo out of Aluminum,
                          Transom Plate out of Aluminum
                          Battery Trays out of Carbon Fiber
                          I then polished the aluminum parts, and gave them the powdercoat.
                          The powder I have been using is Starbright Copper Orange. I flipping love this stuff/


                          Anything worth doing is worth over doing, right?
                          I know this will add weight, but its a cheetah for godsakes. Im not running SAW, where every gram matters.
                          Last edited by larryrose11; 05-24-2014, 07:23 PM.
                          Cheetah, Super Rio, (Mod) Starship (Mod and sold),

                          Comment

                          • larryrose11
                            Senior Member
                            • Jun 2010
                            • 757

                            #14
                            As I said, anything worth doing is worth overdoing.
                            To tha end, I decided to use my last few days of free Techshop best I can, more powder coating!!
                            the drive hardware I have had some scratches in it, so I ended up sandging it all with 400 grit, then wet sand with 1000.
                            Off to the buffing wheel. I used my normal 3 stages of buffing compound, got it all to a mirror finish.
                            The final products. I ended up having to file off some of the coating on the rudder hinge to make it all fit and work properly.
                            Cheetah, Super Rio, (Mod) Starship (Mod and sold),

                            Comment

                            • larryrose11
                              Senior Member
                              • Jun 2010
                              • 757

                              #15
                              On the CF Layup stuff,

                              In my experience, getting the CF as close as possible to the base material , and getting rid of extra resin makes a huge difference in the overall strength.
                              I realize that this can be quite difficult to achieve in something like a hull where the only access is through the hatch.

                              So, I am going to do an experiment. Im going to try to vacuum bag CF into a hull.
                              I have made an inner bag in the general shape of the hull, and an outer bag, and tested them to to identify any problems or leaks (this is where it has failed in the past)
                              Ill lay wetted CF cloth into the hull, put on peel ply, and breather cloth. Insert the inner bag, and put the put the whole thing into the outer bag, and seal the 2 bags together and pull a vacuum between them.
                              has anyone tried this?
                              I plan on trying it this weekend.

                              ....a few days later...
                              I finally got everything smooth enough for my liking inside the hull. You can see some of the yellow Kevlar peeking through from the OEM.


                              I had planned on using a vaccume bag process for the interior. The plan was to make an inner and outer bag.
                              Here is the inner bag being vacuum tested. (Excuse the coat hanger)


                              I cut the CF Cloth, and had it all layed out, ready to go.


                              But....Dough!!
                              Something nicked the inner bag on the inside of the hull!! I could NOT vacuum it all in. Oh well.
                              So, I just used a normal hand process to put the CF in, and it worked well. There were some minor distortions in the CF cloth, but no big deal.


                              Im not giving up on the inner / outer bag process idea. I will continue to experiment with it for Resin Infusion. I have an idea that uses MTI hose with resin infusion to make a single part hull, no joining seams, out of a upper and lower mold.
                              Cheetah, Super Rio, (Mod) Starship (Mod and sold),

                              Comment

                              Working...