Skunkworks 29 Build, Start To Finish

Collapse
X
 
  • Time
  • Show
Clear All
new posts
  • gizmo1
    Senior Member
    • Dec 2010
    • 254

    #1

    Skunkworks 29 Build, Start To Finish

    Hi Guys,

    I picked this 29 Skunkworks Cat up for a Start to Finish Build.

    This will be my 1st scratch build FE Boat, by no means is it my 1st build, i have done a few big gassers, but i got the FE bug after buying one of Mike's Woodstuff Tunnels and adding all the parts and pieces.

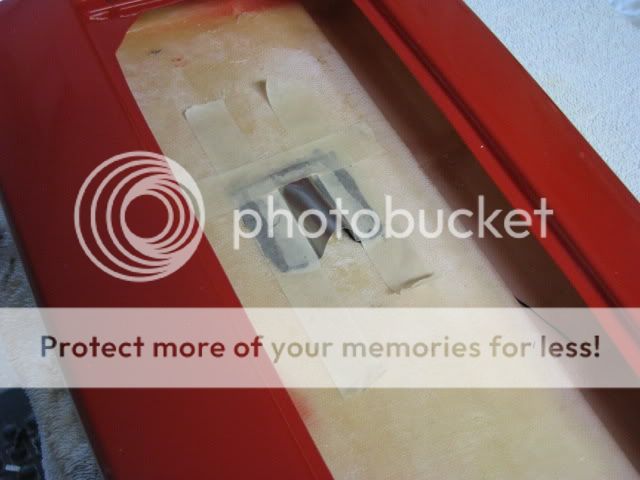
    So here we go, i received the hull, with great anticipation on weds. of this week.

    It has been a mad scramble ordering all the bits for this build and i think i have managed to buy a little from every supplier out there ..

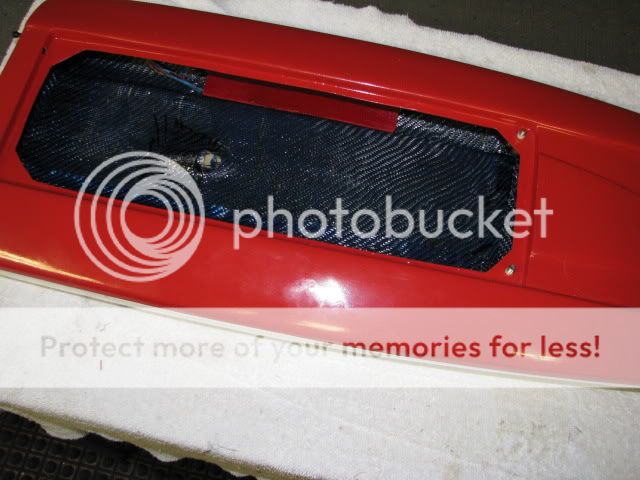
    I will be covering the entire inside of the hull with black/blue combination carbon/kevlar.
    I will also be reinforcing the transom with a custom fitted 1/8" thick carbon/kevlar covered piece of birch, may be overkill but....
    For the battery plates i will be making them out of the same, and they will be neatly tucked into each side of the sponsons, this will be a combination run boat on 4S2P and 5S2P, depending on my mood that particular day...

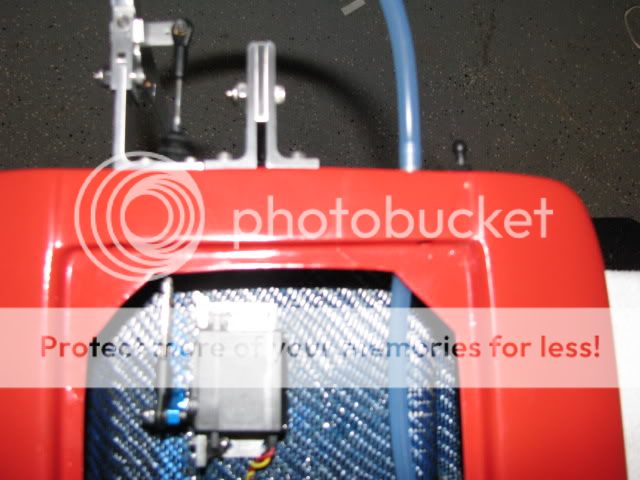
    I will be using the Etti motor mount, with side reinforcement blocks, covered in the carbon/kevlar of course.

    The ESC will have it's own carbon/kevlar custom mount as well.

    The servo mount will be a stand alone Billet mount, took a page from my big gassers there, and yes the carbon theme will continue

    The build will include all Speed Master hardware and a few of my unique touches to keep everything super clean looking through out....

    Thanks to monojeff the boat will have a 1 off wrap that he and i have come up with so she will be as sharp outside as inside..

    Well thats it for now, waiting on all the parts, its killing me....

    Here is what she looks like now, please stay tuned and any input is more than welcome.

    Thanks,
    Buddy


    JAE21 Rigger, ML Boatworks PS 295 Tunnel , TS3 FE Tunnel , H & M No Step 3 Mono , H & M Skater , Wildcat EP , Rio EP .
  • crrcboatz
    Senior Member
    • Jan 2009
    • 914

    #2
    I see it arrived ok. Will you be using the hardware included too?

    Curt

    Comment

    • gizmo1
      Senior Member
      • Dec 2010
      • 254

      #3
      Curt,
      sent a pm your way...
      JAE21 Rigger, ML Boatworks PS 295 Tunnel , TS3 FE Tunnel , H & M No Step 3 Mono , H & M Skater , Wildcat EP , Rio EP .

      Comment

      • gizmo1
        Senior Member
        • Dec 2010
        • 254

        #4
        Ok parts are showing up so time i got started.

        1st step was to get the stuffing tube tunnel made up and mounted.

        I took some scrap sheet metal i had laying around, a few cuts, and bends later i was happy with the end result.
        mixed up a little JB Weld and she is now in place and setting up.

        while the tunnel is setting up i will get to work on the receiver box , battery trays , and transom reinforcement...time to break out the table top scoll saw !!!


        JAE21 Rigger, ML Boatworks PS 295 Tunnel , TS3 FE Tunnel , H & M No Step 3 Mono , H & M Skater , Wildcat EP , Rio EP .

        Comment

        • gizmo1
          Senior Member
          • Dec 2010
          • 254

          #5
          I got the Carbon/Kevlar installed over the last couple of days. i also made and mocked up the two battery trays as well as installed the push-pull on/off switch..whoo-hoo drilled the 1st hole in the boat !!!

          As you can see i changed up the battery trays a bit, decided not waste the Carbon/Kevlar

          I receieved the Etti motor mount, Etti 5mm to .187 coupler, Leopard 4074 1774KV motor, Hughey flex cable,drive dawg, and WolfIV sent me the b/s/p M445 prop.

          I should get the SpeedMaster 21 Rudder and Strut today so o more holes to be drilled....

          More to come..
          Giz.


          JAE21 Rigger, ML Boatworks PS 295 Tunnel , TS3 FE Tunnel , H & M No Step 3 Mono , H & M Skater , Wildcat EP , Rio EP .

          Comment

          • domwilson
            Moderator
            • Apr 2007
            • 4408

            #6
            I like the first gen. Skunk works hulls. It's one of my favorite boats I have...for now. Good job on your progress. Keep us up to date.
            Government Moto:
            "Why fix it? Blame someone else for breaking it."

            Comment

            • gizmo1
              Senior Member
              • Dec 2010
              • 254

              #7
              Originally posted by domwilson
              I like the first gen. Skunk works hulls. It's one of my favorite boats I have...for now. Good job on your progress. Keep us up to date.
              Thanks, this has been a fun build...

              Ok for today's progress i got the Speed Master hardware all mounted up as well as mocked up the servo location and made up the linkage.

              Parts list as follows:

              Speed master 21 mono rudder
              Speed master round bottom strut 3/16"
              OSE rubber linkage boots
              4-40 rod for linkage and 1-4-40 soldered rod end
              4-40 ball links
              Racers Edge Billet Servo Arm
              Hitec HS-5645mg servo
              Gizmomotors Billet Servo Mount
              Aeromarine Large Bulkhead fitting ( 1 for now, there will be 2, the 2nd is on its way, i will be running dual pickups on this build )
              1/4" x 1/8" silicone water line

              Ok now for the hardware mounting location specs

              1st off you need to locate and mark the centerline of the hull, this is not an easy task on this hull due to the shape of the hull.
              i did it by flipping the hull over and laying a straight edge across the sponsons, resting against the 2nd step , from the transom forward , of the hull. then marked the measurement and transfered it to the rear in the tunnel area. once i had centerline drawn in the tunnel i marked the rear of the transom .

              I set the strut 3/16" to the right of center, Centering the strut on that 3/16" mark. for now the strut height is set flush on a flat surface @ a 0 degree angle ( this will all be set after running the boat )

              Tje rudder location is optional for your particular use, i set mine @ 1 7/8" off the center of the strut, the leading edge of the rudder.
              For sport and play set the rudder @ 1 1/2", for racing you can go up to 2" offset.
              I got these numbers for harware location from Jay Turner ( Fluid ) here on the forum. Thanks Jay !!!

              As far a servo,linkage, etc. you will just have to line all of that up per your application and build, depending of the parts you choose.

              I did go ahead and install the 1 bulkhead fitting i had laying around and ran the water line accordingly, more on that as the build progresses.

              well thats it for today...i will be busy with the final installation of the servo, receiver battery mount , and receievr box today. if my ESC shows up today i will get the COG set and work on the stuffing tube, motor mounting, and battery placement to finlize thier location.

              Thanks and i haope this helps,
              Giz.


              JAE21 Rigger, ML Boatworks PS 295 Tunnel , TS3 FE Tunnel , H & M No Step 3 Mono , H & M Skater , Wildcat EP , Rio EP .

              Comment

              • Chuck E Cheese
                Fast Electric Addict!
                • May 2008
                • 1684

                #8
                you will love this boat. i have had them before and it was the best handling cat ever!..
                my recomendation is to play with the legnth of the rudder, yours looks way to long. i used the mini speedmaster on mine and a cut 21 on another. if i remember i took about about 1 1/2 inches off it.
                see my fleet : http://forums.offshoreelectrics.com/...hp?albumid=294

                Comment

                • gizmo1
                  Senior Member
                  • Dec 2010
                  • 254

                  #9
                  Originally posted by Chuck E Cheese
                  you will love this boat. i have had them before and it was the best handling cat ever!..
                  my recomendation is to play with the legnth of the rudder, yours looks way to long. i used the mini speedmaster on mine and a cut 21 on another. if i remember i took about about 1 1/2 inches off it.
                  Thanks for the input my friend, i have the mini, brand new in a package, but i was afraid the boat would " hook " with it...so i figured go long and work from there, it does a look long to me too, hell its as big as the rudder on my 45" Mono !!!

                  Guys i welcome any, and all input, this is my 1st cat. build...done many a mono in big gassers, this FE is all brand new to me..

                  Thanks,
                  Giz.
                  JAE21 Rigger, ML Boatworks PS 295 Tunnel , TS3 FE Tunnel , H & M No Step 3 Mono , H & M Skater , Wildcat EP , Rio EP .

                  Comment

                  • Chuck E Cheese
                    Fast Electric Addict!
                    • May 2008
                    • 1684

                    #10
                    dont get me wrong, it likes a long rudder. just not that long. trim a little at a time and maybee swap out to the mini and see the results. otherwise the build looks great. im jealous as these hulls are not around any longer
                    see my fleet : http://forums.offshoreelectrics.com/...hp?albumid=294

                    Comment

                    • gizmo1
                      Senior Member
                      • Dec 2010
                      • 254

                      #11
                      Originally posted by Chuck E Cheese
                      dont get me wrong, it likes a long rudder. just not that long. trim a little at a time and maybee swap out to the mini and see the results. otherwise the build looks great. im jealous as these hulls are not around any longer
                      I will play around with it...i cant wait to get this bad boy in the water...
                      i'm with you on this hull, i looked at several cat's , read thru a ton of threads and watched a truckload of vids, and when this one came up for sale i just couldn't pass it up.

                      thanks again for the input,
                      Giz.
                      JAE21 Rigger, ML Boatworks PS 295 Tunnel , TS3 FE Tunnel , H & M No Step 3 Mono , H & M Skater , Wildcat EP , Rio EP .

                      Comment

                      • domwilson
                        Moderator
                        • Apr 2007
                        • 4408

                        #12
                        Take a look at this thread... http://forums.offshoreelectrics.com/...ght=skunkworks
                        Government Moto:
                        "Why fix it? Blame someone else for breaking it."

                        Comment

                        • gizmo1
                          Senior Member
                          • Dec 2010
                          • 254

                          #13
                          Time for an update. I reached some milestones this weekend, went from mocked up to finished in some critical areas.

                          I used a lot of JB Weld !!
                          The steering servo and mount are now permanently in place, as well as the final installation of the linkage.

                          The receiver box i ended up with was a small , water proof , box out of a Traxxas Slash, i use these in my gassers and they make for a very clean and safe installation. I did drill a hole for the antenna mount and tube, and i used velcro to attach it to the boat, the ability to remove the box is very nice when wiring the boat.
                          I also utilized a Voltwatch i had laying around, these are not necessary but very handy when using a seperate receiver battery. very in-expensive insurance, and very simple to install, plus i had the extra channel on the receiver so why not....
                          The receiver battery i chose is a Reedy 1600mah 6.0V hump pack, small and cheap...simply stuck some velcro to it and presto install is done.

                          Next up was the final install of the stuffing tube, pretty straight forward, just take your time when mocking it up and getting the bends correct keeping away from radical sharp bends. Be sure everything is lined up properly before the permanent install. i used masking tape on the underside of the hull so the JB Weld did not run all over the place.

                          Next up was the permanent install of the Etti motor mount, again pretty straight forward, but take your time make sure everything is aligned properly. I chose to use some servo tape to keep the JB Weld in check, just simply frame around the mount with the servo tape, set the mount in place and pour the JB Weld in place. Let the epoxy set up for about 2 hours , then remove the servo tape for nice clean lines. then let the epoxy set up over night with some kind of wieght pressing on the mount. As you can see in the pic, the squared of lines of the epoxy look much cleaner than just a round blob of epoxy.

                          Now before any of this can be mounted in the final position you Must have everything mocked up in the boat, all radio gear,esc,motor,batteries,hardware,prop,etc. you want to be able to move things around to het the proper COG ( center of gravity ) for your boat. once you have everything mocked up take a piece of round tubing, in my case used a scrap piece of 5/8 aluminum tubing, set it under the hull and find the balance point of the boat, mark it and then measure from the transom to that mark. i my case i have the ability to move COG by moving the batteries front to back on the battery trays i made up. i have enough adjustability built into this boat to go from 28% to 36%, 36% is way extreme but it is just where the max. ended up being with the batteries all the way forward in the trays. Once i run the boat i will post up the final percenatde for my particular boat and its set up.

                          Guys don't to hung up on COG, yes it is important ,but most of you will have the ability to alter this by moving battery packs around, or by adding some stick on lead. Now that does not meen throw everything forward or to the rear and then try to get the proper COG, use a little common sense and you will be just fine.

                          Well thats it for now, i will finish the wiring and final install of the ESC today, i received the Nuetronics 8mm Bullets saturday so i am off to do some more solering on the motor and ESC. My next post wil show the boat complete minus the graphics i have being made up for it. i will also post up the flex shaft,prop combo and a picture of the Grease i use in all my boats on the flex shafts, with the excepetion of the Woodstuff tunnel due to the putboard set up.

                          Thanks,
                          Giz.


                          JAE21 Rigger, ML Boatworks PS 295 Tunnel , TS3 FE Tunnel , H & M No Step 3 Mono , H & M Skater , Wildcat EP , Rio EP .

                          Comment

                          • gizmo1
                            Senior Member
                            • Dec 2010
                            • 254

                            #14
                            Ok i got the boat all finished up, well almost, just waiting on the graphics.

                            Got the motor installed,as well as the flex cablecut and fitted, mounted up the drive dawg and prop .
                            The T180 esc is now all soldered up with the new 8mm bullets, and mounted in place, just used the trusty velco for the mounting.
                            I got all the Aeromarine bulkhead fittins mounted in the transom, got the aeromarine 2nd water picku mounted up,and the aeromarine water outlet fittings mounted up. Ran all the water lines for the final ime too. I used some plastic wire loom cover to cover the water lines and the esc wires, just makes for a very clean look IMO. I hate a sloppy looking wire and water line install !!! sorry a bit anal there i guess.
                            The last step was to insatll the blue pool noodle flotation, installed pieces in both sponsons and dpwn both sides, she should stay afloat in a blow over...

                            The last thing i have to do is install the custom wrap from jeff, talked to him this weekend and he has the final design, just have to get them printed up ..will post up after they are installed.

                            I hope you enjoyed the build as much as i did, now on to the next one !!!

                            Giz.


                            JAE21 Rigger, ML Boatworks PS 295 Tunnel , TS3 FE Tunnel , H & M No Step 3 Mono , H & M Skater , Wildcat EP , Rio EP .

                            Comment

                            Working...