Results 1 to 12 of 12

Thread: Zipp Kits JAE 21FE v2 33" - Carbon Fiber Wrapped

  1. #1
    Join Date
    Jun 2021
    Location
    AB
    Posts
    47

    Default Zipp Kits JAE 21FE v2 33" - Carbon Fiber Wrapped

    Hello FE friends,

    I've taken a lot from this forum so I would like to try to give something back. This is not the most well documented build, nor am I an expert by any means. I stumbled though a lot of this, especially the carbon fiber work. This is my fifth boat build, first wood model build, and second time messing with carbon fiber (first time vacuum bagging). The only time I have worked with it before was putting an inlay in my DF Explorer, which turned out great functionally, but looks absolutely terrible ha ha. Tricky stuff to work with when you are inexperienced, I made many mistakes. Quickly learning though and already know I will be capable of much better work on future builds thanks to all the hard lessons learned.

    Big shout out to Sam Hallstrom ( @sammyha ) for his build videos on this hull on YouTube. I watched every video a few times, thanks a lot sir! Huge help.

    Specs
    Hull: Zipp Kits JAE 21FE v2 33"
    Motor: Leopard 4074 2.5Y 2000kv
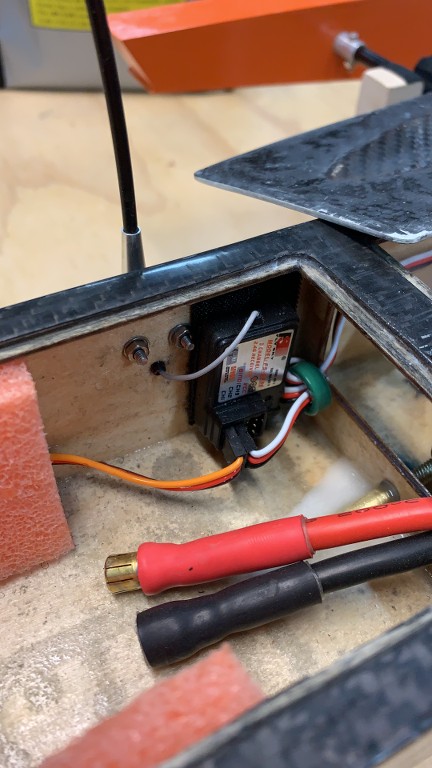
    ESC: Raider 150
    Motor Mount: Carbon Fiber Heavy Duty 40mm
    Collet: Speedmaster collet style coupler 5mm to 3/16" flex
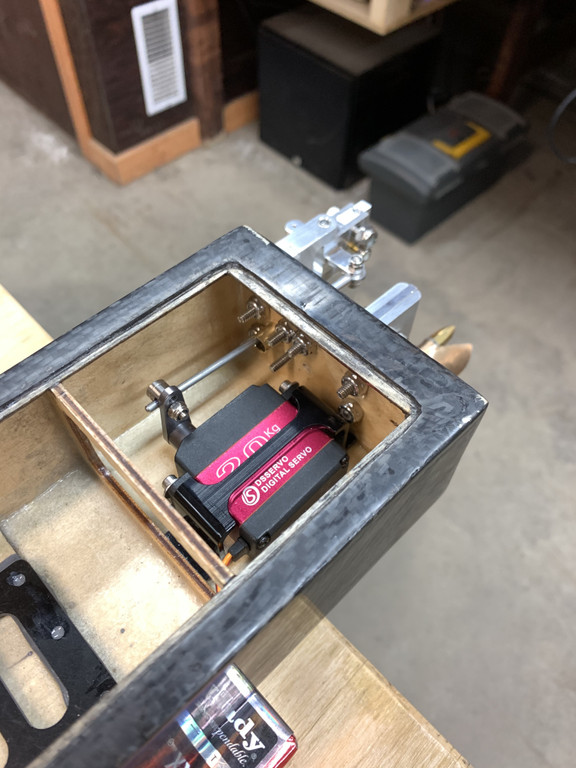
    Servo: DS 3120 20kg
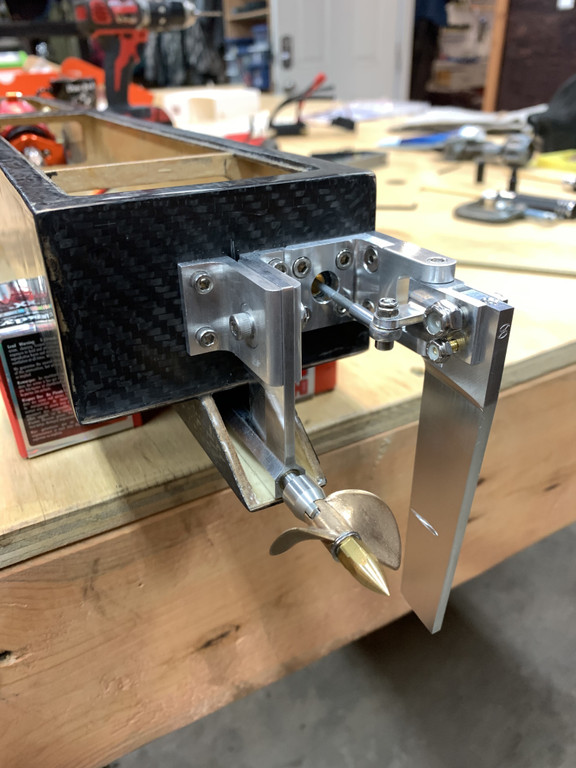
    Strut: Speedmaster 21 Hydro Flat Bottom
    Rudder: Speedmaster Small Single Pickup w/short "L" Bracket
    LiPo: 6s 6000mAh and 6s 4000mAh


    Every part purchased from OSE website aside from LiPo's
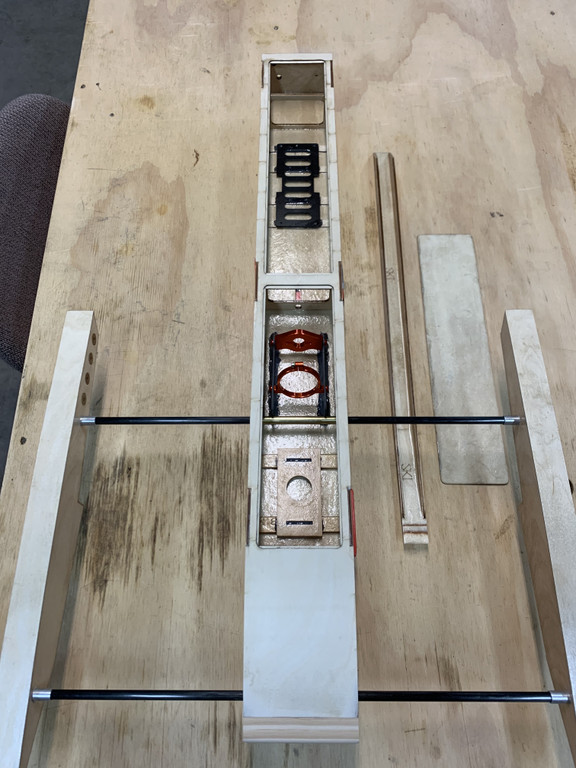
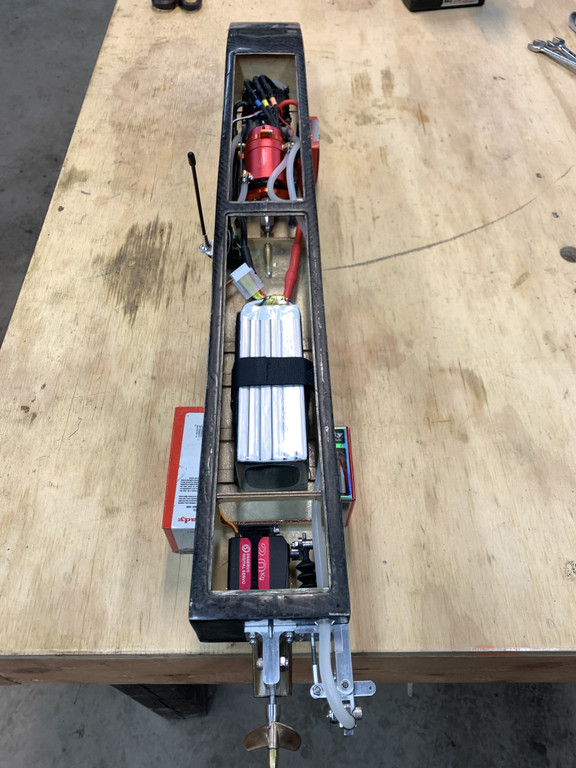
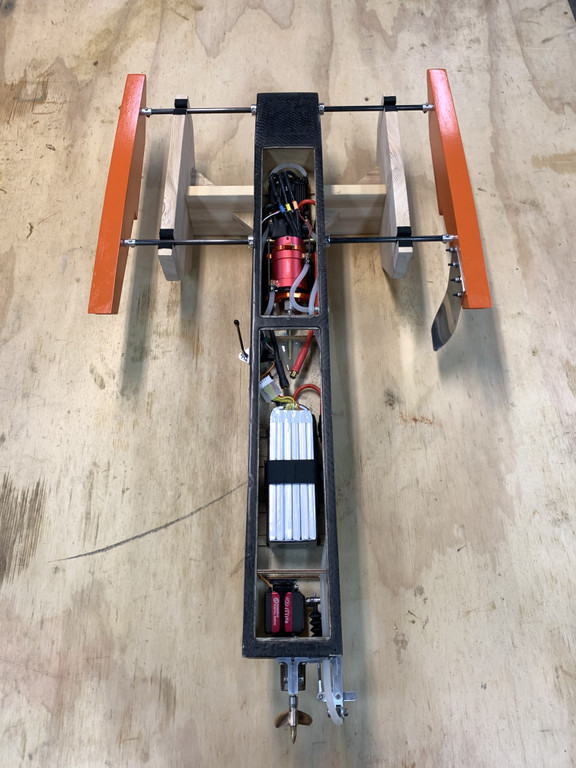
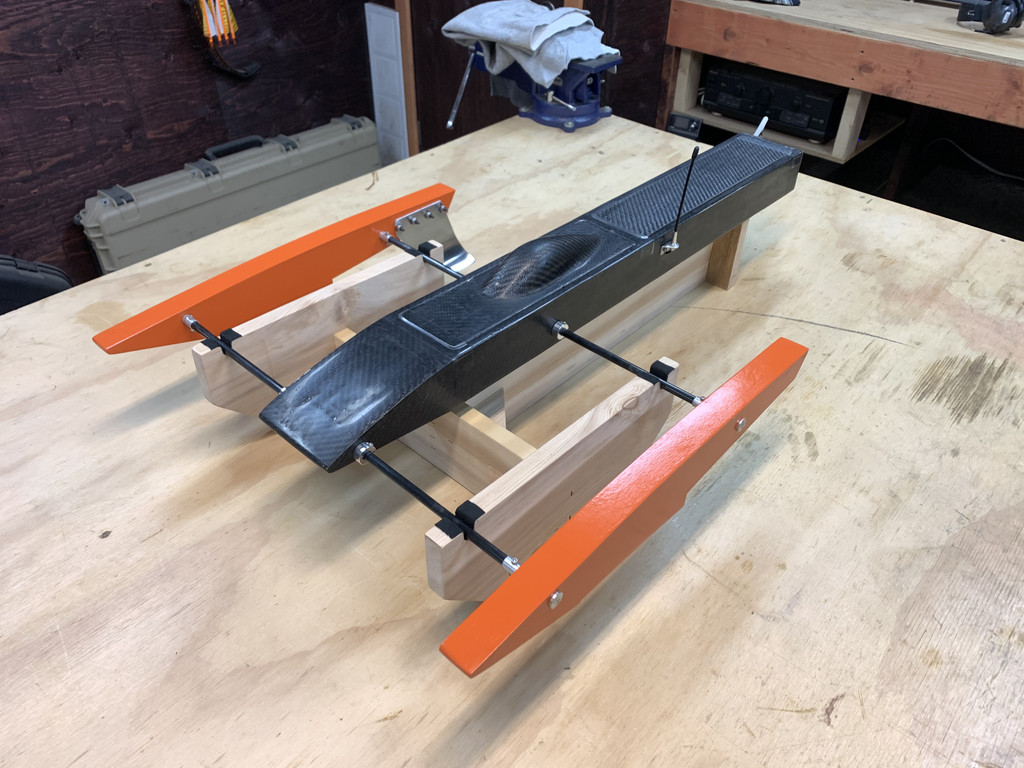
    First mock up


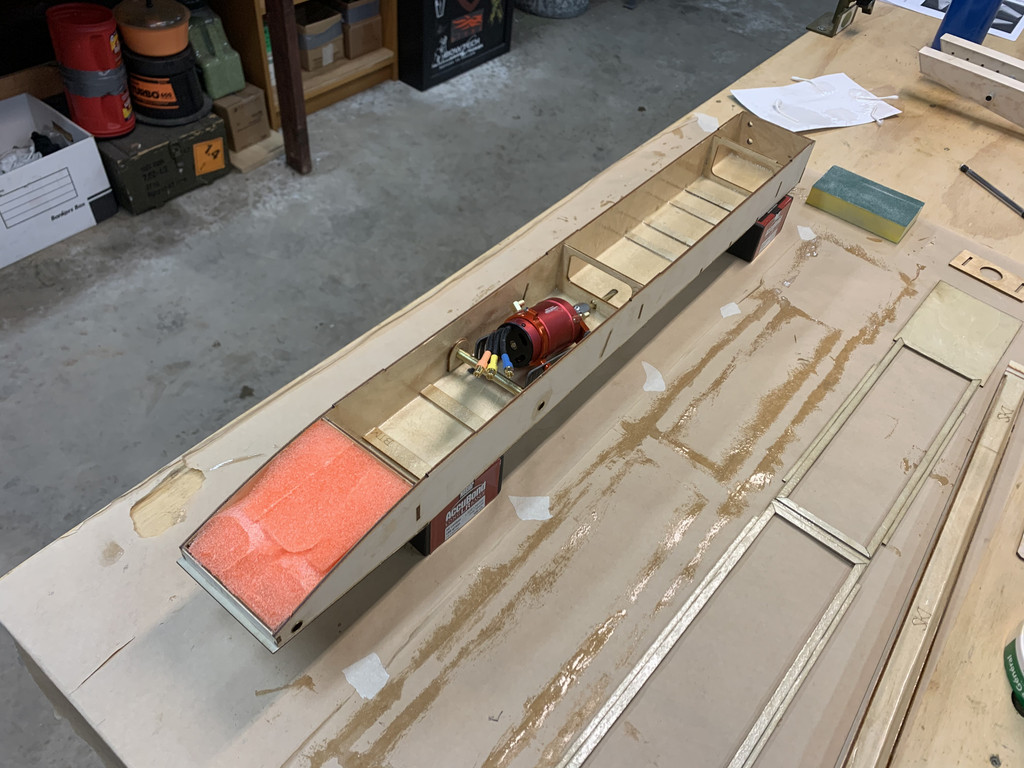
    Tub glued, and pool noodle foam cut into nose. Replaced battery tray supports with 1/8" thick pieces of ply in order to gain headroom for the big 6s 6000mAh packs. They juuust fit in this configuration.


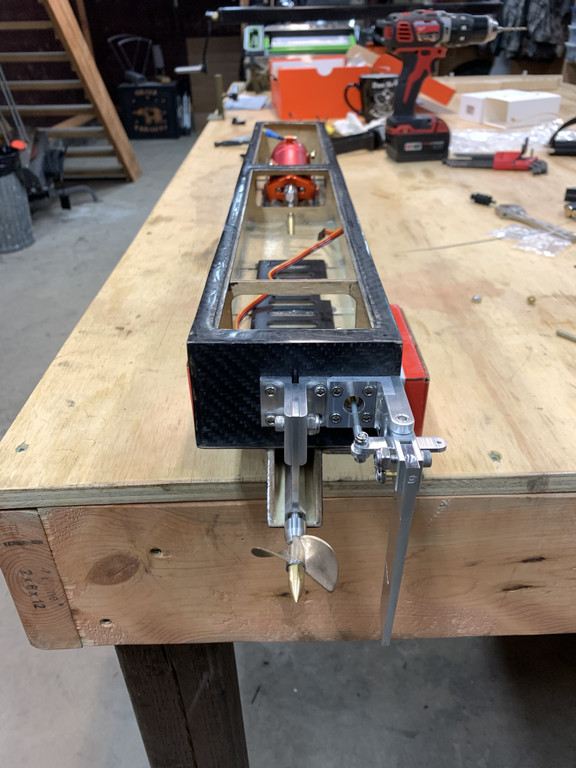
    Motor mount, battery tray and ESC tray in. Inside of tub sealed. I used the Zipp Kits battery tray for an ESC mount and an old fiberglass tray I had laying around for the LiPo


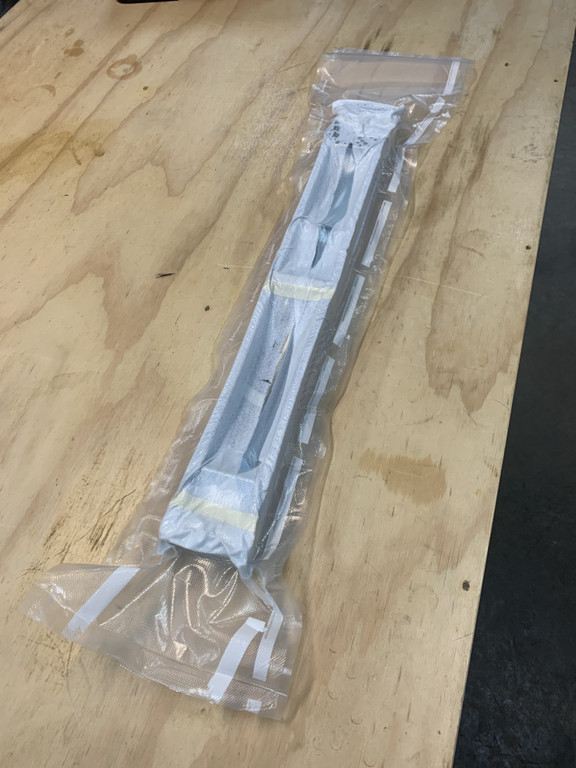
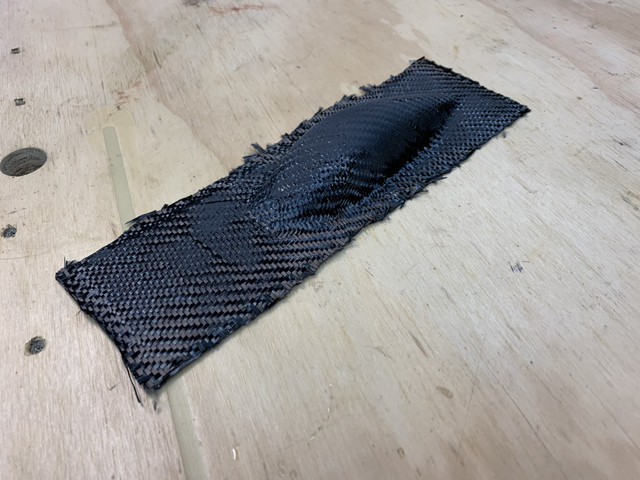
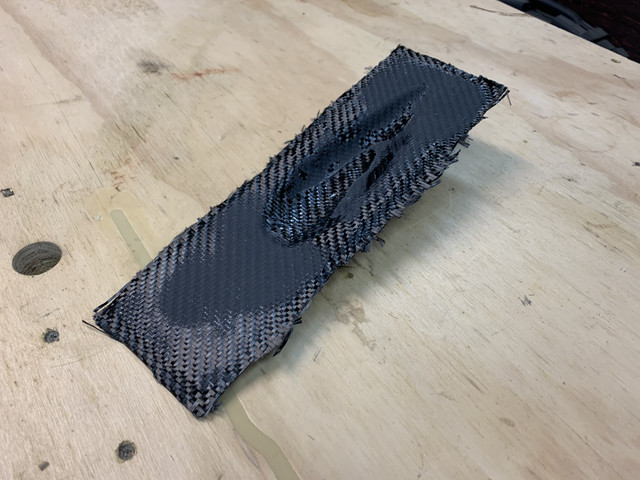
    Tub wrapped and vacuum bagged. I just used a consumer grade food saver vacuum sealer for this task. Worked very well actually. Just have to be careful that all sharp edges are softened as to not puncture bag. I used industrial grade lay up material purchased from a composite supplier near home. Order is, Carbon cloth, peel ply, perforated release film, breather material. I could go on a long time about this process, there is lots of good information online. I just watched a few videos on YouTube and went for it.


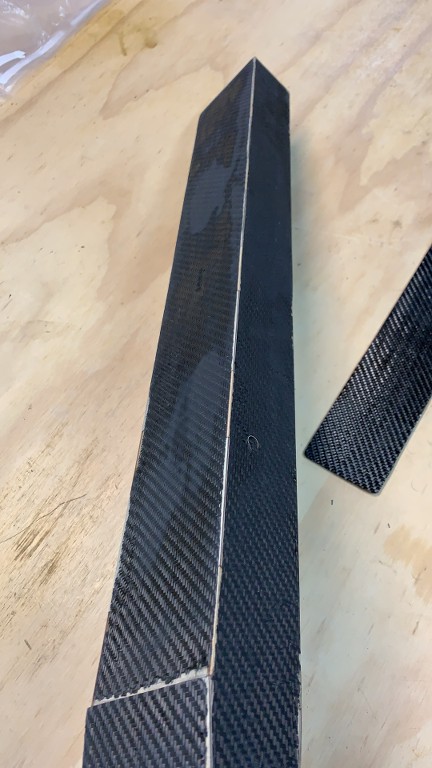
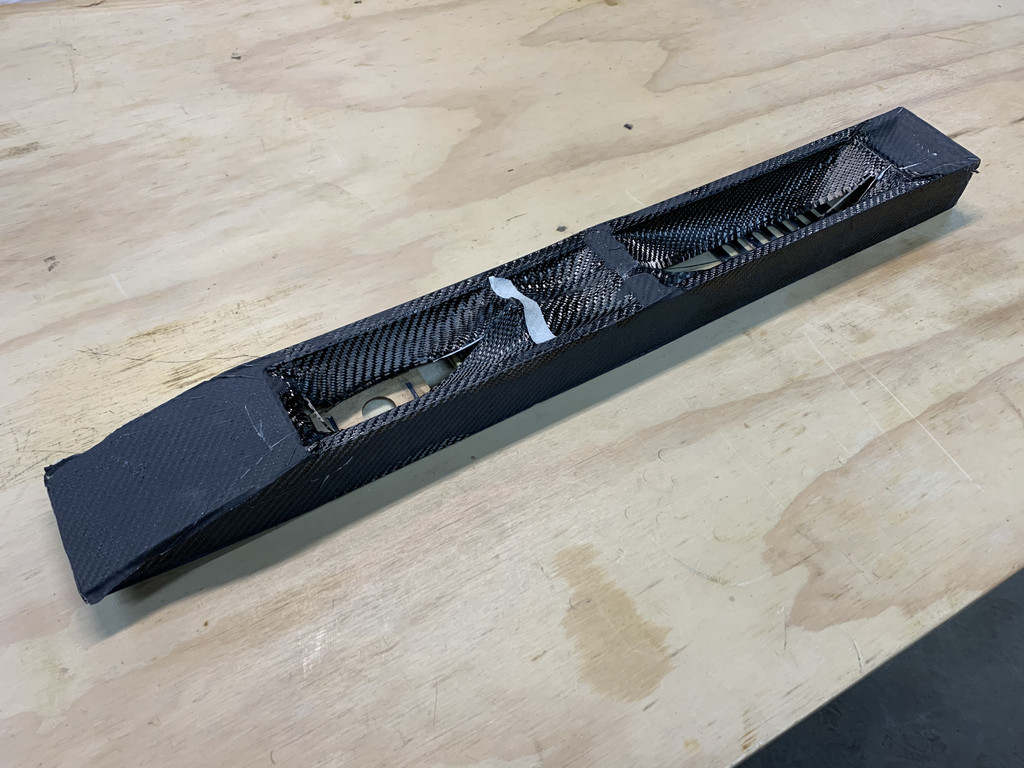
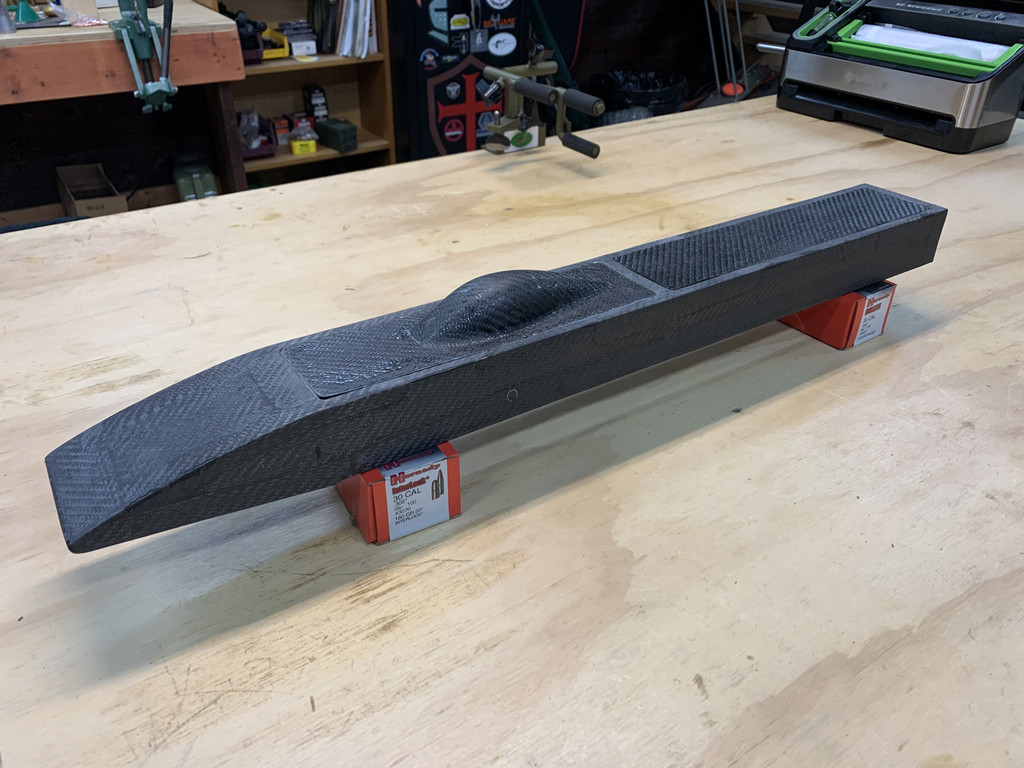
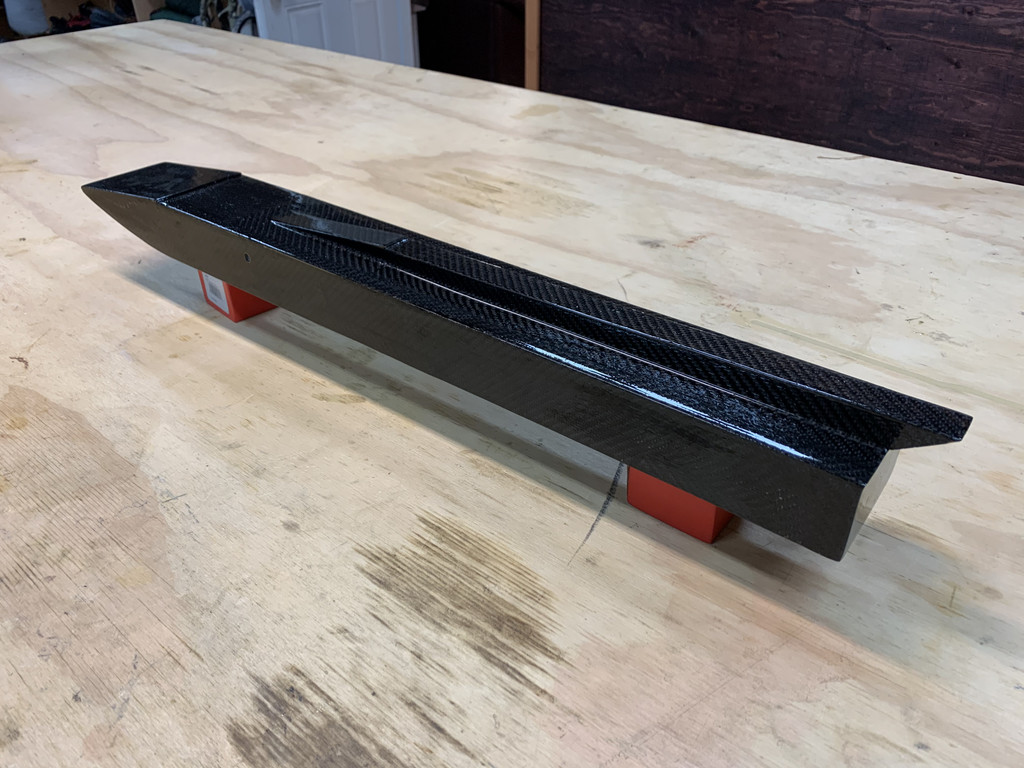
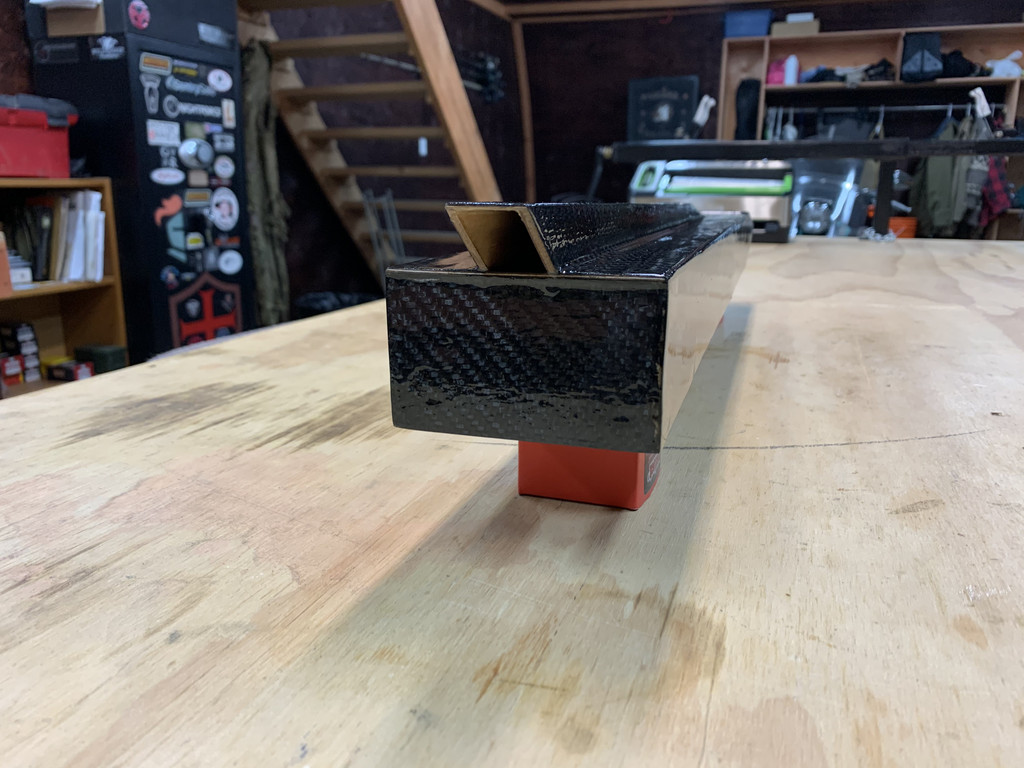
    Tub out of the bag. I realized right away that I messed up. I was dead set on wrapping the tub in one wrap so there would be minimal seams and maximum strength. This didn't work out so well, it was impossible to prevent it from creasing on the hard 90* corners. It's a challenging shape. Next time I would do this in two steps, one side at a time so there are only 2 corners to deal with at a time, I think this would allow you to pull the material tight to avoid creases in the corners.


    Ended up sanding through the corners to get rid of the creases.
    Last edited by mmars89; 05-22-2022 at 04:07 PM.

  2. #2
    Join Date
    Jun 2021
    Location
    AB
    Posts
    47

    Default

    Back in the vacuum bag it went to lay strips on all the corners that I sanded through. At this point I accepted partial defeat and knew there were going to be a ton of seams.. But it'll be functional, that's the main goal. As I said, next time I would do this in 2 parts, on half at a time and would only end up with one seam down the middle, which would mostly be visible on the nose, which could be laid over with another piece.


    The hatch, this was an easy vacuum lay up.


    Everything trimmed and sanded.


    I epoxied the ski on top of the first lay-up and then vacuum bagged a strip over it, once that was sanded it was time for finishing resin coat

    Last edited by mmars89; 05-22-2022 at 02:10 PM.

  3. #3
    Join Date
    Jun 2021
    Location
    AB
    Posts
    47

    Default

    Hardware installed. Thanks Sam H for the great tip to sand 45* angles into the strut and rudder brackets to allow them to fit without overhang. Also, I am able to slide the stuffing tube in and out with the ski on. I think the slightly shallower angle of the motor mount vs. the factory mount allows this.


    Bench Test
    https://www.youtube.com/shorts/NN4sfeUddvY
    Last edited by mmars89; 05-22-2022 at 02:52 PM.

  4. #4
    Join Date
    Jun 2021
    Location
    AB
    Posts
    47

    Default

    And here she is completed, with cedar stand. I should have reinforced the nose with an internal rib because as you can see it concaved in a little bit from the pressure of the vacuum bag. Also, definitely could have achieved a better finish if desired and had the time to put into wet sanding and buffing. I'm more about function over form so just gave it a light dry sanding with 320 grit to get rid of any ripples/bubbles in the finishing resin, then a quick wet sanding with 400 and 800 grit auto body sand paper. I seem to wreck a lot of boats so why make them super pretty lol

    Total Weight w/o LiPo: 5.08 lbs
    w/ 6s 4000mAh: 6.40 lbs
    w/ 6s 6000mAh: 6.92 lbs


    Maiden run. Running a De-tongued x442 with the turn fin set neutral as a starting point. I don't play nice with my boats ha ha, almost all my runs end in "OOOOHHHHHH!!!" lol (hence the decision to lay carbon fiber on the tub). It actually landed right side up and I ran it back to shore. Just missing some tape and a tiny bit of water got in because of that, but she didn't have a scratch. Ran 2 4000mAh packs through it that day, temps were good, motor and ESC around 100-110F, packs around 120-125F. Water temp was cool, around 50F, so that would have helped a lot. Either way, I think it's got some room to prop up a little. Those Raider 150's are super solid for their cost. Will get a GPS run with the 442 and some bigger props next time.

    https://www.youtube.com/watch?v=IJII4-5R9hY


    Will definitely be doing much more vacuum bagging in the future. Any hints or tips from more experienced builders would be greatly appreciated! Would also be happy to share anything I have learned if anyone has any questions.


    Thanks

    Mitch
    Last edited by mmars89; 05-22-2022 at 02:59 PM.

  5. #5
    Join Date
    Jun 2021
    Location
    OH
    Posts
    3

    Default

    Not enough rpm if you ask me.

    Sent from my SM-G991W using Tapatalk

  6. #6
    Join Date
    Jun 2021
    Location
    AB
    Posts
    47

    Default

    Quote Originally Posted by ILoveBotesNMotes View Post
    Not enough rpm if you ask me.

    Sent from my SM-G991W using Tapatalk
    Was thinking I will need to throw a 12s ESC in there so I can get on your level lol fewfewfefwfefew

  7. #7
    Join Date
    May 2014
    Location
    FL
    Posts
    636

    Default

    Great job. Never would have thought that a food sealer would pull enough vacuum for that.
    Ron - The Villages, FL

    https://castawaysboatworx.org/

  8. #8
    Join Date
    Jun 2021
    Location
    AB
    Posts
    47

    Default

    Quote Originally Posted by zooma View Post
    Great job. Never would have thought that a food sealer would pull enough vacuum for that.
    Thank you, much appreciated!

    Yes the little food saver unit is actually pretty good. I've probably sealed 500+ pounds of meat in hundreds of bags with it and it's still going strong. I have no idea what the actual pressure of vacuum it is capable of pulling, I doubt it can hit absolute vacuum of -14.7psi. I actually had to stop it before it got to its full vacuum strength because I was worried it was going to collapse the tub. With it being hollow it was starting to bow the sides in pretty good, even with the two temporary bulkhead spacers in place that the kit comes with. It seemed to do the job good enough though, I could see the excess resin being squeezed through the perforated film and being absorbed by the breather material. I let it go to its full strength for the hatch, that worked really well.

    I guess this would be more of a vacuum bag assisted lay up. I know the industrial grade set ups achieve a near perfect vacuum. Though, it would not really have made a difference on this particular project with the tub being hollow. Could have spent more time and made a pile of temporary bulkheads to support the tub better but I think it would still be pushing near the danger zone under full vacuum. 14.7 pounds per square inch would be a lot of stress on the large areas of the tub.

    If I foresee many more vacuum bag projects, and on bigger parts, I might have to invest in a proper set up. That stuff can add up very fast though, I'm a little cheap for that, too many other hobbies ha ha. Would be really cool to get all the stuff to make molds and start making all sorts of stuff. Maybe one day!

    Thanks again!

  9. #9
    Join Date
    Jun 2010
    Location
    Mi
    Posts
    738

    Default

    Nice work!
    I think the RPM is fine. you may consider getting rid of the smallest water fitting on the boat, as its choking the cooling flow.

    On riggers, weight is everything. Extra weight pushes more of the hull in the water, making more drag.
    If you decide to redo the work, If I may make a suggestion:
    I would probably start with a new tub, and make it out of slightly thinner plywood than the stock design. Your adding strength with the CF.
    blocks in the areas where you sanded through, put some extra wood on the inside, and sand the tub before you put down the CF.
    With the vacuume setup, push the vac bag all around INSIDE of the tub, so you there is no bridging in the bag. You can use saran wrap against wood where you don't want the CF to bond.
    Adding some heat when you are vaccume bagging thins out the epoxy, allowing more to squeeze out through the peel ply. 120F-150F is good. A water bath does this well.
    Cheetah, Super Rio, (Mod) Starship (Mod and sold),

  10. #10
    Join Date
    Jun 2021
    Location
    AB
    Posts
    47

    Default

    Quote Originally Posted by larryrose11 View Post
    Nice work!
    I think the RPM is fine. you may consider getting rid of the smallest water fitting on the boat, as its choking the cooling flow.

    On riggers, weight is everything. Extra weight pushes more of the hull in the water, making more drag.
    If you decide to redo the work, If I may make a suggestion:
    I would probably start with a new tub, and make it out of slightly thinner plywood than the stock design. Your adding strength with the CF.
    blocks in the areas where you sanded through, put some extra wood on the inside, and sand the tub before you put down the CF.
    With the vacuume setup, push the vac bag all around INSIDE of the tub, so you there is no bridging in the bag. You can use saran wrap against wood where you don't want the CF to bond.
    Adding some heat when you are vaccume bagging thins out the epoxy, allowing more to squeeze out through the peel ply. 120F-150F is good. A water bath does this well.
    Thanks for the feedback, it is appreciated.

    Which water fitting are you referring to, the outlet?

    I definitely agree with all your notes on the tub. I was thinking along the same lines towards the end of the build, that I should have sanded it down a lot more to reduce the thickness of plywood and shed weight. Starting new with thinner material would be the best option for sure.

    I kind of tried pushing the bag inside at first but with using the food saver bag it wasn't wanting to stretch and contour very well and was starting to scrunch up the layup, so I just focused on keeping the layers pulled tight in the proper directions. Definitely not ideal ha. I also should not have epoxied the motor mount in before vacuum bagging, that was a bonehead move, it really got in the way. I did more research yesterday on the different vacuum bagging material available and I think that would be the ticket to do like you say and get it formed on the inside with no bridging. I see there is some pretty stretchy stuff available. Next time!

    Great tip on the warm water too, that makes a lot of sense.

    When I destroy this one and build Zippy 2.0 I will apply all these tips and lessons! ha ha

    Thanks again
    Cheers

  11. #11
    Join Date
    Jun 2010
    Location
    Mi
    Posts
    738

    Default

    On the vac bagging material, dont bother with the stretchlon stuff. it bonds to epoxy. The normal pink vacume bag works fine, just make sure the bag is over sized so you can work it into the voids. LFT mean Lay Flat Tube. Its handy because you only have to seal the top and bottom.
    to prevent any wrinkles in the CF: I would lay the carbon down, and put your peel ply over the top, and hold it all in place with painters tape or flashing tape. Put the breather over the top, and put it in the bag.

    AS for the motor mounts, these high performance boats like more span on the mounts, or the width between the motor shaft and the mount attachment.
    With a larger span, the farther you are from the motor the less force that needs to hold the motor in place (for a given torque)
    For that reason, the JAE mounts that attach directly to the tub are your best choice, and it will less likely warp the tub bottom.
    Cheetah, Super Rio, (Mod) Starship (Mod and sold),

  12. #12
    Join Date
    Jun 2021
    Location
    AB
    Posts
    47

    Default

    Quote Originally Posted by larryrose11 View Post
    On the vac bagging material, dont bother with the stretchlon stuff. it bonds to epoxy. The normal pink vacume bag works fine, just make sure the bag is over sized so you can work it into the voids. LFT mean Lay Flat Tube. Its handy because you only have to seal the top and bottom.
    to prevent any wrinkles in the CF: I would lay the carbon down, and put your peel ply over the top, and hold it all in place with painters tape or flashing tape. Put the breather over the top, and put it in the bag.

    AS for the motor mounts, these high performance boats like more span on the mounts, or the width between the motor shaft and the mount attachment.
    With a larger span, the farther you are from the motor the less force that needs to hold the motor in place (for a given torque)
    For that reason, the JAE mounts that attach directly to the tub are your best choice, and it will less likely warp the tub bottom.

    Ahh good to know about the stretchlon material, thanks for the tips. And now that you mention it, I can see that a big part of my struggles getting the bag to conform probably had a lot to do with the bag diameter being so small, as well as the shape of it. I can definitely see it being much easier with a larger bag. Gonna have to invest in a pump, fittings and bag material next time.

    And good to know about the mount. That does make sense how it would spread the forces out more evenly into the structure of the tub. I guess I just had it in my head that it wouldn't support the motor well enough, without having rear support. On the next build I will go with the JAE kit mount.

    Thanks!
    Mitch

Bookmarks

Bookmarks

Posting Permissions

  • You may not post new threads
  • You may not post replies
  • You may not post attachments
  • You may not edit your posts
  •