Built this with parts from my Mini Rio project that I abandoned.

 Speed addict!
Built this with parts from my Mini Rio project that I abandoned.
Fast Electric Addict!
Ad some more pictures and specs that looks pretty interesting
Jim
"Our society strives to avoid any possibility of offending anyone except God.
Billy Graham
Speed addict!
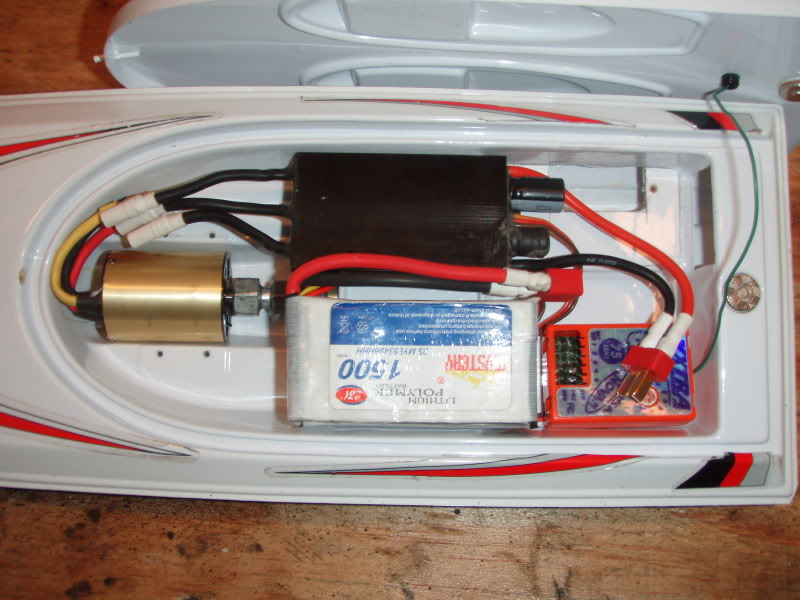
The first picture is the plastic mount that I made for the speed control
The speed control is for an SV27
The motor is an Ammo 28-35-2700
The battery is a 3S1500 Mah 25C pack
The second picture is the hardware it's for the mini hydro from mini cat racing
The prop is an Octura X430
Speed addict!
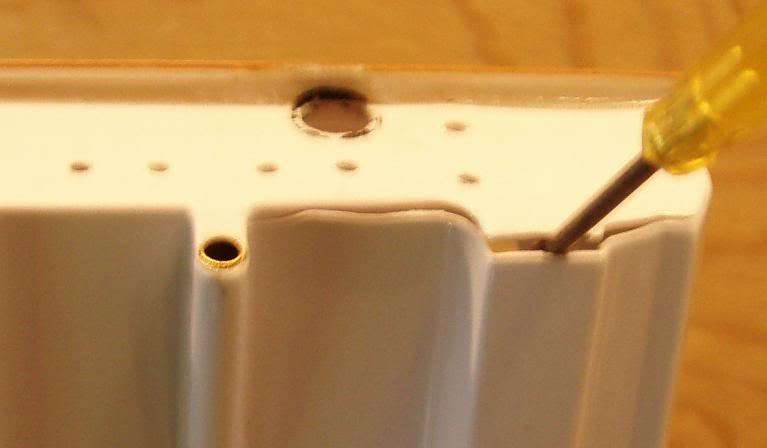
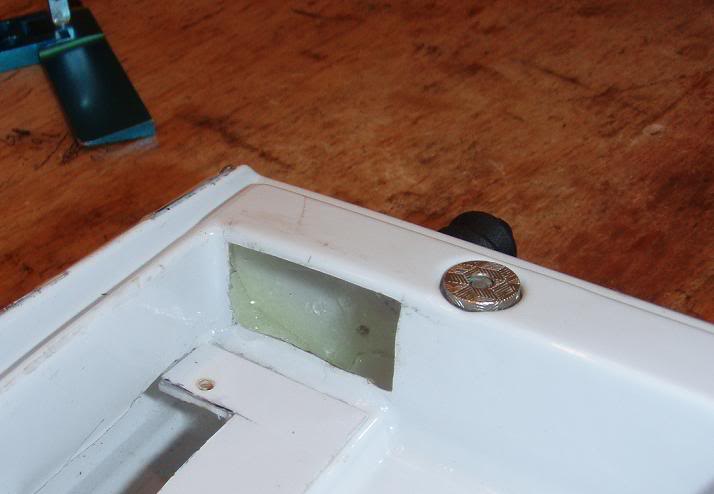
This is what happend today when the rudder hit some unkown object that is submerged in the local pond.
Speed addict!
I cut this hole so I could get to the crack from the inside

Speed addict!
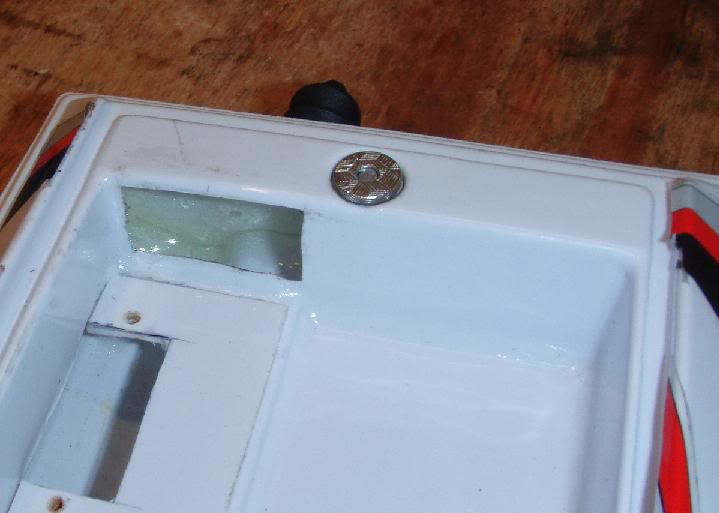
Five Minute Epoxy to the rescue!!

Last edited by jfabcustom; 12-17-2008 at 10:16 PM.
Speed addict!
I used five minute epoxy on the crack. Once it set I decided to fill the rest of the hull with foam. I had already filled the bow.
.
Speed addict!
That's it for now. I'll try to get video once it runs again, provided it's longer than 40 seconds.
Speed addict!
This is a new hull with a new inline strut/rudder bracket that I designed and scratched out on my Dad's Bridgeport Mill. The blue anodized parts are from Mini Cat Racing and the raw aluminum part is what I designed. The component layout inside the hull will be different this time as well to accomadate a much lower C/G. Hull is ready to be tub tested. If she doesn't leak I'll just need to make a longer rudder pushrod and she'll be ready to run.

Refuse the box exists!
Good looking build. I'm curious to find out what the transom weight is and how it sits in the water. Have you figured out where the COB is?
IMPBA: 7-Time FE World Record Holder "Don't think outside the box. Rather, refuse to admit that the box exists in the first place!"
MGM Controllers - Giant Power Lipos - ML Boatworks - Wholt's Wire Drives & Struts - Nano-Oil
Speed addict!
Not yet I just finnished the tub test. No leaks! It didn't seem to weigh the transom much more than the previous setup. None of the internal components had been installed at that point(speed control, reciever, batt, ETC.) So it was hard to tell. I'll get a pic in the tub when she's all together. maybee tonight.
Speed addict!
Ok here are some pics. In the first two the hull is balanced at 4.5" from transom which is about 32% of the 14" Hull
Next is the layout inside the hull
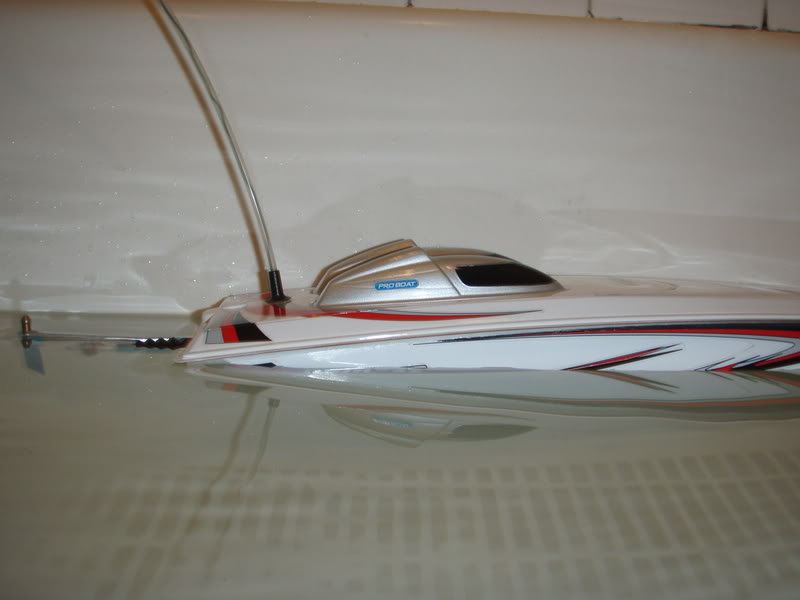
and these two are how it sits in the water. it doesn't sit much lower in the rear than it did with the previous setup.
Speed addict!
Any thoughts/Comments?
Refuse the box exists!
I'd say try it and see how it runs!
Also, wash the bathtubLOL => you asked for thoughts/comments! Or put a mat down to cover it up next time
Make sure you get a video of the maiden voyage! We're looking forward to seeing how she runs.
IMPBA: 7-Time FE World Record Holder "Don't think outside the box. Rather, refuse to admit that the box exists in the first place!"
MGM Controllers - Giant Power Lipos - ML Boatworks - Wholt's Wire Drives & Struts - Nano-Oil
Speed addict!
Your right! I guess it is about time for a CLR treatment in the tub? LOL! The fact that I work with metal all day doesn't help the tub's situation either. I'll make sure to get a video next time I run the boat. I should be able to run it soon since the weather here just cleared up today. Although the pond may still be in pretty rough shape due to the storms we had. It's only knee deep and it fills with leaves and twigs sometimes.
Refuse the box exists!
That must make rescue fairly easy!
IMPBA: 7-Time FE World Record Holder "Don't think outside the box. Rather, refuse to admit that the box exists in the first place!"
MGM Controllers - Giant Power Lipos - ML Boatworks - Wholt's Wire Drives & Struts - Nano-Oil
Speed addict!
That's the primary reason it has become my test pond. No rescue boat required!
Speed addict!
Who's we?Originally Posted by Meniscus

Speed addict!
Ok here's the video. The new setup seemed to work well! I think with a little tuning it will run even better. There is a little play in the steering pushrod and I think eliminating the play will also help. Big thanks to my Dad for everything he's tought me on his mill. He's the man when it comes to making brackets. Thanks Dad!
Click play all videos
http://www.youtube.com/view_play_lis...598D4690290161
by the way Meniscus, this was not the shallow pond where I normally run, as it was full of moss.
Last edited by jfabcustom; 02-24-2009 at 01:04 AM.
Speed addict!
Anyone have any Ideas on why she's hopping out of the water? I've tried several tuning adjustments: strut height, strut angle, C/G. Nothing seems to help. This thing just want's to shoot right out of the water. I'm thinking that, due to the size of the boat, the tunnel may be too shallow, and when it airs out, the boat takes flight.
Here's the funny part. There is a video on you tube called Ballistic Proboat Mini C. This boat still has the steerable drive on it and it seems rock solid at almost top speed? crazy!I feel like giving up. It may be time for a new build. A larger size hull that's meant for some speed. This little boat certainly got me hooked though.
Last edited by jfabcustom; 03-01-2009 at 09:37 PM.
Senior Member
if you are done with it you should sell it arr i would buy it if the price was right. let me know.
Speed addict!
It's not worth selling. I'd never get my money back. I sorta lost my ass on this one. But it wasn't a waste. I've learned a lot from building this little thing, mainly not to go overboard with a hull that will not perform how you want it to. I may try running the stock out drive like this guy http://www.youtube.com/watch?v=XEMWA1U6IEQ Though everything I've read states how unstable the steerable out drive is, this is the most stable Mini C I've seen.
Speed addict!
I'll try again. Anyone have any ideas on why this thing is porpoising? Here's a video http://www.youtube.com/watch?v=kXPCxrI_d4I any input is appreciated! Thanks!
Speed addict!
Either no one is interested in the Mini C anymore, or I'm just gettin' no love from you guys. Am I doing something wrong? What's the deal, how can I get some help? I see the views going up on my thread but I get no responses, No help.
Anyway, I'm going to try lifting the strut. I'll need to change the angle of the stuffing tube so that it exits the transom a little higher. This will allow me to raise the strut without binding the flex cable.
Anyone, anyone, Bueller, Bueller, Bueller????
Refuse the box exists!
It looks like too much air in the tunnel section. Try changing the angle of the strut so that the prop is slightly lower than the front of the strut. This will push the nose down while running.

IMPBA: 7-Time FE World Record Holder "Don't think outside the box. Rather, refuse to admit that the box exists in the first place!"
MGM Controllers - Giant Power Lipos - ML Boatworks - Wholt's Wire Drives & Struts - Nano-Oil
Speed addict!
Thanks for the response! I believe my main problem is limited strut adjustability. I can only adjust so far in any direction before the flex shaft binds. This is because of how close the strut is in relation to the stuffing tube. If I lift the exit location I will be able to lift the strut up without binding the flex cable.
From my research I 've found that most people like to set the bottom of their strut housing even with the bottom of the boat and then adjust up from there. IE - Boat sitting flat on the table -- strut sitting flat on the table. Mine seems to be alot lower than this ''standard''. So I will try to achieve this first by moving the stuffing tube up, and from there I'll make small angle and hieght adjustments to the strut to get her dialed in.
Man, it sure helps to get input from people with experience, but one sure does learn alot when forced to dig for the answer. I just get side tracked so easily when searching through the forums.
Thanks again, James
scale FE racer: Namba 826
Great looking mods! I am working on a scratch build modeled after this, so I have been following to see what I can learn. I like the sound of these last two responses. I think Meniscus hit it and you identified the limitation. How about this: extend the length of exposed stuffing tube.
My thread (scratch build micro cat), I will be updating soon shows probably 3" of exposed stuffing tube; I think you could use more exposure... My recommendations:
1) trim off the plastic housing that accompanies the stuffing tube to the exit point at the transom so that there is an oval hole in the tunnel.
2) fill this hole with JB or Epoxy.
3) now you have potentially inches more stuffing tube that you can bend up or down with the strut adjustments that are being recommended.
Speed addict!
Moving my stuffing tube freed up all kinds of adjustment. but no matter where I placed the strut the boat would still jump out of the water. I even tried some extreme downward angles but no luck (though I got better launches with these angles).
Oh well, I was hoping I could get her dialed. I think since this hull is so small and weak and cheap and warped and ETC. It's just not worth tying to make it go fast.
not sure what's next? I like cats, always have.
Refuse the box exists!
Try moving the CG forward. Always remember that it may not just be a strut issue if you can't resolve that way. Sure, it will run a little wetter, but it will be more stable.
IMPBA: 7-Time FE World Record Holder "Don't think outside the box. Rather, refuse to admit that the box exists in the first place!"
MGM Controllers - Giant Power Lipos - ML Boatworks - Wholt's Wire Drives & Struts - Nano-Oil
Refuse the box exists!
After looking back at your pictures, your last option would be to skeletonize your custom bracket for the rudder. If you don't like the looks of straight holes, try going with triangle shapes. This will help reduce the amount of weight you have in the back with the removal of excess material.
Finally, you could try putting some weights in the front, just to see how she responds to the CG difference.
Hope this helps
IMPBA: 7-Time FE World Record Holder "Don't think outside the box. Rather, refuse to admit that the box exists in the first place!"
MGM Controllers - Giant Power Lipos - ML Boatworks - Wholt's Wire Drives & Struts - Nano-Oil
 Posting Permissions
 |

 Reply With Quote


Bookmarks