
 Tweet
Tweet
looks pretty cool how long do you think it will take to complete this?
-
Failure is the First step to SUCCESS

-
IF I can keep on it, it should be done mid-January. I won't be able to do some things right away which will delay finishing. We moved this summer and I couldn't bring along a lot of supplies like West Systems epoxy, so I have to save $$ to buy a new gallon. Same for the varnish to finish it up.
Planking will take me a while because I can't use CA any more, so it'll probably take 2-3 weeks just for each of the two planking layers. I'm working on an airplane and a boat with Caleb, an airplane with Ian, and an airplane for a magazine article - plenty to keep busy.
AndySpektrum Development TeamComment
-
We didn't do anything on the boat last night. My wife borrowed a season of The Untouchables from the library so we all stayed up late to watch it.
Full Size Image
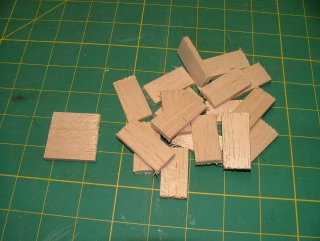
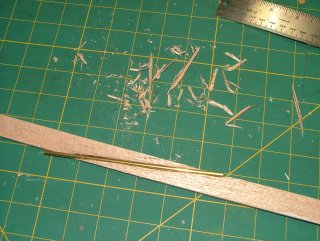
I started this morning by cutting up the scraps from earlier steps into pieces 3/4" x 1-1/2". These will become tabs to loft the bulkheads above the building board.
Full Size Image
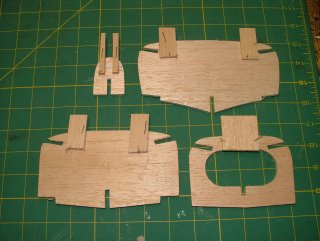
These were then attached to the bulkheads and allowed to dry. Note that I and H are different than the others.
Full Size Image
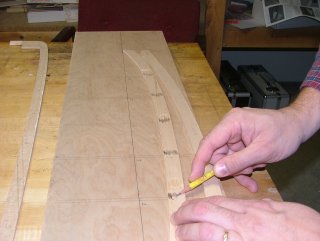
The approximate location of each bulkhead was marked on the sheers and chines. This was done to look "fuzzy" so I'd remember it was approximate. (I have a short memory :D ).Spektrum Development TeamComment
-
Full Size Image
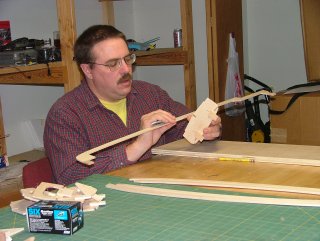
Next I sanded the notches for keel, chines, and sheers to fit snugly at the marked locations. A snug fit will make things easier in later steps. The sanding was done with a large nail file.
Full Size Image
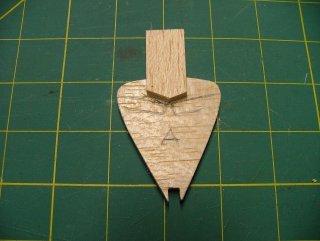
I don't like to cut the keel in two, so I notched it to accept the stuffing box. I chose to use a 1/8" ID tube instead of the 1/4" tube Garry recommends, but I'm using a different power system as well. This is one of those times when you need to make a choice about your own power system. Note also that I didn't extend the stuffing box below where the planking will be. This will make finishing easier. Should I decide to change the stuffing box to a larger size, the existing one can be removed with heat.
We are finally done making kit parts! Time to start BUILDING!
Full Size Image
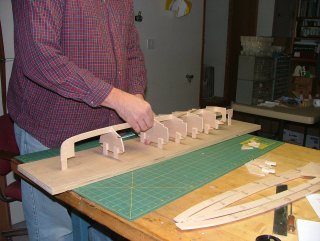
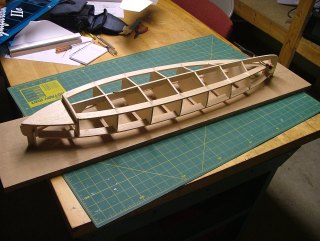
Each bulkhead is positioned on the keel at the location marked on it back at the beginning.
Full Size Image
I had to modify the tab on A so that the sheers could butt against it. The marks tell me exactly where they will be located when aligned properly.
Full Size Image
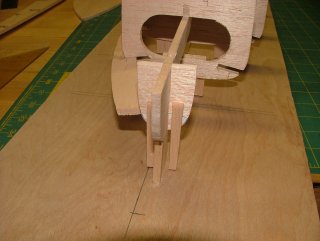
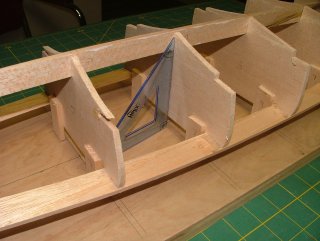
Bulkhead I needs to be positioned properly too. I like to insert the chines at this time so that everything will be snugly linked together. The chines butted up snugly fore and aft as well as within the slots. Taking your time to make true parts pays off!
Full Size Image
After these components are assembled (but not yet glued), make sure that they are all perpendicular to the building board AND to the keel. The snug fit will allow you to adjust things and have them stay put. After you've done each bulkhead once, go back and verify just in case something was jostled.Spektrum Development TeamComment
-

Full Size Image
Glue the tabs to the building board. Align the keel on one side of the drawn center line, and move it fore/aft until the bulkheads align with their lines.

Full Size Image
Then make sure your keel is still straight, and allow it to dry.
You may have noticed that I didn't glue any of the boat parts together yet. That's so that I will be able to double check them again after the glue to the board is dried. It's much easier to straighten things if they aren't glued together. This gluing is easily accomplished with thin CA wicked into the joints. I can't use it, so I will just have to work some wood glue into the joints.
At the same time I will glue down the chines, then sand in preparation for planking. I will also be looking for someone at work who will let me rip a bunch of 1/8" balsa into 1/4" and 1/2" strips.
AndySpektrum Development TeamComment
-
Looking good Andy!!
I'm a little curious why you can't use CA anymore?
DougMODEL BOAT RACER
IMPBA President
District 13 Director 2011- present
IMPBA National Records Director 2009-2019
IMPBA 19887L CD
NAMBA 1169Comment
-
Allergic. If I catch a whiff, I have symptoms of a head cold for three days. I developed it making UL-1 (the real ones, not the imitations from AC) and Electric Thunder hulls.
AndySpektrum Development TeamComment
-
I understand that the 'foam safe' ca's cause fewer problems* for those allergic to regular ca.
*note that I said fewer problems, NOT zero problems.Still waiting for my boat to come in.it came in
Comment
-
Exactly. It also doesn't bond balsa as well in my experience.
With diluted wood glue, the water will swell the joint and the glue will, of course, glue it. Then it will be double-glued and all will be well.
AndySpektrum Development TeamComment
-
heheh I use wood glue(white) for my wood boats. I figure if after 6 or more layers of paint it isn't sealed...I got bigger problems :-)(I do seal the inside of the boats w/ epoxy)Still waiting for my boat to come in.it came inComment
-
CA has worked great for me, but I also fillet the insides with epoxy.The Manx has been sitting dormant, but I think I finally have my motivation back. I hope to see it float soon.
Comment
-
Aliphatic resin (the type of wood glue I use) is only water soluble until dry. Then it resists water nicely. Other wood glues (PVA, like Elmers white) stay water soluble even after drying.
This will be sealed inside and out also.
The wood glue is diluted (lots of water) to cause the wood to swell, giving a mechanical bond in addition to the adhesive. It's the same idea used on wooden ships.
AndySpektrum Development TeamComment
-
I developed the same type of allergic reation to CA fumes. Only it lasted for several days, felt like I had asthma as well as a severe cold.
I still use CA. But I bought a respirator. Made all the difference. Now, whenever I use anything stinky, I breathe sweet clean air instead because I have this thing on my face:
Comment
-
Thanks for the respirator info, Tom. Being claustrophobic makes them impractical for me, but there may be another reader for whom they are an answer. Slow building is fun too!
OK, so I hope you all had a happy time with family, thanking the Good Lord for His blessings on our lives, our families, and our nation. With all the hubbub I didn't get to post these pictures from Wednesday, so here goes.
Full Size Image
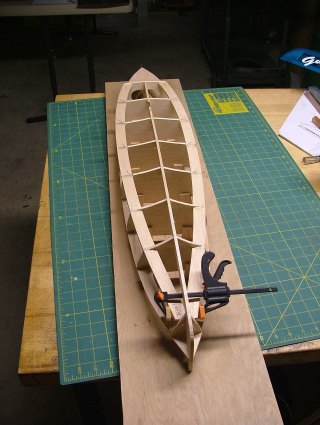
The next step was to glue all the bulkheads to the keel and deck sheers. I then added the chine pieces and pinned them in place. A clamp holds the bow together.
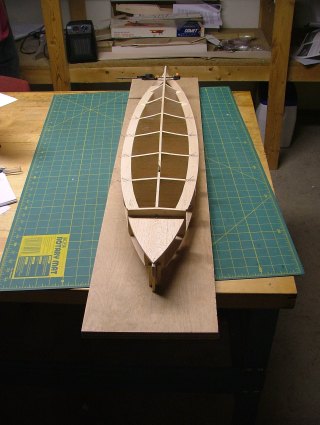
Full Size Image
The pressure plate is glued and pinned in location also. Make sure it's level!
Full Size Image
This thing is starting to really look boat-like, even upside down!
The next step will be to sand all the bottom and side surfaces to get smooth flowing lines in preparation for planking. I will do the sanding outdoors using a 12" sanding block. We are still having nice-enough weather here (today was clear, 35, and winds 5-10) to go flying, so that's taking precedence.
Today I also cut a bunch of 1/8" balsa sheets into 1/4"' and 1/2" wide strips on a table saw with a friend from work. We used a 200-tooth 10" blade turning at 3500 RPM. Now THAT was a dusty operation, even with the dust collector running! (I also ordered my saw - they are $80 off at Sears thru tomorrow!)
We cut way more wood than was necessary to cover the boat. This will allow me to use the best pieces for each position. Remember, we want to use pieces which do not try to twist the hull. We will be using comparable pieces for opposing parts, so we may not have as much usable wood as we thought.
AndySpektrum Development TeamComment
-
Way to go Andy...superb workmanship...your gut and mine look about the same. It is great to see you are back into boat building.
DouggieComment


Comment