My Impulse 31 v2 upgrades with photos, it's comming along.

Collapse
X
 
  • Time
  • Show
Clear All
new posts
  • spanky17
    Member
    • Aug 2013
    • 56

    #1

    My Impulse 31 v2 upgrades with photos, it's comming along.

    Here are some photos of the upgraded parts I received from OSE. The Seaking 180 amp esc was a very tight fit but by trimming some of the rail I was able to get it in. The water tubing that connects both sides of the esc and cant be seen in the photo's fits perfect with no kinks. The new parts include the following.
    Leopard 4074, 1650kv motor.
    Rear motor brace. I will make up some brackets for it and fasten to the rails.
    Seaking 180 amp ESC V2.
    Octura S&B M445 prop.
    OSE upgraded flex cable.
    Octura flex hex coupler.
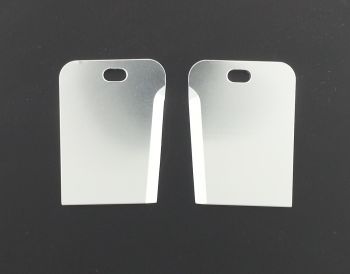
    Speedmaster adjustable trim tabs.
    OSE 1/4 inch silicon tubing.
    Silicon tubing clamps.
    I will be running this boat with 2 GensAce 3 cell 5000mah 40c lipo's connected in series for 6 cell.
    My radio is a Spektrum DX3R pro.
    I am running the same set up in my Black Jack 29 minus the trim tabs of course. I still have to solder and button everything up, after that it will be working on my canoe for the recovery boat. Thanks to all who took the time to help me out with this project and steer me in the right direction with parts. I cant wait to get it on the water. I have my own personal pond on my property but im afraid this boat would be across it in 1/2 a second. _DSC5165 copy rs.jpg_DSC5168 copy rs.jpg_DSC5171 copy rs.jpg_DSC5172 copy rs.jpg_DSC5174 copy rs.jpg
  • jworm49
    Member
    • Aug 2013
    • 64

    #2
    It looks great do u have any pics without the ESC in the boat? I can't really see the part you said you cut away

    Comment

    • spanky17
      Member
      • Aug 2013
      • 56

      #3
      No photos without the esc. The part I cut is the left rail, it looks the same as the right rail with the three large holes, I cut away two of the holes. You can see where the tubing enters and exits from the esc. The tubing closest to the rear of the boat enters the esc from the rudder and the other exits it and enters the motor at the lower right side. The part of the esc that is under the left side of the hull and cant be seen is were the tubing makes a 180 degree bend ( exit and enter back in) hope this helps.
      Originally posted by jworm49
      It looks great do u have any pics without the ESC in the boat? I can't really see the part you said you cut away

      Comment

      • jworm49
        Member
        • Aug 2013
        • 64

        #4
        Ok thanks man reading that and looking at it again it makes more sense. Can you post a pic of how the batteries are wired up once you get the soldering all done? I want to go with this set up as well. I'm going to have to pay someone to solder mine up because I don't know how to or have the stuff to do it. Also I can figure out how the motor wires up but how are you wiring the batteries in series to the ESC?

        Comment

        • spanky17
          Member
          • Aug 2013
          • 56

          #5
          Sure I will post pics when done but maybe I can explain it first. To get 6 cell out of two 3 cell lipo's you need to connect them in series. The esc has two wires, red and black but two batteries have 4 wires with red and black. To do this you make a harness that connects the red wire from the esc to the red wire on battery number one then the black wire from the esc to the black wire on battery number two. That leaves a black wire on battery number one and a red wire on battery number two not connected to anything right, well those two wires ( red and black) get connected together. I know it seems strange connecting a pos and a neg like that but that is how its done in a series connection with a harness. This way of connecting doubles the voltage but the Mah stays the same, in a parallel connection (all pos to pos and neg to neg) the voltage stays the same but the Mah doubles. I hope this makes sense to you. Perhaps someone can explain it easier.
          Originally posted by jworm49
          Ok thanks man reading that and looking at it again it makes more sense. Can you post a pic of how the batteries are wired up once you get the soldering all done? I want to go with this set up as well. I'm going to have to pay someone to solder mine up because I don't know how to or have the stuff to do it. Also I can figure out how the motor wires up but how are you wiring the batteries in series to the ESC?

          Comment

          • spanky17
            Member
            • Aug 2013
            • 56

            #6
            I should have said a series connection adds the two voltage ratings of the packs together because you can connect 2 cell and 3 cell packs together to make a 5 cell pack. That is providing they are of the same Mah and c rating and is a good idea if from the same manufacturer as well.

            Comment

            • jworm49
              Member
              • Aug 2013
              • 64

              #7
              Ok so yer making a harness kind of like what was on the stock ESC?

              Comment

              • spanky17
                Member
                • Aug 2013
                • 56

                #8
                Exactly, now why didn't I think of saying it was just like the stock hook up lol.

                Comment

                • spanky17
                  Member
                  • Aug 2013
                  • 56

                  #9
                  Soldering is not to difficult to do if you have a decent soldering iron that can get to a good high temp. I use the Track Power solder station and it has worked perfect for me when soldering up motors and esc's for my other RC vehicles and hexacopters, as well as making harnesses, LED lighting, changing battery leads among other things. It just takes some practise is all. If your going to be in the hobby for a while you may as well learn how to do it.
                  Originally posted by jworm49
                  Ok thanks man reading that and looking at it again it makes more sense. Can you post a pic of how the batteries are wired up once you get the soldering all done? I want to go with this set up as well. I'm going to have to pay someone to solder mine up because I don't know how to or have the stuff to do it. Also I can figure out how the motor wires up but how are you wiring the batteries in series to the ESC?

                  Comment

                  • jworm49
                    Member
                    • Aug 2013
                    • 64

                    #10
                    yeah you are right it is a skill I should learn.

                    Comment

                    • iop65
                      Senior Member
                      • Mar 2013
                      • 367

                      #11
                      motor :cooling
                      not perfect this way ; air will get trapped in the jacket
                      outlet should be on top/highest piont

                      Comment

                      • Darin Jordan
                        Fast Electric Addict!
                        • Apr 2007
                        • 8335

                        #12
                        Originally posted by iop65
                        motor :cooling
                        not perfect this way ; air will get trapped in the jacket
                        outlet should be on top/highest piont
                        I theory, this could be true, but in reality, the water is being forced in at a MUCH higher rate and pressure than it can escape... the water jacket will have so much water pressure in it that air won't be able to be trapped inside it, in my opinion. If the water is squirting out of the side of the boat several inches or more, I don't think you have anything to worry about. Water is going to be forced into the jacket and take up every bit of available space, purging it of air pretty quickly. Going to have to have some clear evidence to the contrary to convince me otherwise.

                        I'll experiment with that with my latest build-up and see...


                        As for the upgrades, looks like fun. Do yourself a favor... buy a set of these... Trust me! :)

                        http://www.offshoreelectrics.com/pro...?prod=ose-1400

                        Darin E. Jordan - Renton, WA
                        "Self-proclaimed skill-less leader in the hobby."

                        Comment

                        • spanky17
                          Member
                          • Aug 2013
                          • 56

                          #13
                          I was wondering about this myself. Unfortunately without being able to turn the brass pieces on the jacket this was the only way it could sit. I thought about turning the jacket around end for end but it gets really tight around were the esc is so both brass ends would have been more or less sideways to each other.
                          Originally posted by iop65
                          motor :cooling
                          not perfect this way ; air will get trapped in the jacket
                          outlet should be on top/highest piont

                          Comment

                          • spanky17
                            Member
                            • Aug 2013
                            • 56

                            #14
                            Hi Darin thanks for the info. I read up on your turn fins but unfortunately it was after I had placed my last order. I will be getting a set of these for sure with my next order from OSE.
                            Originally posted by Darin Jordan
                            I theory, this could be true, but in reality, the water is being forced in at a MUCH higher rate and pressure than it can escape... the water jacket will have so much water pressure in it that air won't be able to be trapped inside it, in my opinion. If the water is squirting out of the side of the boat several inches or more, I don't think you have anything to worry about. Water is going to be forced into the jacket and take up every bit of available space, purging it of air pretty quickly. Going to have to have some clear evidence to the contrary to convince me otherwise.

                            I'll experiment with that with my latest build-up and see...


                            As for the upgrades, looks like fun. Do yourself a favor... buy a set of these... Trust me! :)

                            http://www.offshoreelectrics.com/pro...?prod=ose-1400

                            Comment

                            • jworm49
                              Member
                              • Aug 2013
                              • 64

                              #15
                              Spanky, I like your set up the Seaking 180 seems to be the ESC everyone goes with for if they plan in running 6S. I'm wondering though are there other choices that would be reliable in the same price range that would not require cutting the rail to fit?

                              Comment

                              Working...